Video Mount Products PDS-LWAB User Manual
Page 3
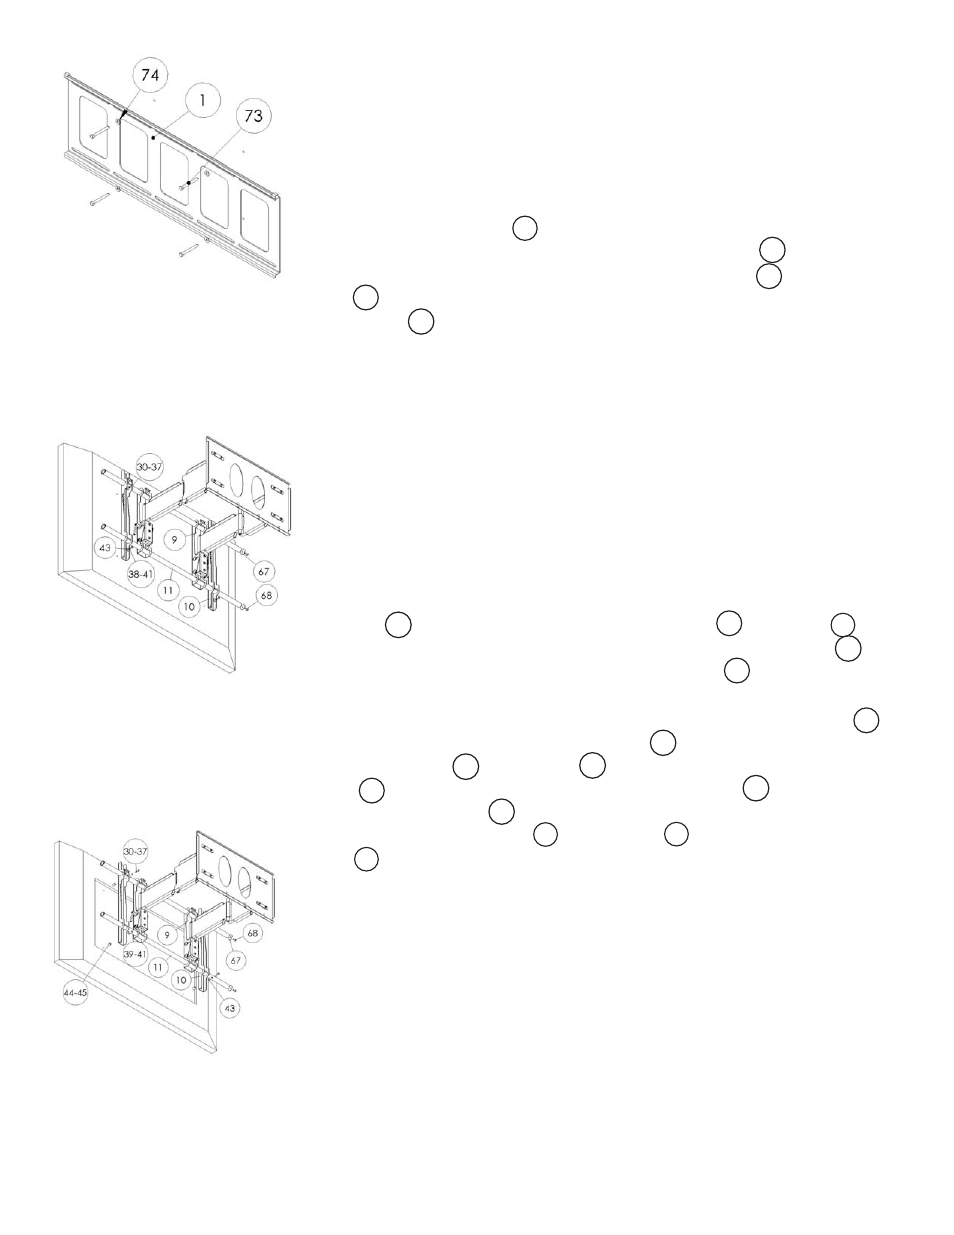
Step 1
Before starting, lay out all parts to your mount and match them to
the parts list provided. Verify that you have all your parts before
attempting to assemble the mount.
Step 2
Mark the wall or desired mounting surface in preparation of instal-
lation of wall plate . If mounting to wooden studs, pre drill pilot
holes using a 7/32” drill bit. Attach the wall plate to the wood-
en stud using the 5/16” by 2.5” long lag screw and washer
making sure the small ear f aps are on the top rail of the wall
plate . WARNING: Please verify that your mounting surface
will support the combined weight of your mount, mounting hard-
ware, and fl at panel. Also verify that the mounting surface is safe
to drill through. Please note only mounting hardware for mount-
ing to wooden studs will be provided with the unit. If mounting to
a surface other than wooden studs then other hardware will be
required. If in doubt or uncertain about any of the above, please
contact a professional installer.
Step 3
Determine the correct screw size and if you need to use washers,
lock washers, or spacers. Note: Spacers are used for TVs with re-
cessed hole patterns.
Secure the TV to the screen mounting brack-
ets using the appropriate hardware through . In
order to line up the holes on the screen mounting bracket you
may need to loosen the adjustable screws make sure to re-
tighten them after if you do. Note: For smaller hole patterns it may
be necessary to place one of the screen mounting brackets in
between the pivot mount brackets . To do so simply remove
the washer and screw from the end of the mounting tube
. Slide off the screen mounting bracket and the pivot
mount bracket and slide them back on in the reverse order.
Replace the washer and screw onto the mounting tube
when fi nished.
Step 2 : Attaching the wall plate
(Lag screws are not included)
Step 3A: Attaching the fl at
panel to the mount (holes are
not recessed)
Step 3B: Attaching the fl at
panel to the mount (holes
are recessed)
10
10
30
68
67
51
67
68
11
10
45
9
9
11
10
1
1
74
73
1