Tennsco Add-A-Stack User Manual
Page 3
16
18
19
STEP 12) Lift the unit and mobile carriage on top of the solid steel square rod on the track assembly, the steel wheel of
the carriage will roll on this steel square rod. The carriage does not roll on anything but the solid steel rod.
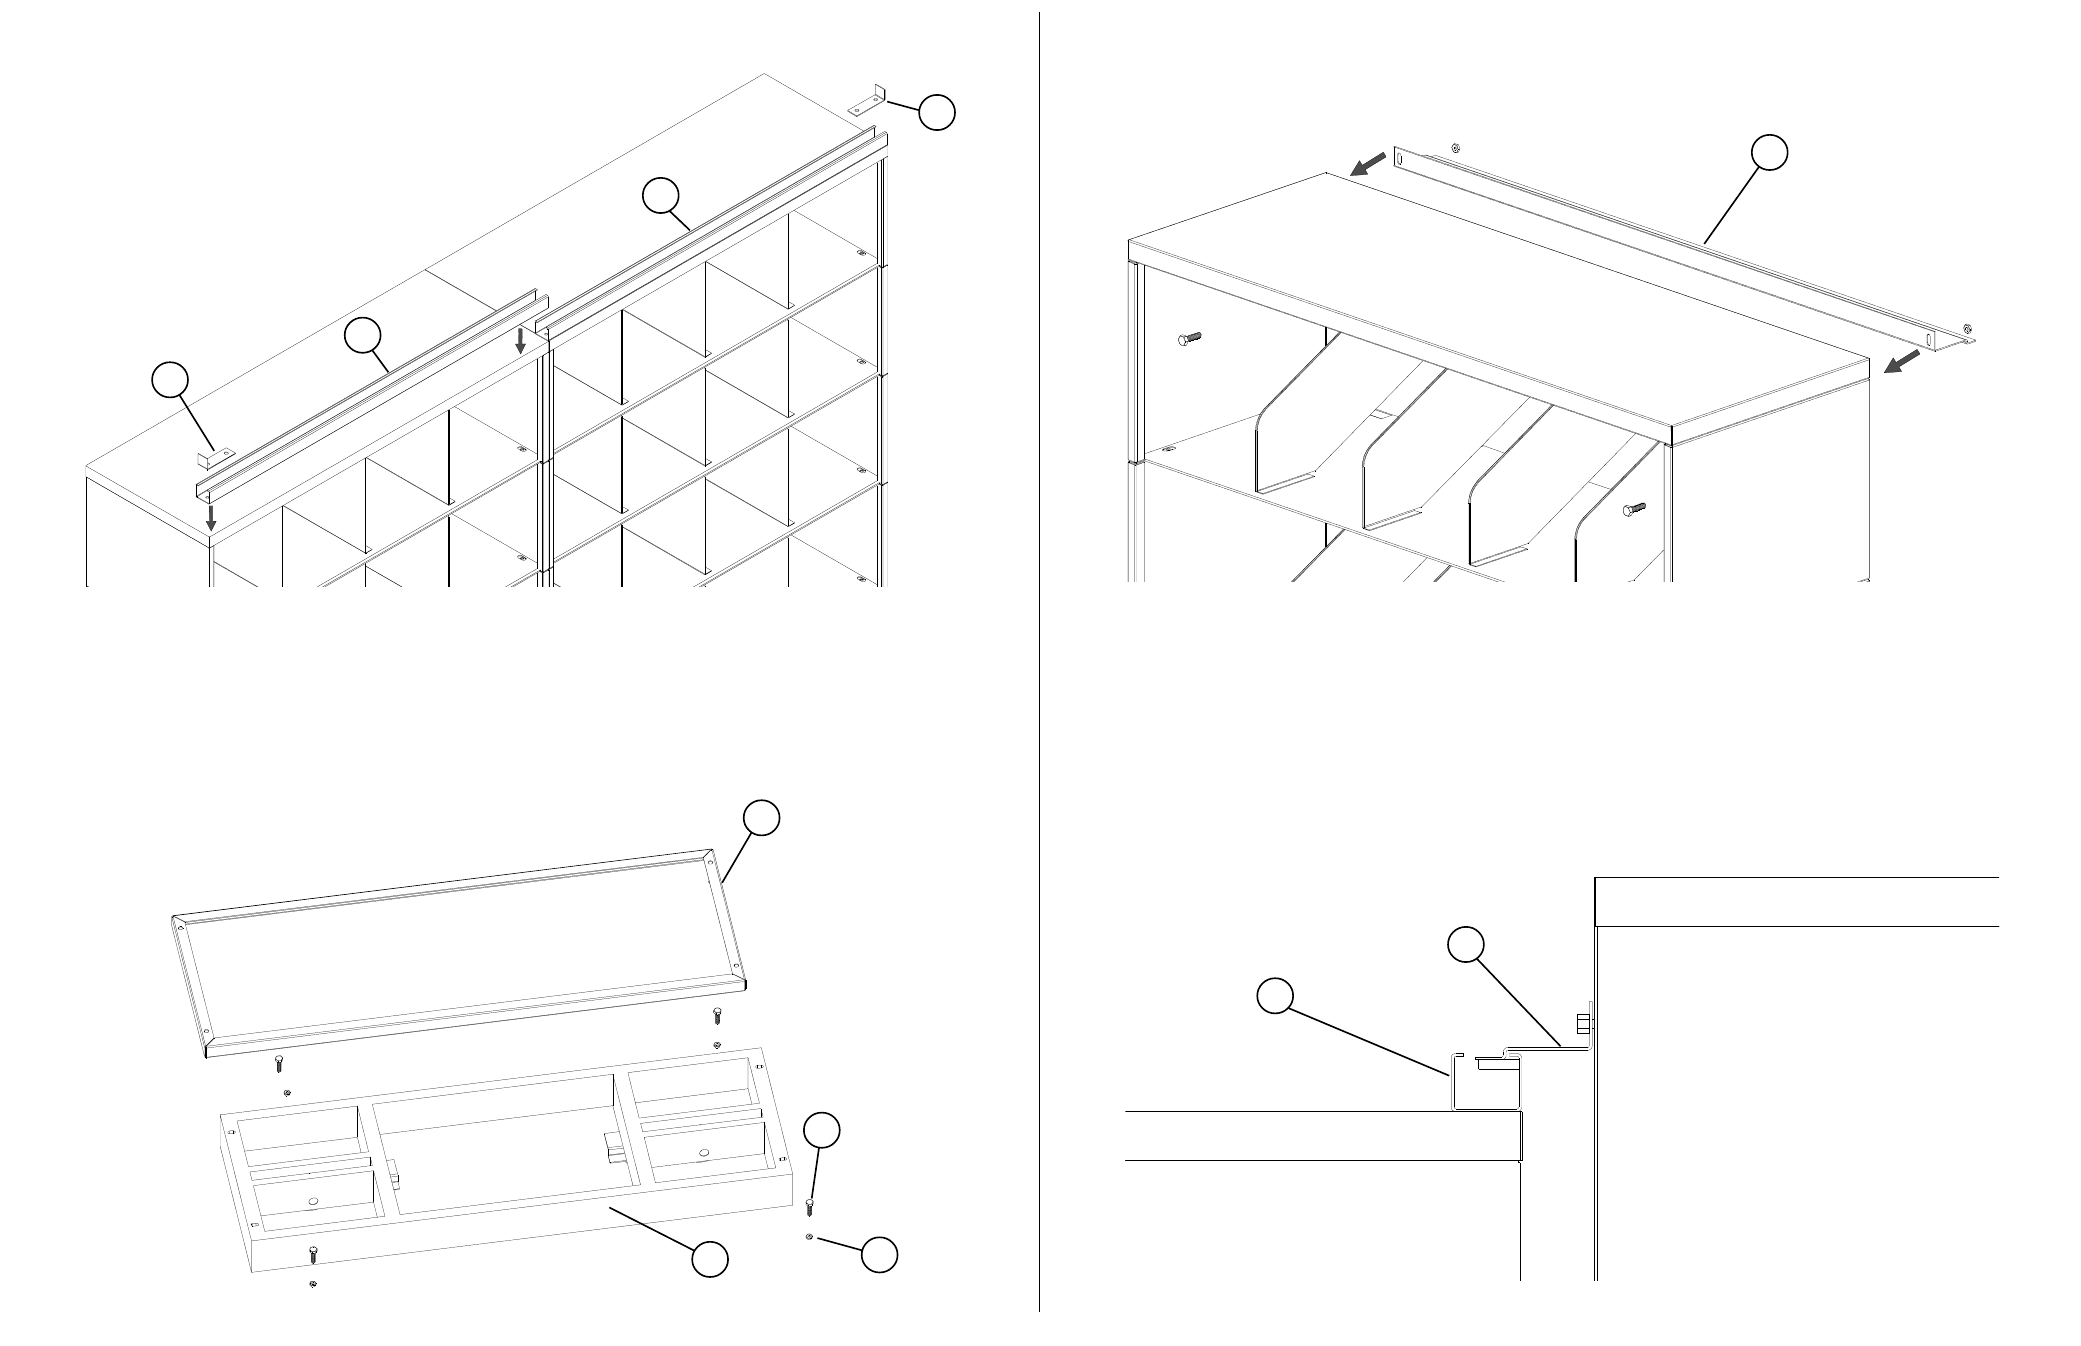
STEP 13) Next slide the Stabilizer Roller Bracket Assembly (#20) into the Top Track. Hold the Stabilizer Roller Bracket
Assembly against the back panel of the front unit and mark where the holes will need to be drilled to attach the bracket.
STEP 14) Next attach the bracket (#20) to the unit and check to see if the unit rolls freely on the steel track. The steel
wheel of the carriage will roll on the square steel bar in the floor assembly. Do not have the carriage rolling on any surface
except the steel bar. Some adjustment may be needed to the brackets for a smooth free operation. Make sure the mobile
unit is level and plumb before using. Recheck all bolts for tightness.
STEP 9) Lay Top Track (#13) on top of the unit and drill two holes through the Top of the unit, locate the track flush with the
front edge of the shelving top. Place the Stop Angle (#23) at each end of the shelving run and bolt through it to attach the
Top Track to the shelving top.
STEP 10) Next attach the base of the unit (#16) to the top of the Mobile Carriage (#17) using four (4)
1
/
4
- 20 x 1 bolts (#18),
and
1
/
4
- 20 hex head nuts (#19). Once the base is attached to the carriage lift a completed section of levels and attach it to
the base that is attached to the carriage.
STEP 11) Repeat step 11 for each unit to be mounted on a Mobile Carriage.
17
23
13
13
23
20
23
13
End view of Front Unit
End view of Rear Unit