Star Lights Revolution T8-18 User Manual
Page 4
- 4 -
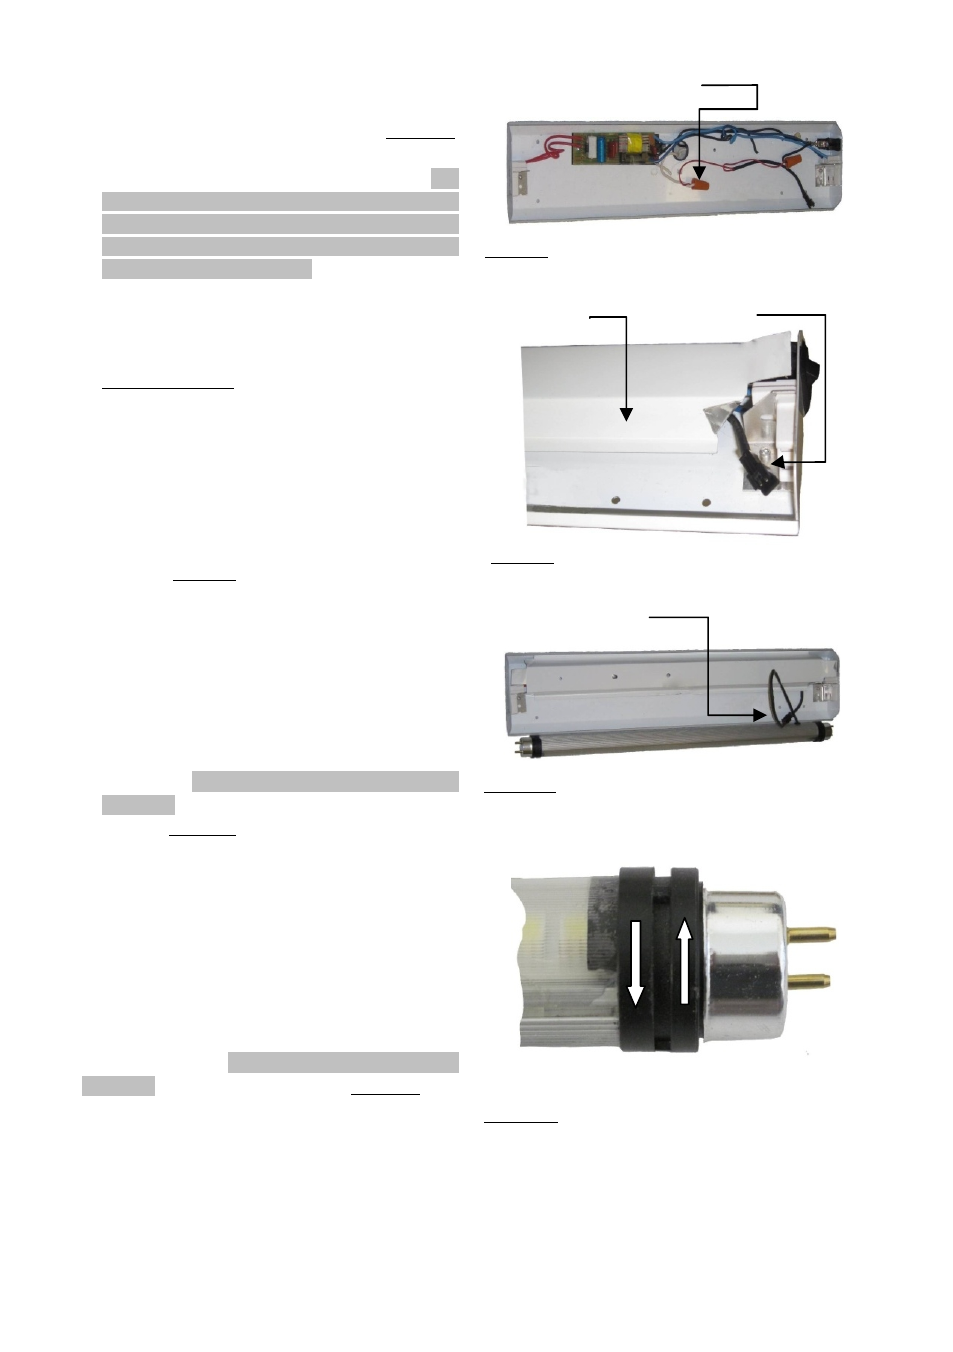
6. After locating the Ground wire (-) Figure 8,
attach the wire to the Wiring Harness as shown
using the
wire
nut
provided.
The
REVOLUTION T8 LED TUBE LIGHT™
contains polarity correcting circuitry, so do not be
concerned which of the (+) or (-) connections the
Harness wiring is connected to.
7. Important Note: Do not allow the wire
harness to rest against, or contact, any sharp
edges.
8. After connecting the wiring harness connections
in step 6 above, replace the Ballast Cover.
Leave the end of the harness protruding as
shown in Figure 9.
9. Plug the
REVOLUTION T8 LED TUBE
LIGHT™ harness into the protruding plug as
shown in Figure 10.
10. The ends of the
REVOLUTION T8 LED TUBE
LIGHT™ can be rotated as shown in Figure 11. This
feature allows you to direct the light array to your
preference. This feature also allows the end pins to
lock into place, ensuring a propper fit into the fixture.
Wire Connector
Figure 8 -
T8 Fluorescent Tube Fixture Showing the Negative(-)
Wire affixed to the Wiring Harness Provided with the Tube Light.
Ballast Cover
Harness Plug
Figure 9 -
T8 Fluorescent Tube Fixture the end of the Harness
protruding from under the ballast cover
Harness & Plug
Figure 10 -
T8 Fluorescent Tube Fixture with the Harness &
Plug
Figure 11 -
T8 Fluorescent Tube Fixture with the Harness &
Plug