Rebel9 pro (economy, value and window) – SHARKOON Rebel9 Pro Window User Manual
Page 15
REBEL9 PRO (EcOnOmy, vaLuE and windOw)
11. Installation of additional fans / optimized airflow
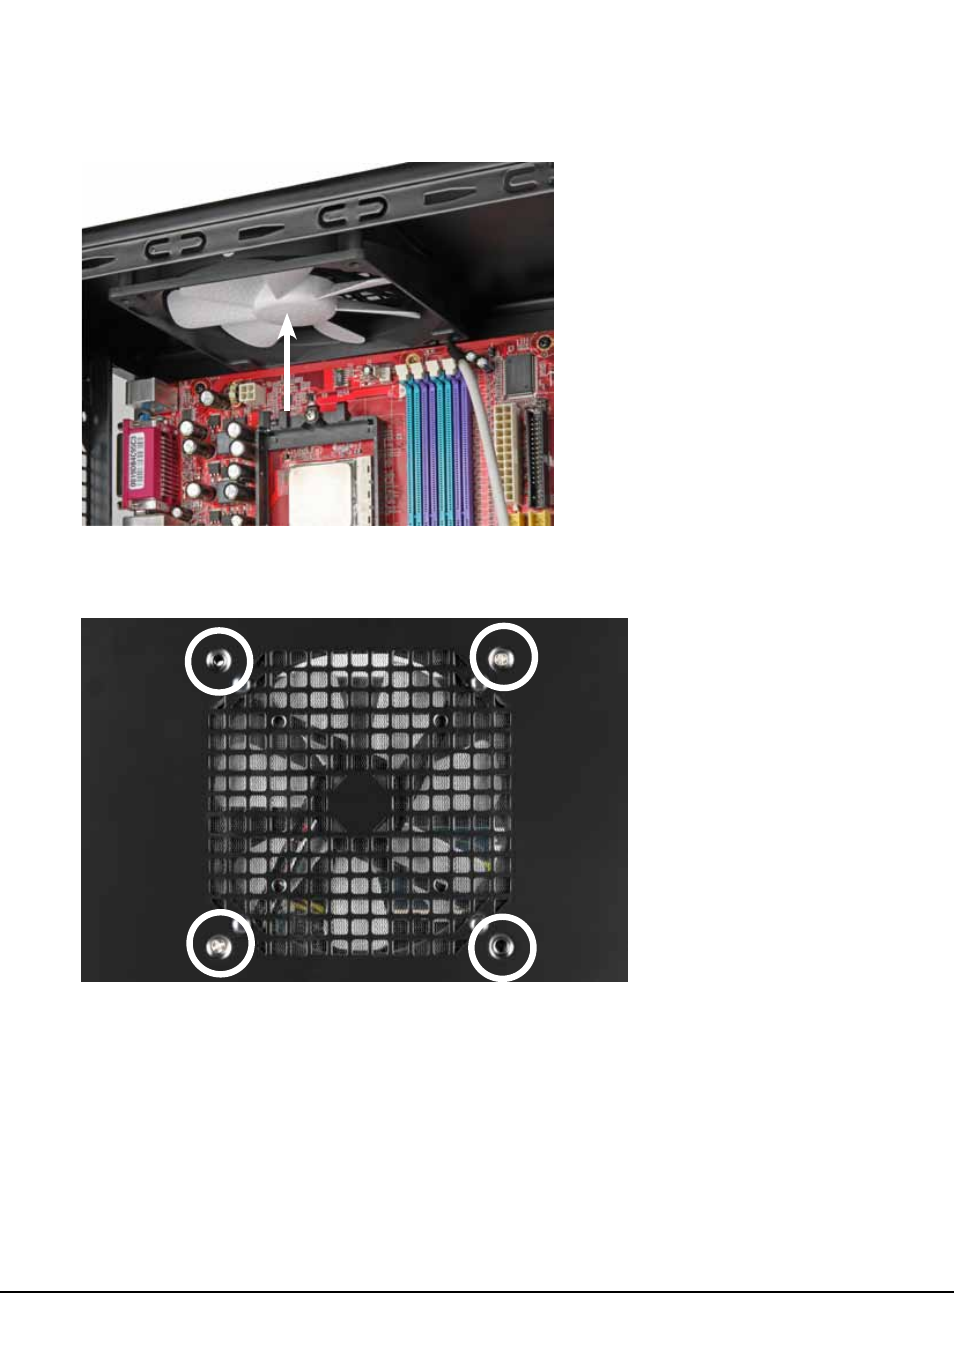
1. Place the fan against the respective bracket from the inside (e.g. in the top panel / fig. 23).
fig. 23
2. Screw the fan to the attachment from the outside (fig. 24).
fig. 24
Note:
The Rebel 9 Pro case offers a lot of possibilities to install fans.
While installing fans make sure that (cool) air is taken in on the case’s front side/bottom and
blown out on its back side/top. The PC components with the highest heat development
should be placed directly within the airflow.
See also other documents in the category SHARKOON Computer Accessories:
- Rebel9 Pro Value (16 pages)
- HDD VIBE FIXER (1 page)
- T9 Value (15 pages)
- T5 Value (17 pages)
- Vaya (15 pages)
- Tauron (23 pages)
- T28 (18 pages)
- Nightfall U3 (17 pages)
- 5.25 BayExtension (1 page)
- DriveLink USB2.0 (8 pages)
- SATA QuickPort XT USB3.0 (5 pages)
- SATA QP Pro LAN (Giga) (22 pages)
- SATA QP Intern Multi (1 page)
- DriveLink Combo USB3.0 (5 pages)
- FireGlider Black (30 pages)
- Tactix (12 pages)
- DarkGlider (15 pages)
- Drakonia (11 pages)
- Drakonia Black (11 pages)
- FireGlider Optical (20 pages)
- QuickStore Portable (18 pages)
- QuickStore Portable USB3.0 (18 pages)
- QuickStore Portable Pro (6 pages)
- QuickStore Portable Pro USB3.0 (5 pages)
- 4-Port USB-Hub (1 page)
- MS120 (19 pages)
- MS140 (19 pages)
- WPM V2 (13 pages)
- WPM Bronze (13 pages)
- Rush Power M (14 pages)
- X-Tatic Analog (10 pages)
- X-Tatic Digital (15 pages)
- X-Tatic Sound Control Unit (13 pages)
- Unatic (28 pages)
- Unatic (18 pages)
- SHA550-12A (1 page)
- Furious (15 pages)
- Nightfall (17 pages)
- Rebel12 Value (11 pages)
- Flexi-Drive S2S (7 pages)
- USB LANPort 100 (27 pages)
- SATA QuickPort Pro LAN (27 pages)
- Bandit (12 pages)
- X-Tatic SP (2 pages)
- DriveLink USB3.0 (8 pages)