Furious, Installation of a 3.5" device – SHARKOON Furious User Manual
Page 12
FURIOUS
29
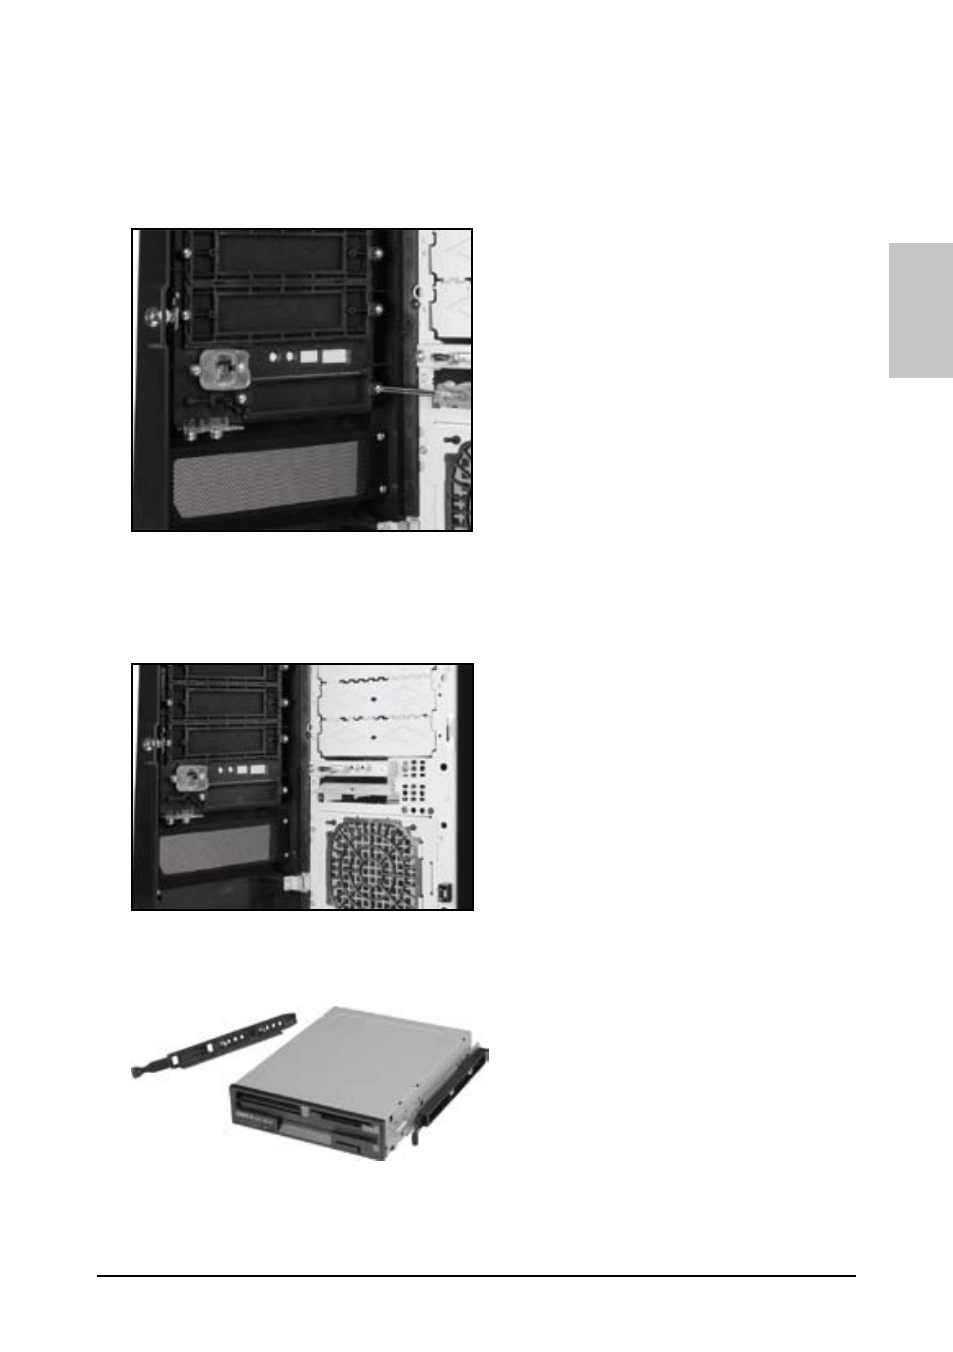
8. Installation of a 3.5" device
1. Open the case’s front bezel.
2. Remove the 3.5" front bezel of the 3.5" mounting bay by loosening its screws and
pushing the bezel to the inside (fig. 15).
fig. 15
3. Carefully take out the metal bezel that closes the 3.5" drive bay by using a gripper
(fig. 16).
fig. 16
4. Attach the mounting rails to the 3.5" device from both sides (fig. 17).
fig. 17
ENGLISH
See also other documents in the category SHARKOON Computer Accessories:
- Rebel9 Pro Value (16 pages)
- HDD VIBE FIXER (1 page)
- T9 Value (15 pages)
- T5 Value (17 pages)
- Vaya (15 pages)
- Tauron (23 pages)
- T28 (18 pages)
- Nightfall U3 (17 pages)
- 5.25 BayExtension (1 page)
- DriveLink USB2.0 (8 pages)
- SATA QuickPort XT USB3.0 (5 pages)
- SATA QP Pro LAN (Giga) (22 pages)
- SATA QP Intern Multi (1 page)
- DriveLink Combo USB3.0 (5 pages)
- FireGlider Black (30 pages)
- Tactix (12 pages)
- DarkGlider (15 pages)
- Drakonia (11 pages)
- Drakonia Black (11 pages)
- FireGlider Optical (20 pages)
- QuickStore Portable (18 pages)
- QuickStore Portable USB3.0 (18 pages)
- QuickStore Portable Pro (6 pages)
- QuickStore Portable Pro USB3.0 (5 pages)
- 4-Port USB-Hub (1 page)
- MS120 (19 pages)
- MS140 (19 pages)
- WPM V2 (13 pages)
- WPM Bronze (13 pages)
- Rush Power M (14 pages)
- X-Tatic Analog (10 pages)
- X-Tatic Digital (15 pages)
- X-Tatic Sound Control Unit (13 pages)
- Unatic (28 pages)
- Unatic (18 pages)
- SHA550-12A (1 page)
- Nightfall (17 pages)
- Rebel12 Value (11 pages)
- Flexi-Drive S2S (7 pages)
- USB LANPort 100 (27 pages)
- SATA QuickPort Pro LAN (27 pages)
- Bandit (12 pages)
- X-Tatic SP (2 pages)
- DriveLink USB3.0 (8 pages)