Installation of a 3.5" device – SHARKOON Tauron User Manual
Page 19
Tauron
19
10. Installation of a 3.5" device
1. Remove the case’s front panel by gently pulling it towards you.
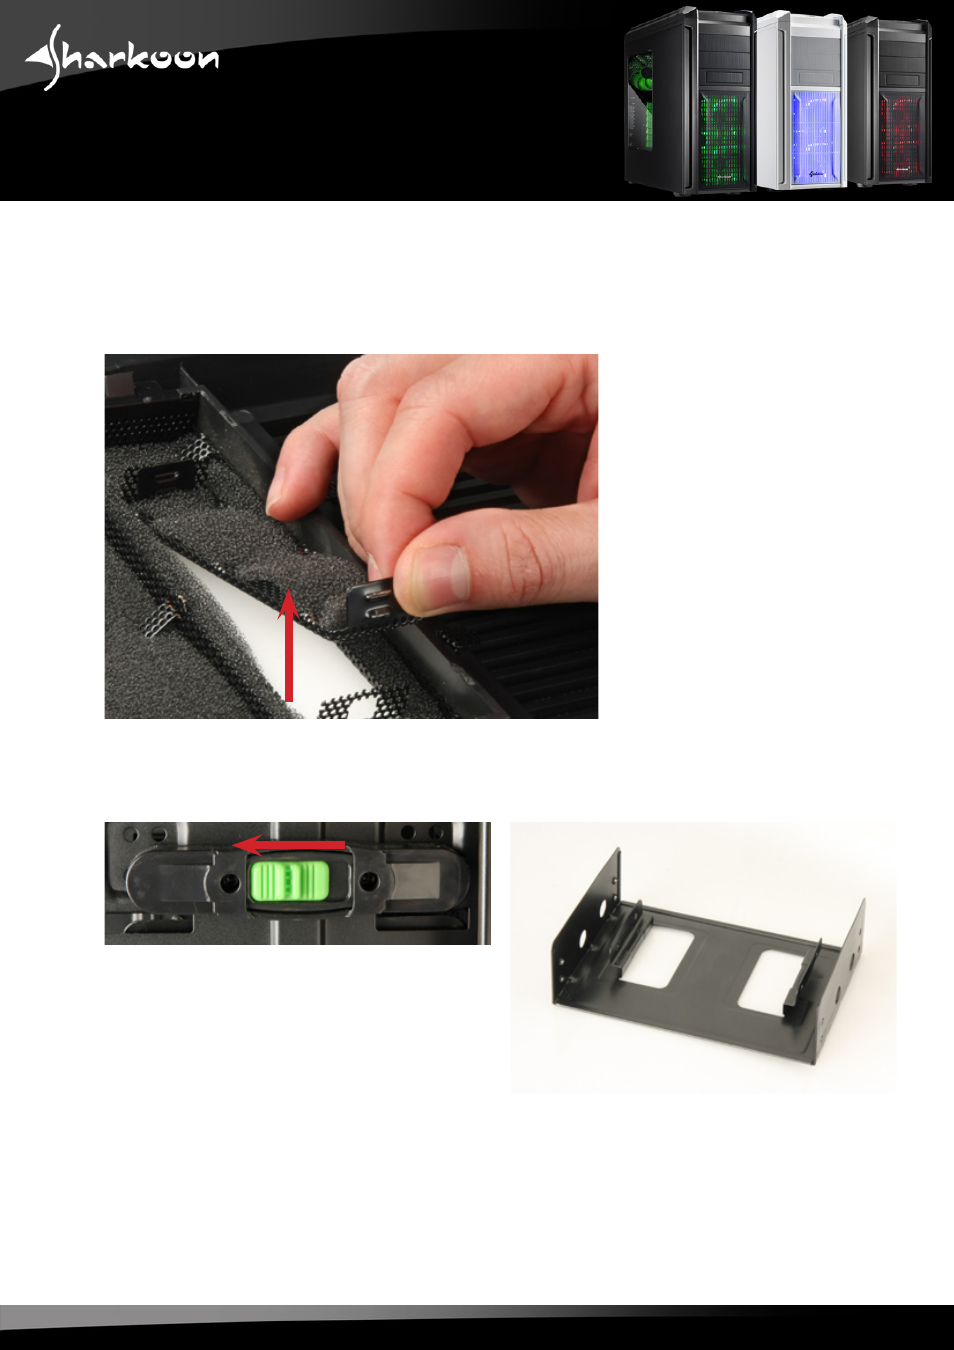
2. Dismantle the 3.5" front bezel by removing it from the front panel (fig. 17).
Fig. 17
3. Unlock the quick fasteners, which attach the mounting frame for 3.5” devices inside the case (fig. 18a)
and remove the mounting frame from the case (fig. 18b).
Fig. 18a
Fig. 18b
(Carefully remove an optionally present metal bezel covering the 3.5" drive bay by using a gripper.)
See also other documents in the category SHARKOON Computer Accessories:
- Rebel9 Pro Value (16 pages)
- HDD VIBE FIXER (1 page)
- T9 Value (15 pages)
- T5 Value (17 pages)
- Vaya (15 pages)
- T28 (18 pages)
- Nightfall U3 (17 pages)
- 5.25 BayExtension (1 page)
- DriveLink USB2.0 (8 pages)
- SATA QuickPort XT USB3.0 (5 pages)
- SATA QP Pro LAN (Giga) (22 pages)
- SATA QP Intern Multi (1 page)
- DriveLink Combo USB3.0 (5 pages)
- FireGlider Black (30 pages)
- Tactix (12 pages)
- DarkGlider (15 pages)
- Drakonia (11 pages)
- Drakonia Black (11 pages)
- FireGlider Optical (20 pages)
- QuickStore Portable (18 pages)
- QuickStore Portable USB3.0 (18 pages)
- QuickStore Portable Pro (6 pages)
- QuickStore Portable Pro USB3.0 (5 pages)
- 4-Port USB-Hub (1 page)
- MS120 (19 pages)
- MS140 (19 pages)
- WPM V2 (13 pages)
- WPM Bronze (13 pages)
- Rush Power M (14 pages)
- X-Tatic Analog (10 pages)
- X-Tatic Digital (15 pages)
- X-Tatic Sound Control Unit (13 pages)
- Unatic (18 pages)
- Unatic (28 pages)
- SHA550-12A (1 page)
- Furious (15 pages)
- Nightfall (17 pages)
- Rebel12 Value (11 pages)
- Flexi-Drive S2S (7 pages)
- USB LANPort 100 (27 pages)
- SATA QuickPort Pro LAN (27 pages)
- Bandit (12 pages)
- X-Tatic SP (2 pages)
- DriveLink USB3.0 (8 pages)