Air exhaust, Between uses, Filling of driver chamber with liquid – SANDPIPER MP04D User Manual
Page 3: Caution
520-136-000 10/02
Model MP04D Design Level 3 Page 3
maintenance schedule to do so on a regular basis. This practice should include cleaning
the spool and sleeve components with a safety solvent or equivalent, inspecting for signs
of wear or damage, and replacing worn components.
To re-install the sleeve and spool set, lightly lubricate the o-rings on the sleeve with
an o-ring assembly lubricant or lightweight oil (such as 10 wt. air line lubricant).
Re-install one end cap, and retaining ring on the valve body. Using the arbor press or
bench vise that was used in disassembly, carefully press the sleeve back into the valve
body, without shearing the o-rings. Re-install the spool, opposite end cap and retaining
ring on the valve body. After inspecting and cleaning the gasket surfaces on the valve
body and intermediate, re-install the valve body on the pump using new gaskets.
Tighten the four hex head capscrews evenly and in an alternating cross pattern, at 150
in./lbs. (16.94 Newton meters).
AIR EXHAUST
If a diaphragm fails, the pumped liquid or fumes can enter the air end of the pump, and
be exhausted into the atmosphere. When pumping hazardous or toxic materials, pipe the
exhaust to an appropriate area for safe disposition.
This pump can be submerged if materials of construction are compatible with the
liquid. The air exhaust must be piped above the liquid level. Piping used for the air
exhaust must not be smaller than 1" (2.54 cm). Reducing the pipe size will restrict air flow
and reduce pump performance. When the product source is at a higher level than the
pump (flooded suction), pipe the exhaust higher than the product source to prevent
siphoning spills.
Freezing or icing of the air exhaust can occur under certain temperature and
humidity conditions. Use of a MARATHON Extractor/Dryer unit should eliminate most
icing problems. Check the exhaust periodically for build-up of ice or contaminants (see
Figure 2).
BETWEEN USES
When used for materials that tend to settle out or transform to solid form, the pump
should be completely flushed after each use, to prevent damage. Product remaining in
the pump between uses could dry out or settle out. This could cause problems with valves
and diaphragms at re-start. In freezing temperatures, the pump must be drained between
uses in all cases.
FILLING OF DRIVER CHAMBER WITH LIQUID
The driver chambers are filled at the factory with water.
If you need to substitute another liquid to prevent system contamination, first consult
the factory for chemical compatibility with pump construction.
Follow the steps listed below to replace the liquid in the pump after disassembly or
liquid loss:
1. Filling is accomplished through the pipe plugs at the top of the liquid driver chamber
(see Figure 3).
2. After the driver fluid has been emptied from the pump, the driver diaphragms will
naturally come to center.
3. Remove the entire discharge manifold assembly exposing the ports in the outer
diaphragm chambers.
4. Fill either side with 600 ml. (20.44 fl. oz.) by volume with the driver liquid. It is
imperative that the driver liquid chambers be filled with the correct amount of driver liquid
as too little or too much will cause premature diaphragm failure and erratic pumping.
5. After filling with the proper amount of liquid, if the liquid does not come to the top
of the fill hole, pressure should be applied to the Teflon diaphragm with a blunt tool
through the discharge material flow port in the outer chamber until it does come to the
top (see Figure 4). To facilitate this filling, a taper punch can be used in the hole of the
rod to manually shift the pump.
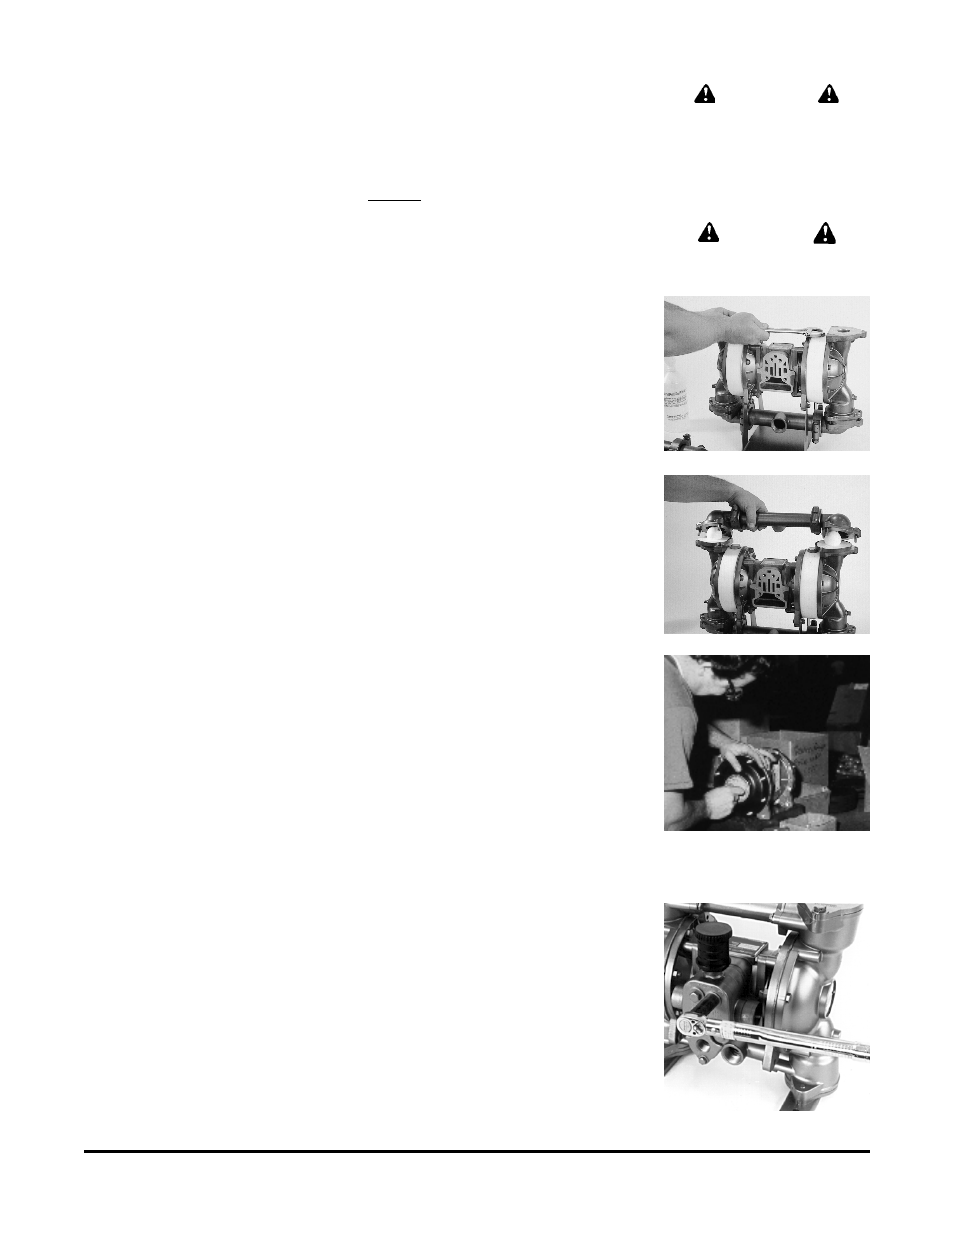
6. When the driver fluid rises to the top of the fill plug hole, screw the boss plug, with
o-ring installed, into the chamber (see Figure 5). (Do not overtighten.) Remember to keep
pressure on the Teflon diaphragm until the boss plug is tight to prevent air from drawing
back into the chamber.
7. Filling the opposite side is accomplished in the same manner as described in 5 and 6.
The correct amount of fluid will come to the top of the fill hole. Screw in the boss plug.
CAUTION
In the event of diaphragm rupture,
pumped material may enter the air
end of the pump, and be discharged
into the atmosphere. If pumping a
product which is hazardous or toxic,
the air exhaust must be piped to an
appropriate area for safe disposition.
CAUTION
Do not use a wrench on the
diaphragm rod. Flaws on the surface
may damage bearings and seals.
Fig. 5 Tighten the boss plug.
Fig. 6 Ball check valves
Fig. 7 Diaphragm installation
Fig. 8 Torquing the air inlet capscrews