RIKON Power Tools 20-110 User Manual
Page 11
11
Figure 14
Figure 15
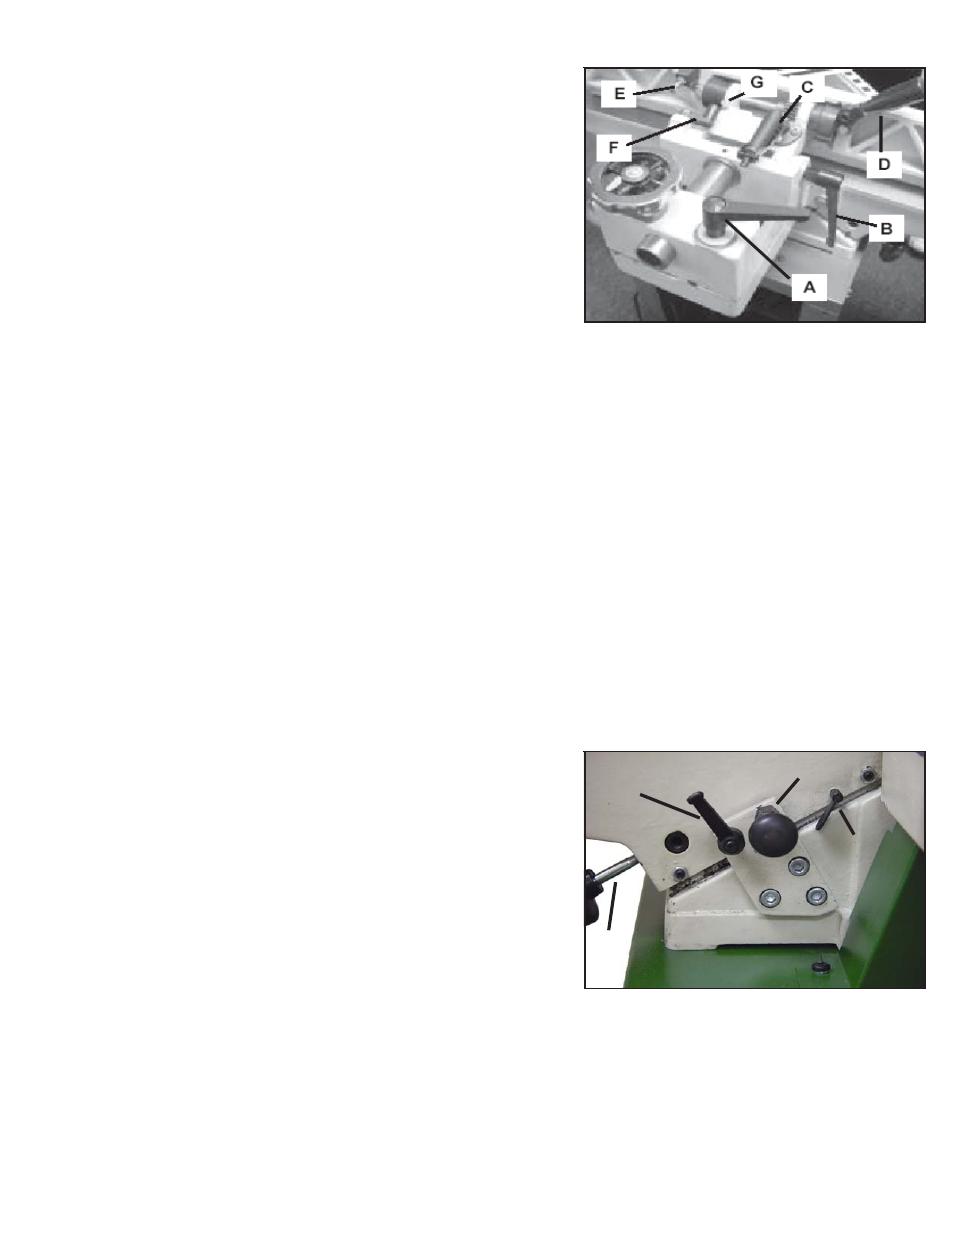
45º Fence Adjustment
1. Loosen lock handle (B, Figure 14). Move the stop plate
(F, Figure 14) out of the way and position the fence at the
45
º
angle. Make sure the fence sits against the stop bolt
(G, Figure 14).
2. Place a combination square on the fence and table to
confirm a 45
º
angle setting.
3. To adjust, loosen lock nut and bolt (G, Figure 14), until a
45
º
angle is obtained, and tighten lock nut (G, Figure 14).
4. Tighten lock handle (B, Figure 14).
Depth Lock Handle
1. Install the depth lock handle. (A, Figure 15). The depth
lock handle helps lock the infeed bed in place for
rabbeting cuts.This should be attached before Depth
Limiting Stop (B, Figure 15) for easier installation.
Depth Limiting Stop
1. Attach depth limiting stop. (B, Figure 15).
4. Place a combination square on the in-feed table to check
that the fence is 90
º
to the table.
5. If fence is not square to table, release lock handle (D,
Figure 14) and turn handle (C, Figure 14) until the fence is
90
º.
6. Now that the fence is 90
º
to the table, adjust the positive
stop screw assembly (E, Figure 14) to maintain the 90
º
position.
7. Retighten lock handle (D, Figure 14).
A
B
C
D