Adjustments and operation, Mounting the on / off switch, 90º fence adjustment – RIKON Power Tools 20-110 User Manual
Page 10: Installing handwheels
10
Figure 10
Figure 11
Figure 12
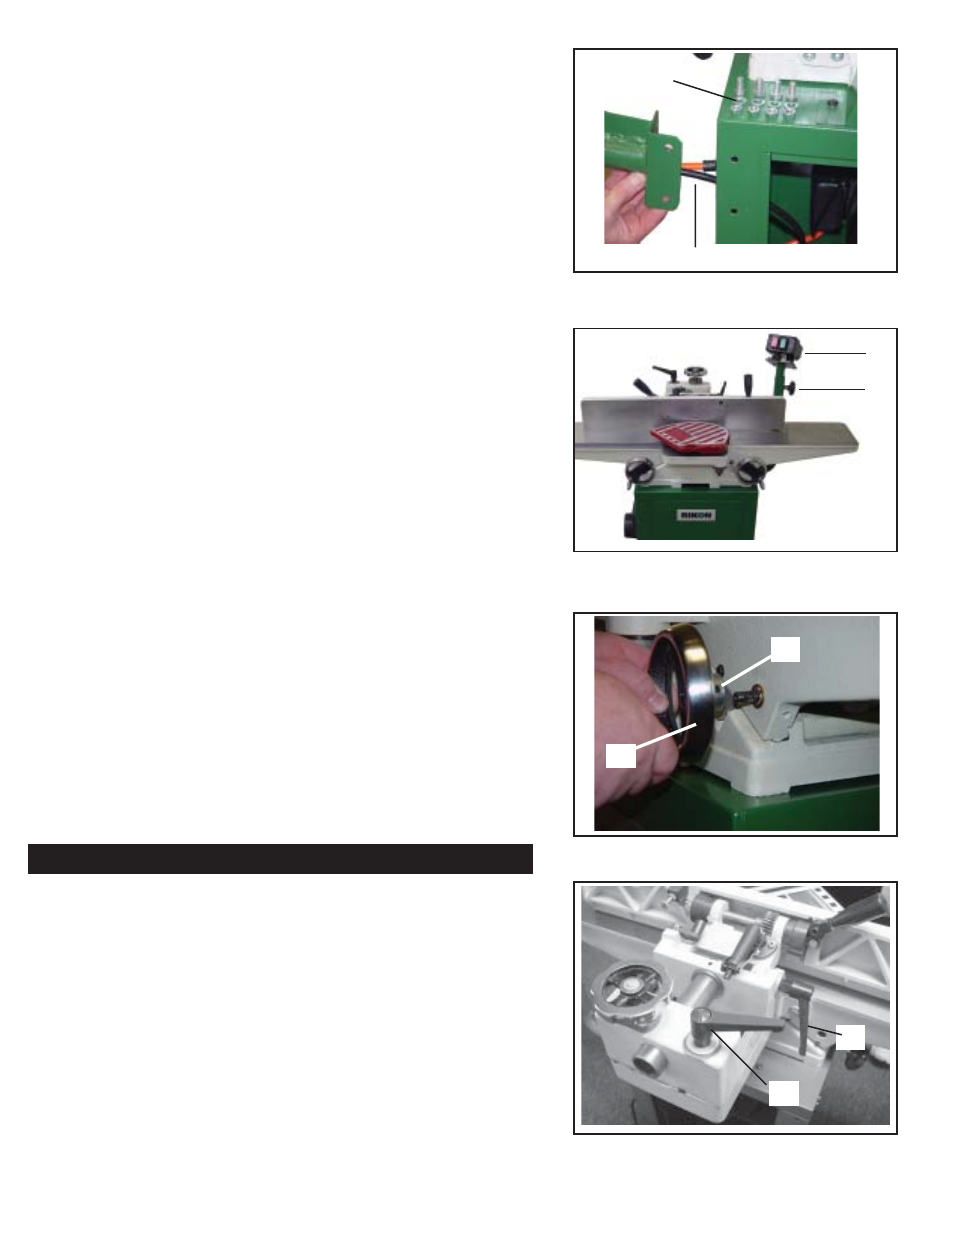
Mounting the On / Off Switch
1. Decide where you want to mount the on / off
switch. It can be mounted on the in-feed side of
the cabinet or the out-feed side.
2. Feed the two power cords through the cabinet
(Fig. 10).
3. Mount the power switch column to the cabinet using
(4) 3/8” x 3/4” bolts, (4) washers and (4) 3/8” nuts
using a 14mm socket/wrench and tighten.
4. Plug the motor cords together (Green cords).
5. Plug the power cords together (Black cords).
6. Adjust the height of the switch to your desired
height by loosening the adjustment knob
(A, Fig. 11) on the power switch column.
7. Adjust the switch (B, Fig. 11) to the desired angle.
8. Re-tighten the adjustment knob (A, Fig. 11) on the
power switch column.
90º Fence Adjustment
1. Set in-feed table to the same height as the out-feed
table.
2. Move the fence by releasing lock handle (A,
Figure 13) and pushing the fence assembly until it
overlaps the tables.
3. Adjust the fence to a 90
º
angle by releasing lock
handle (B, Figure 13).
Installing Handwheels
1. Press handwheels (A, Fig. 12) onto shaft, aligning
the slot in the handle with the pin on the shaft. If
necessary, use a hammer with a block of wood to
tap the handwheel completely onto the shaft.
2. Tighten set screw, (B, Fig. 12).
Power Cords
Mounting
Hardware
A
B
B
A
Figure 13
A
B
Adjustments and Operation