Assembly – RIKON Power Tools 10-050 User Manual
Page 8
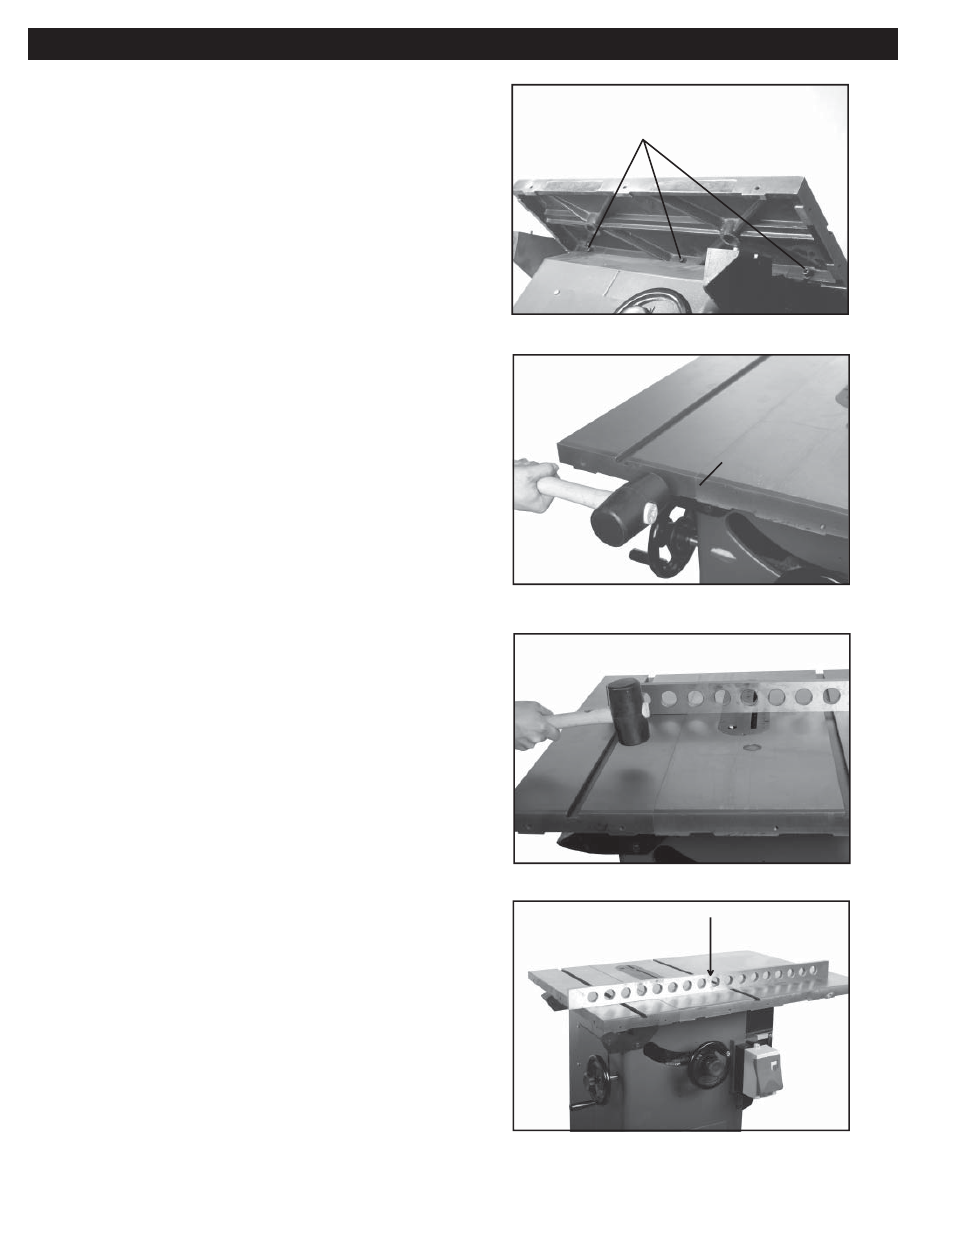
Figure 1
8
Figure 2
Figure 3
Installing the Right Table Wing
1. Mount the cast iron table wing using
three M10x30 hex head bolts and three M10
fl at washers. Figure 1.
With assistance hold the extension wing up to the
table, and insert the bolts and washers.
Finger tighten only.
NOTE: If assistance is not available, hold the wing
in vertical position up to the saw table, insert the
middle screw and lock washer fi nger tight, then
pivot the wing to level position. Insert the other two
screws and washers fi nger tight.
2. Align table wing toward the front edge of the
saw table until the two faces are fl ush. Figure 2.
3. Level table wing with the saw table across its
entire width, using a straight edge and hammer
with rubber hammer (or block of wood ). Figure 3.
As each section of the table wing becomes fl ush
with the table, tighten the screw under that area.
Continue until all three screws are fully tightened.
Check with straight edge and adjust as needed.
Figure 4.
Installing the Optional Left Wing
The optional left cast iron table wing with miter slot
is used in place of the optional slide table. Please
refer to the instructions above for proper installa-
tion.
Figure 4
Assembly
Hex. socket screw
Spring washer
Front edge fl ush