Adjustments, Changing the bandsaw blade – RIKON Power Tools 10-350BAL User Manual
Page 11
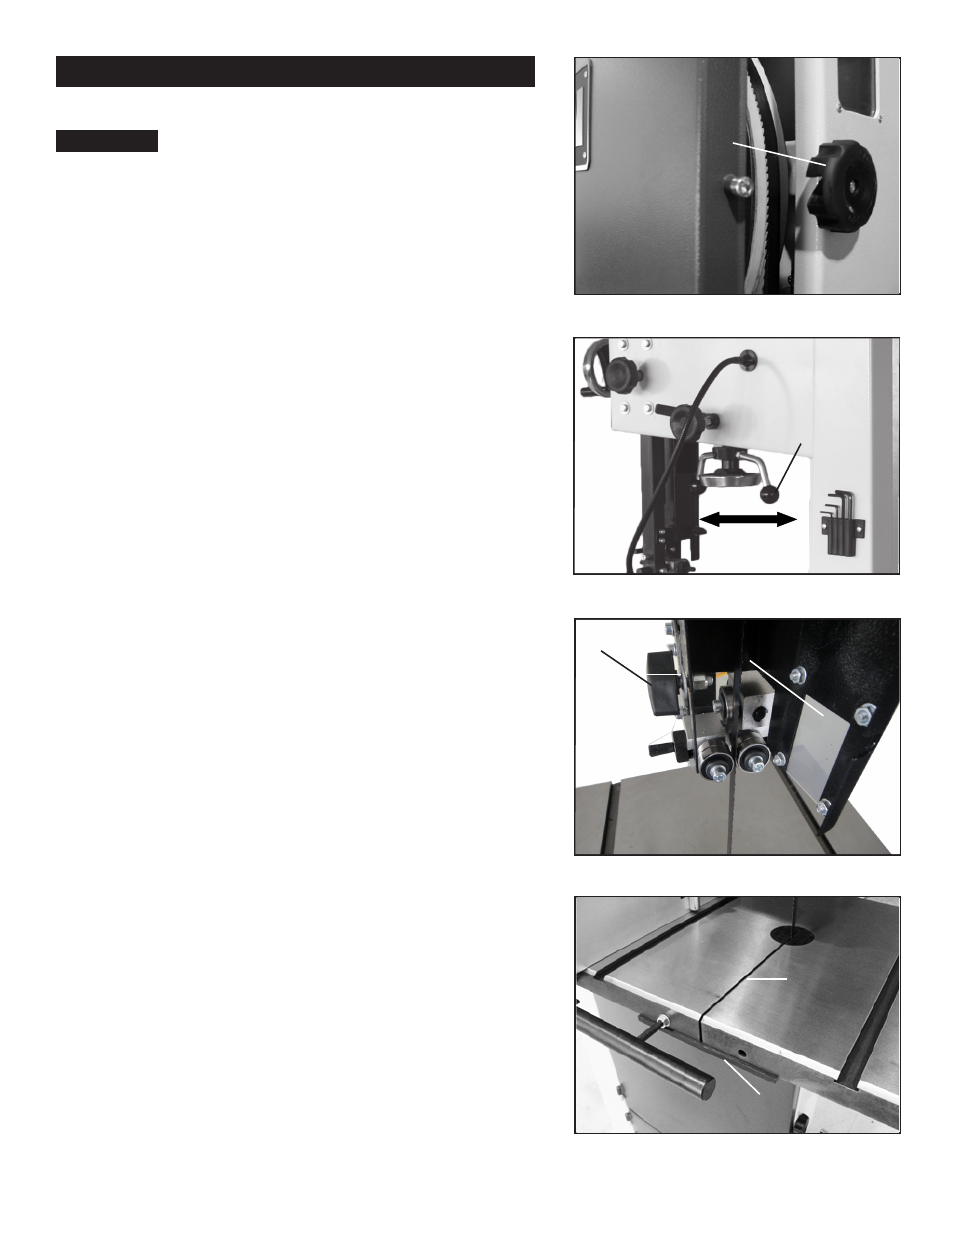
Changing the Bandsaw Blade
Unplug the machine from the electrical
supply. This ensures that the Bandsaw will not
accidentally turn on if the ON/OFF switch is bumped.
a) Open the top and bottom wheel doors by turning
the door locking knobs. (A-Fig.13)
b) Release the blade tension by moving the quick
release lever (Fig.14) from right to left. Open the
hinged door on the blade guard by loosening the
wing screw (A-Fig.15). Loosen then open the
table leveling bar (A-Fig.16).
c) Remove the saw blade by feeding it through the
slot in the table (B-Fig.16), upper and lower blade
guides and the slot in the spine of the machine,
being careful not to cut yourself. Wear gloves for
protection.
d) When installing the new blade, ensure the blade
teeth are pointing downwards and towards you at
the position where the blade passes through the
table.
e) Center the blade on both wheels.
Adjustments
11
f
) Re-tension the new blade by moving the quick
release lever (Fig.14) left to right and check the
blade tracking. Spin the upper wheel clockwise
three times. The blade should run in the center of
both wheels. Refer to “Tracking the Saw Blade”
on page 10 for more details.
g) Set the blade guides as described in the section
“Adjusting the Blade Guides” on page 12.
h) Close the hinged door on the blade guard
and tighten the wing screw (A-Fig.15). Close the
table leveling bar and tighten (A-Fig. 16).
i) Close and lock both the wheel doors (A-Fig.14)
before reconnecting the power supply.
Warning!
On
Off
A
Figure 13
Figure 14
A
Hinged Door
Figure 15
Figure 16
A
B
A
Quick Release
On
Off