Changing the drive belt, Drive belt positions high/low speed, Drive belt tension – RIKON Power Tools 10-321 User Manual
Page 11
11
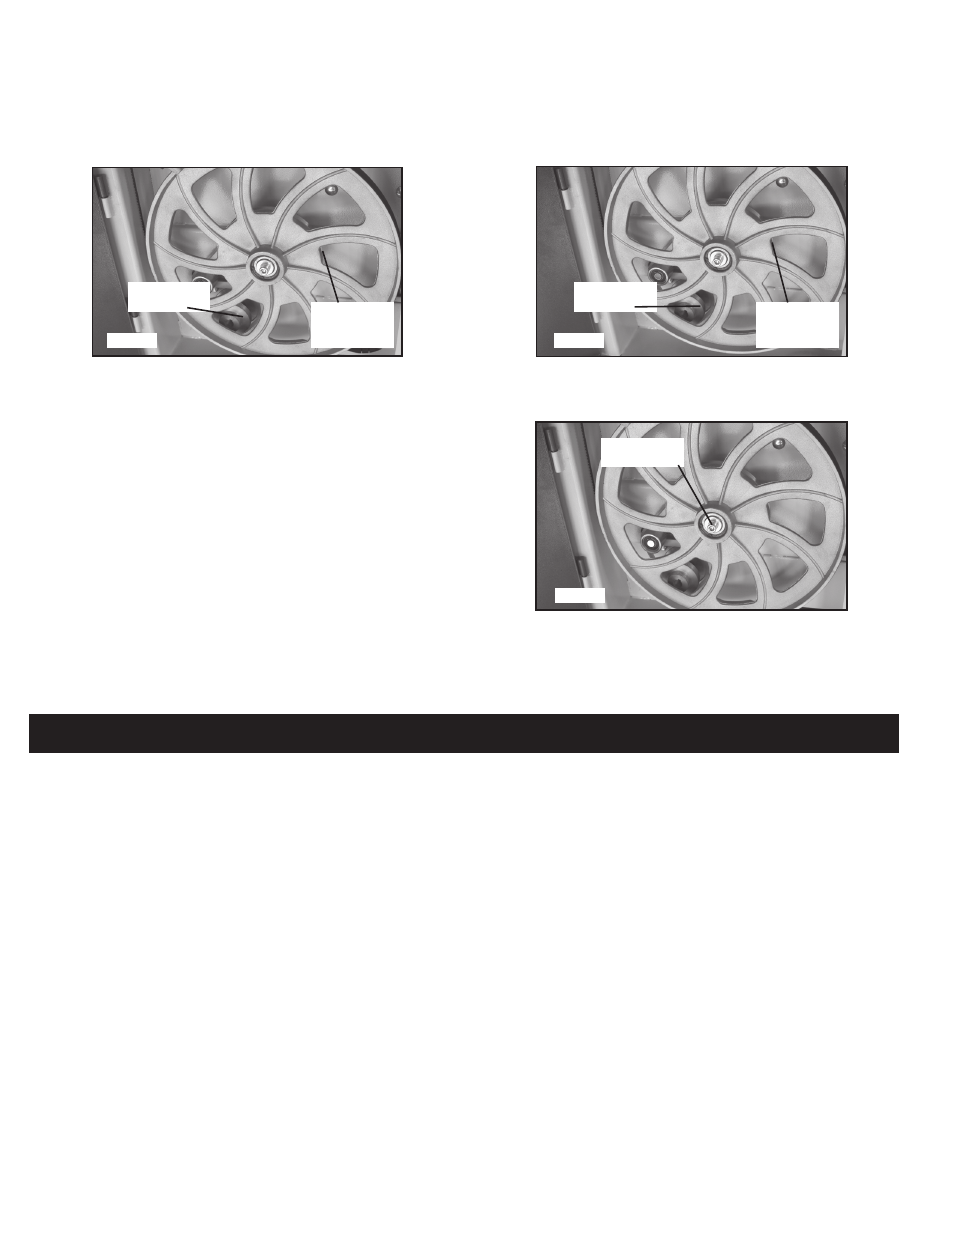
A.
For the low speed 1620 ft/min, fit the belt to the front pulley on
both the motor and bandwheel. (See FIG. 23)
B.
For the high speed 3340 ft/min, the belt should be fitted to the
rear pulley on both the motor and bandwheel. (See FIG. 24)
Note: The rear bandwheel pulley is hidden from view.
14. CHANGING THE DRIVE BELT
A. Release the saw blade tension by turning the blade tension knob
on the top of band saw counterclockwise.
B.
Release the belt tension by using the crank handle.
C. Using a hex wrench remove the hex socket head cap screw
(See FIG. 25)
from the center of the lower wheel.
D. Carefully slide the lower wheel forward and at the same time
release the saw blade from the wheel.
E. Remove the old drive belt and fit the new belt (ensure ribs in drive
belt are seated correctly before reassembling and tensioning the drive
belt).
F. Follow procedures for CHANGING AND ADJUSTING THE SAW
BLADE & TRACKING THE BAND SAW BLADE, before restoring
power to the band saw and setting up for use.
FIG. 24
FIG. 23
13. DRIVE BELT POSITIONS HIGH/LOW SPEED
Front Motor
Pulley
Front
Bandwheel
Pulley
Rear Motor
Pulley
Rear
Bandwheel
Pulley
Hex Head
Cap Screw
FIG. 25
FIG. 23
Drive Belt Tension:
Tension the drive belt using the crank handle until tight. Add/Remove
tension until there is 1/2” to 3/8” side deflection.