Self-check and calibration – Johnson Level & Tool Mfg. 40-6660 User Manual
Page 16

16
©2007 Johnson Level & Tool
8. Self-Check and Calibration
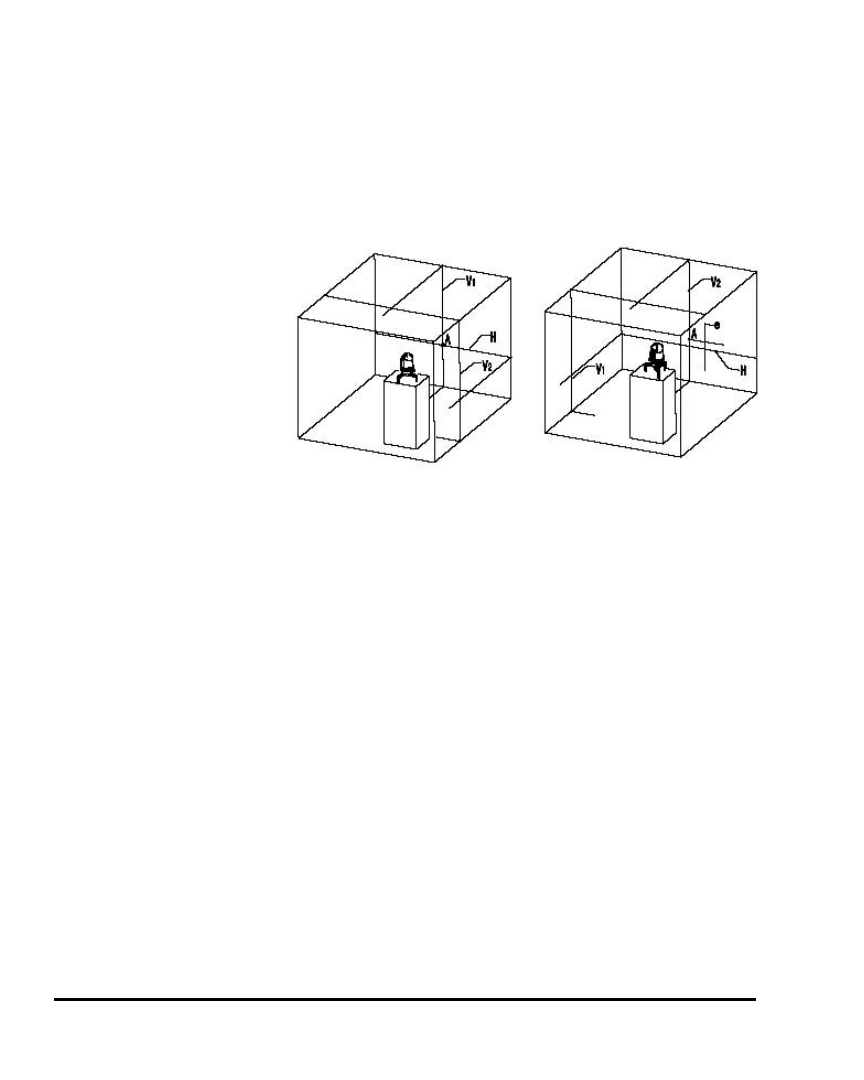
Horizontal Laser Line Accuracy Self-Check
1. Find a wall and set up the instrument at 16 ft. (5m) away from the wall.
2. Unlock the instrument and switch on the laser line H, V1, V2 by
pressing the button H, V1,V2.
3. Rotate the instrument
horizontally to have
V1 face against the
wall, and mark its
intersection with H
as point A (Fig. 11-1).
4. Turn the instrument
to have V2 coincide
with point A.
5. Measure the distance e between H and point A.
6. If e >0.079" (2mm), the horizontal accuracy is beyond tolerance
(Fig. 11-2).
Vertical Laser Line Accuracy Self-Check
1. Find a wall and set up the unit at 16 ft. (5m) away from the wall.
2. Unlock the instrument and switch on the laser line V1 by pressing
the button V1.
3. Rotate the instrument horizontally to have V1 face against the
wall.
4. Hang up a plummet at the position of V1 as standard plumb line,
which is 9 ft. (3m) long and as close to the floor as possible.
5. Turn the fine adjusting knob to have the upside of V1 coincide
with the standard plumb line.
Fig. 11-1
Fig. 11-2
