3 instrument accuracy adjustment – Johnson Level & Tool Mfg. 40-6902 User Manual
Page 8
8
©2009 Johnson Level & Tool
5.3 Instrument accuracy adjustment
If the error is more than 3/16” at 100’, it is
necessary to adjust the instrument.
When adjusting the instrument:
1. Remove rubber cover to expose the two
calibration set screws.
2. Using a 1.5mm Allen wrench, loosen the two calibration set screws.
3. Rotate the eyepiece seat to make the crosshair center in the reticle of
instrument on the same level with a known reference point. Then
rotate the eyepiece tube to make the horizontal hair on the reticle of
instrument level by using a known level reference point.
4. Tighten the two set screws and restore rubber cover to its original
position.
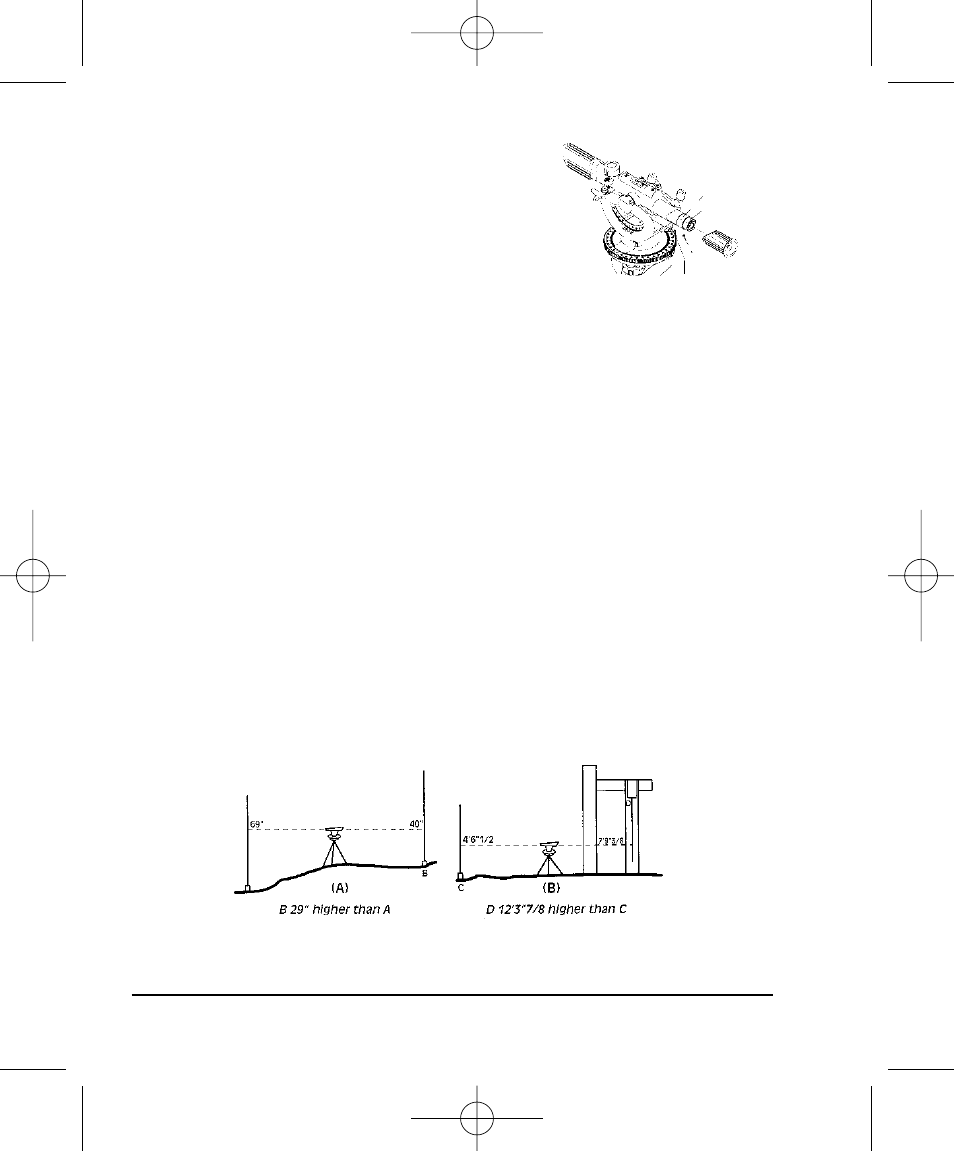
5.4 Determining difference in elevation
Measuring a difference in elevation from one set-up
To find the difference of elevation between two points which can be observed
from one position, set up and level your instrument about midway between these
points. Be sure that a leveling rod held on both opposite points can be read when
your telescope is level. Each point should not be greater than 150 to 200 feet
away from the instrument or you may have difficulty reading the rods. The height
of the line of sight (horizontal crosshair) above or below each of the points is
found by reading the rod.
A line of sight 69 inches above A and 40 inches above B is shown above.
Therefore, B is higher than A by 29 inches.
Eyepiece tube
Eyepiece seat
Set Screws
2594H 7/29/09 10:12 AM Page 8