Elitegroup M50EI v.4 User Manual
Page 10
■ chapter 4 upgrading your computer
4-10
To install the DIMM under the keyboard, do the following:
1.
Power OFF the notebook. Unplug the AC cord and all
cables/devices attached to the notebook. Remove the battery.
2.
Place your hand on a large metal object momentarily to
discharge any static electricity. Place the notebook on a flat
surface and fully close the LCD lid.
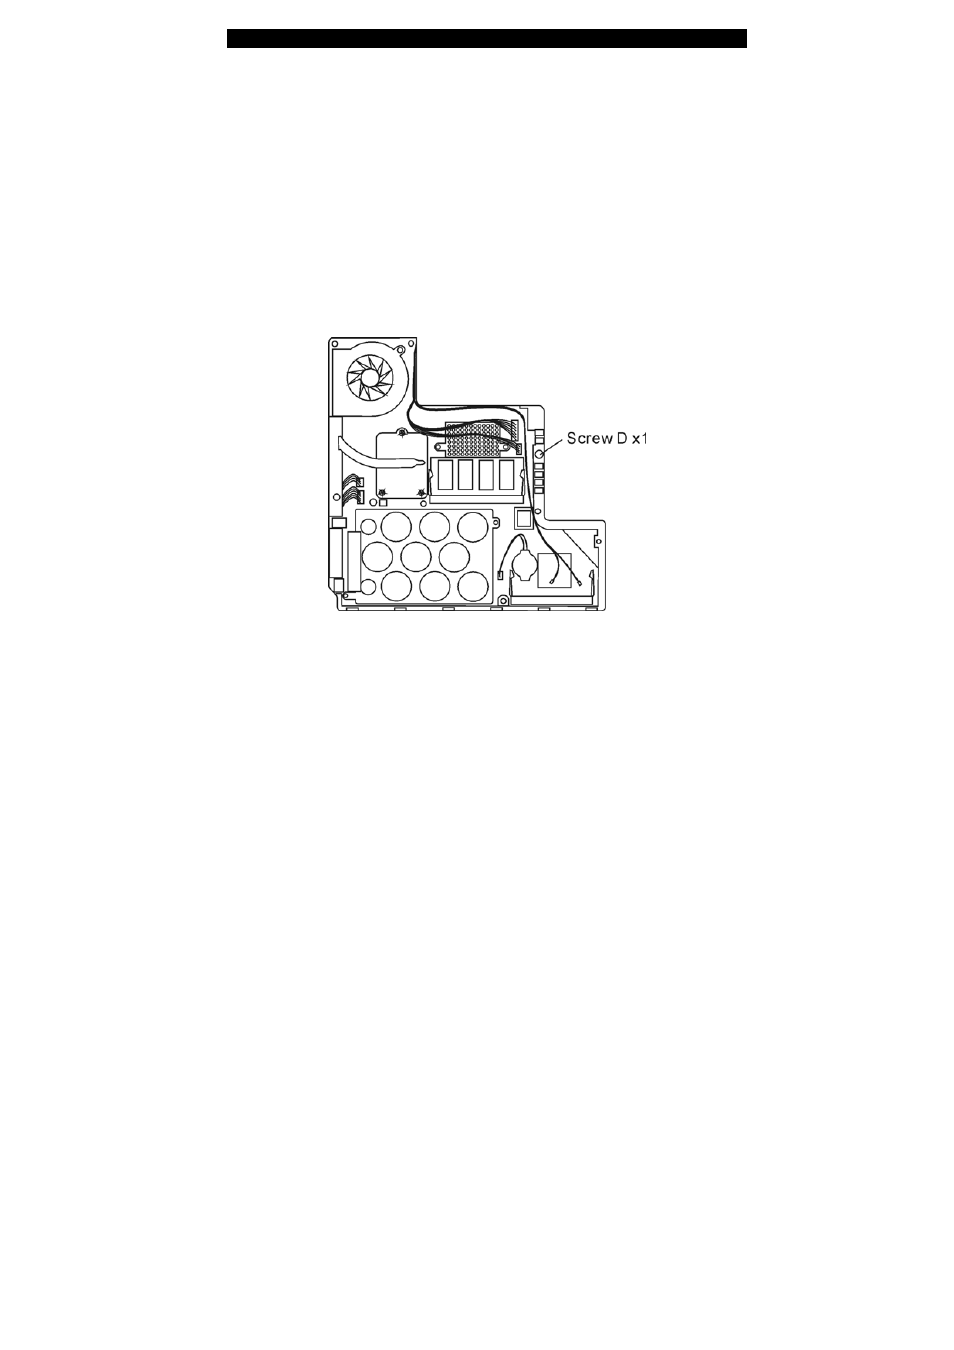
3.
Follow the Step 3 and Step 4 from the previous section
and remove Screw D.
4.
Find the keyboard latches near the upper edge and the
side edges of the keyboard. The latch is spring-loaded. It will
retract when pressed and revert back to its original position
when released. Using a small blade to press the latch inward.
The keyboard tray should pop up slightly over the latch. If the
keyboard tray does not pop up, try to gently lift it up just over
the latch. Repeat the step for the other keyboard latches.
- MB50II / IA ID 1 (72 pages)
- MB40II ID 9 (73 pages)
- MB40II / IA ID 8 (73 pages)
- MB40II ID 7 (71 pages)
- MB40II ID 6 (57 pages)
- MB40II ID 5 (56 pages)
- MB40II ID 4 (53 pages)
- MB40II / IA ID 3 (73 pages)
- MB40II / IA - 41II ID 2 (72 pages)
- MB40II ID 1 (73 pages)
- L41II (69 pages)
- U40-50SA (70 pages)
- U41II (65 pages)
- U10IL (84 pages)
- A900 (V2.1) (85 pages)
- A535 (117 pages)
- A531_TM5800 (110 pages)
- 755SI4 v.1 (22 pages)
- 755SI4 v.2 (17 pages)
- 755SI4 v.3 (6 pages)
- 755SI4 v.4 (7 pages)
- 755SI4 v.5 (8 pages)
- 755IN v.1 (22 pages)
- 755IN v.2 (10 pages)
- 755IN v.3 (14 pages)
- 755IN v.4 (10 pages)
- 755IN v.5 (17 pages)
- 755IN v.6 (6 pages)
- 755IN v.7 (7 pages)
- 755IN v.8 (9 pages)
- 755II1 v.1 (22 pages)
- 755II1 v.2 (10 pages)
- 755II1 v.3 (14 pages)
- 755II1 v.4 (10 pages)
- 755II1 v.5 (17 pages)
- 755II1 v.6 (6 pages)
- 755II1 v.7 (7 pages)
- 755II1 v.8 (9 pages)
- 557 (81 pages)
- 536 (71 pages)
- 532 (83 pages)
- 332 (73 pages)
- 331 (75 pages)
- 330 (73 pages)
- 331 (77 pages)