Readylift – ReadyLIFT Honda Pilot, 2009-2011, 2WD & 4WD, 2.0F/1.0"R" User Manual
Page 6
ReadyLift
®
(Part# 69-8010)
Honda Pilot FWD/4WD Installation Instructions
Revised
7-26-10
ReadyLift Suspension, Inc.
3201 W. MacArthur Blvd, Santa Ana, CA, 92704
Tol l Fre e (8 8 8 )9 2 2 - 2 2 9 4 F ax 7 1 4 - 86 2 - 2 9 72
Please read instructions thoroughly and completely before beginning installation.
Check www.Readylift.com for any installation instruction updates
Installation by a trained mechanic is recommended.
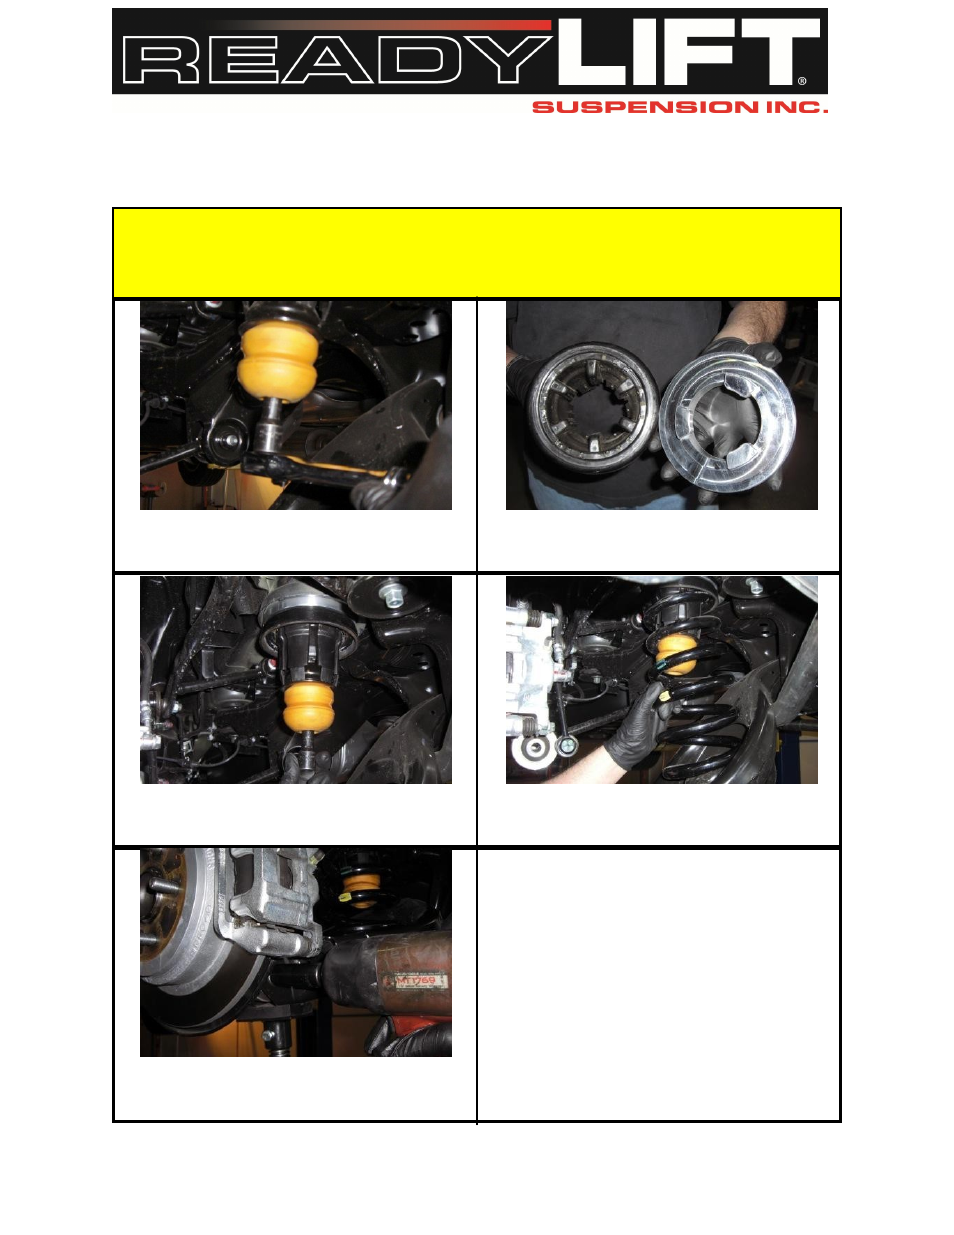
23.
24.
Use a 14mm socket and extension to remove the rear
bump stop bracket. Remove the plastic coil isolator.
The Readylift rear coil spacer will mount in the grooves
of the on top plastic coil isolator.
25.
26.
Reinstall the bump stop bracket and coil isolator with the
Readylift coil spacer on top.
27.
Reinstall the shock.
Repeat steps 15-28 on opposite side. Once oppo-
site side is completed reconnect the lower sway bar
end links, tighten to 50 lb-ft. Install the rear wheels,
lower vehicle to the ground. Tighten the EZ Arm
bolt at the body to 117 lb-ft on both sides. Be sure
to double check that all hardware is tightened to
factory specifications. Alignment is required on both
front and rear. Use factory specifications.
Push down on the lower control arm and install the coil.
Make sure that the coil is properly seated in the lower
control arm.
Use a jack to raise the lower control arm, align the
mounting holes and install the OEM bolt. Tighten to 117
lb-ft.
28.