Readylift – ReadyLIFT Honda Pilot, 2009-2011, 2WD & 4WD, 2.0F/1.0"R" User Manual
Page 4
ReadyLift
®
(Part# 69-8010)
Honda Pilot FWD/4WD Installation Instructions
Revised
7-26-10
ReadyLift Suspension, Inc.
3201 W. MacArthur Blvd, Santa Ana, CA, 92704
Tol l Fre e (8 8 8 )9 2 2 - 2 2 9 4 F ax 7 1 4 - 86 2 - 2 9 72
Please read instructions thoroughly and completely before beginning installation.
Check www.Readylift.com for any installation instruction updates
Installation by a trained mechanic is recommended.
Repeat Steps 1-13 on opposite side. Be sure to
double check that all fasteners are to factory torque
specifications. Reinstall the front wheels and
tighten lug nuts to factory specifications.
If vehicle is on a two post lift continue to the next
step.
If vehicle is on jack stands, lower the vehicle to the
ground. Chock the front wheels to prevent a rollout,
lift the rear of the vehicle by the frame and
support with jack stands. Please consult your own-
ers manual for the proper locations to support your
vehicle.
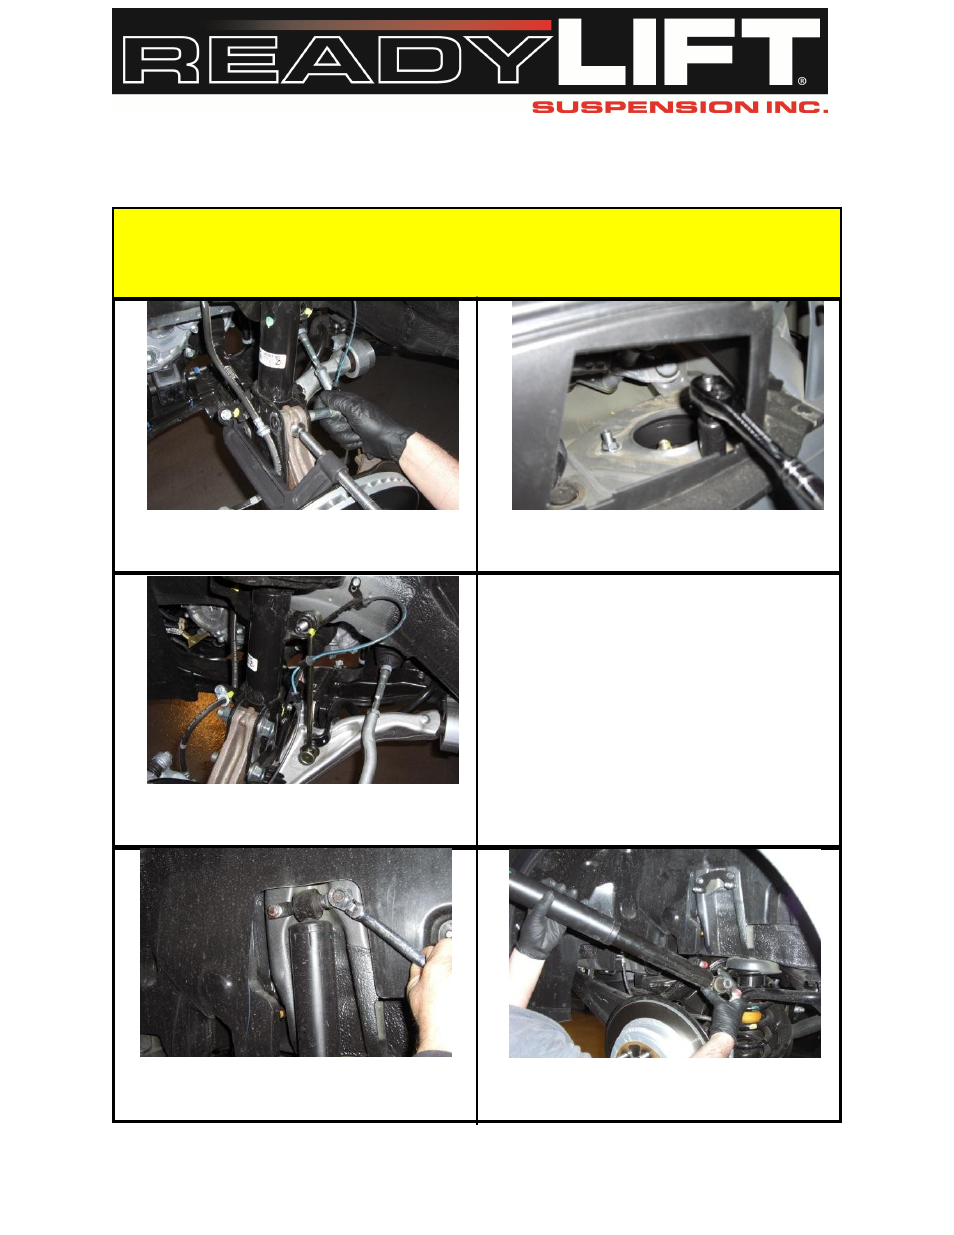
11.
12.
Insert the knuckle into the lower strut mount. A C-Clamp
may be needed to align the mounting holes. Insert the
OEM hardware and tighten to 200 lb-ft.
Tighten the three upper strut mounting nuts (14mm) 30
lb-ft.
13.
14.
Install the supplied sway bar end link. Tighten to 85 lb-
ft. Reinstall the brake line support bracket and ABS line
support bracket using the OEM hardware.
15.
16.
Remove the rear wheels. Unbolt the upper shock
mounting nut and bolt using a 14mm wrench or socket.
Unbolt the lower sway bar end link. Remove the lower
shock mounting bolt and remove the shock.