Pfister 8N8-CT0C User Manual
Page 6
CAUTION: Maintenance
DISASSEMBLY
1. Replacement parts may be available at the store where
you purchased your faucet.
2. When replacement parts are not available, please write or
call Price Pfister Consumer Service.
3. Always turn off water and relieve pressure before
working on your faucet.
NOTE: Trim Care
Cleaning Instructions:
For all Handles and decorative finishes, use only a soft damp
cloth to clean and shine. Use of polish, detergents, abrasive
cleaners, organic solvents or acid may cause damage. Use
of other than a soft damp cloth will nullify our warranty!
Special Trim:
Trim products which contain Porcelain or other similar
substance are not acceptable for public areas or Commercial
use. Installation of Said Trim is at Users Risk!
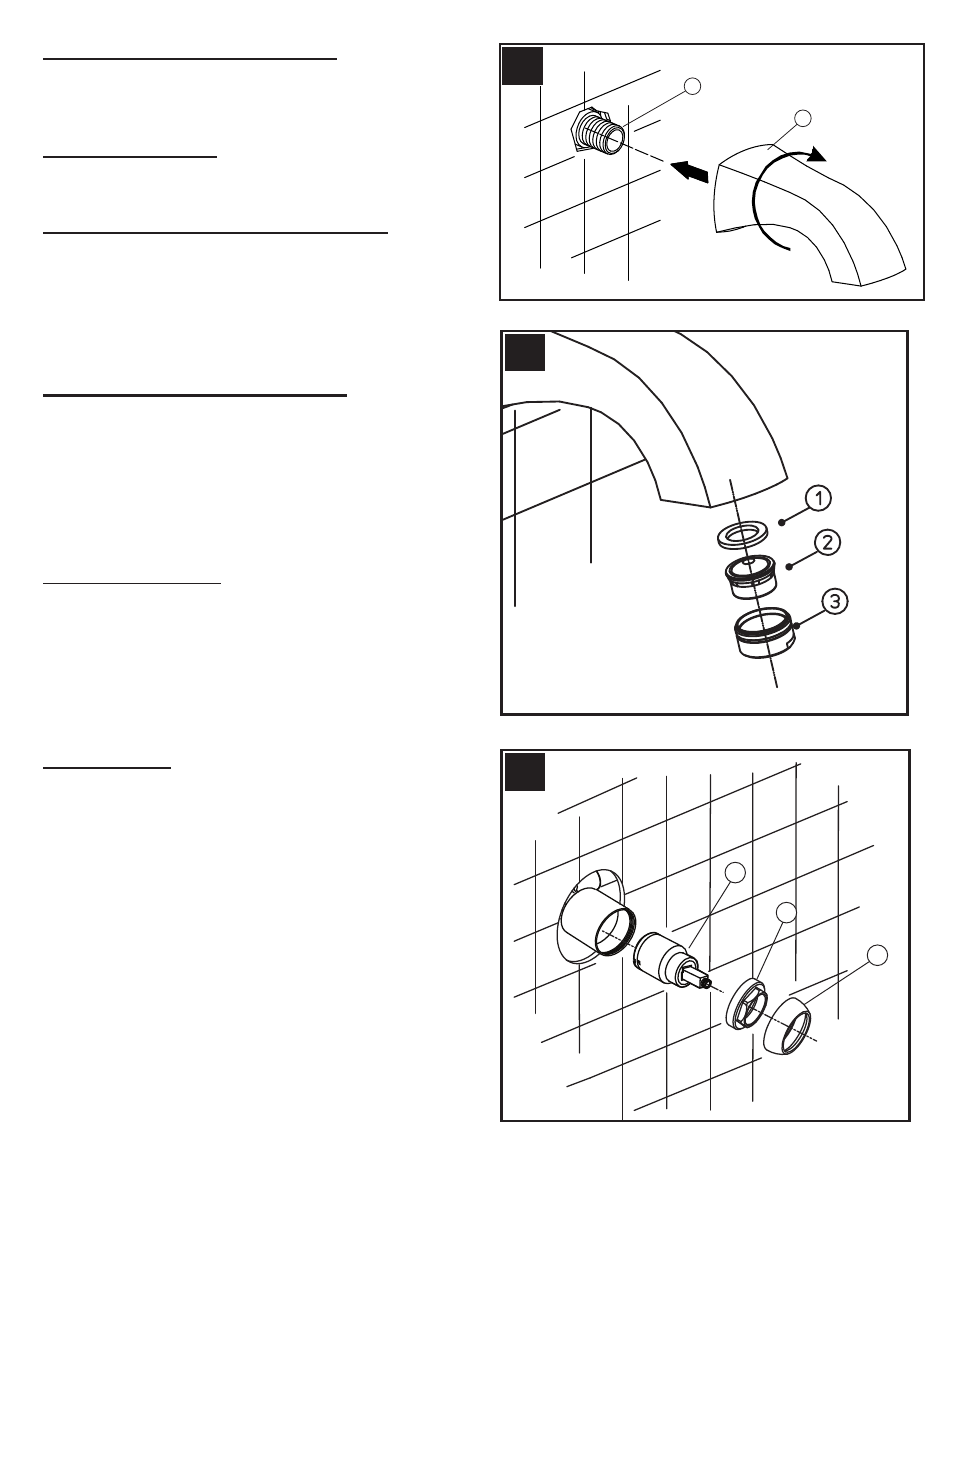
9 SPOUT INSTALLATION (Fig.F)
For tub only products: Screw Spout (1) to Pipe Nipple (2)
and tighten until Spout (1) is properly positioned to the fin-
ished wall.
10 UNIT START UP
Turn on hot and cold water supplies, and check all connec-
tions for leaks.
11 CLEANING THE AERATOR (Fig.G)
It is advisable to periodically clean the aerator, in order to
avoid build-up of dirt and limestone, which in time could
gradually limit the water flow. To clean the Aerator, disas-
semble Aerator Housing by separating the Aerator Head
(3), Basket (2) and Washer (1). Once parts have been
cleaned, reassemble by reversing steps.
12 CARTRIDGE REMOVAL(Fig.H)
Turn off water supplies and relieve pressure before
working on your faucet! Remove handle (see step 6). Re-
move the Dome Cap (1) and Nut (2) by unscrewing coun-
terclockwise. Carefully remove the Cartridge (3) by pulling it
straight up and out. Reassemble valve by reversing steps.
1
2
F
G
1
3
2
H
6