Trouble shooting tips – Pfister R89-020K User Manual
Page 7
13
14
TROUBLE SHOOTING TIPS
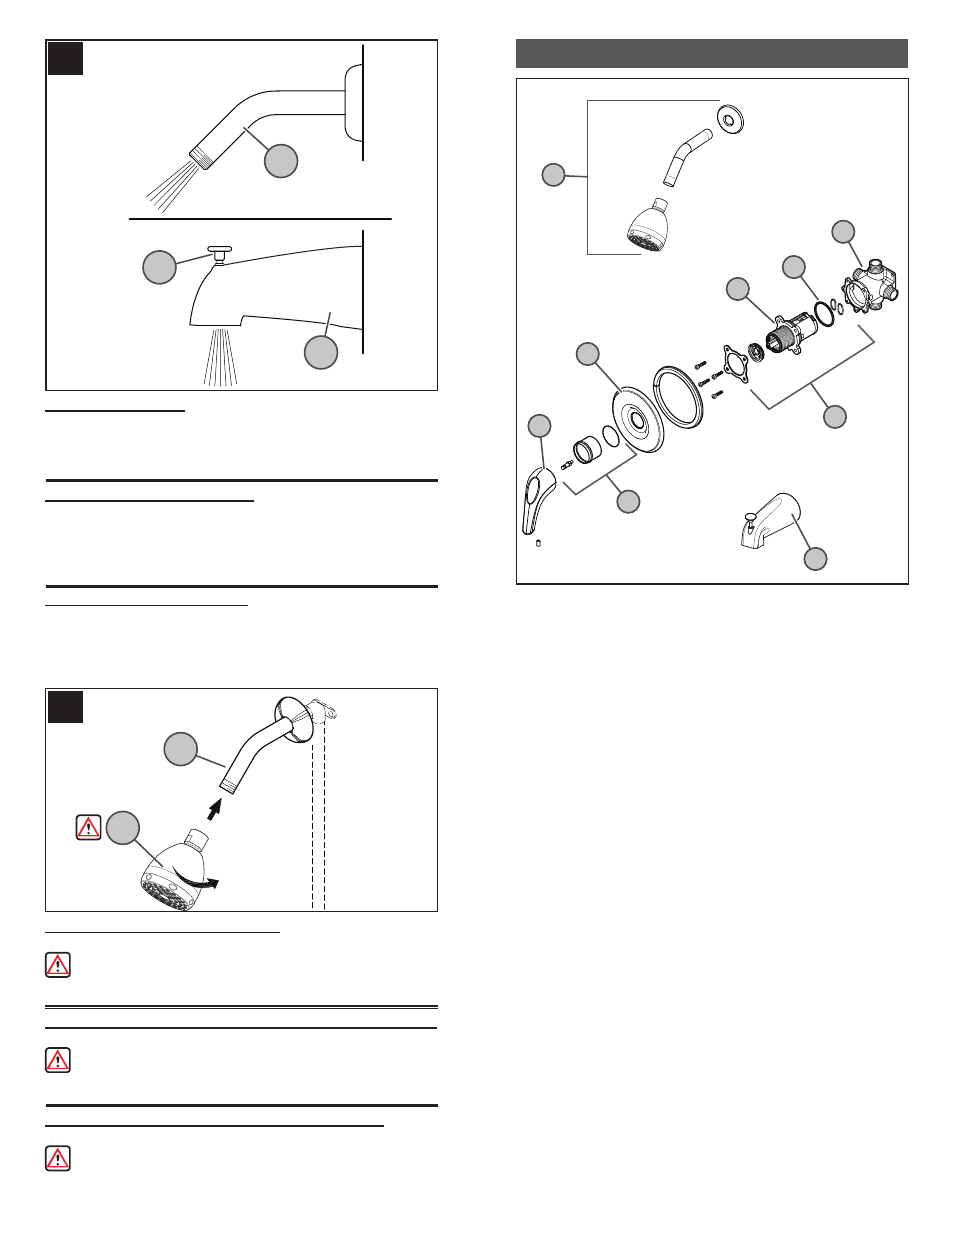
13 FINAL FLUSHING
For final flushing, turn valve on and allow water to run through the Tub Spout
(13A) for several minutes. Pull Spout Knob (13B) up to allow water to run through
Shower Arm (13C). Allow water to run for several minutes untill all foreign mater
clears the line.
14 SHOWER HEAD INSTALLATION
Thread Shower Head (14A) onto Shower Arm (14B).
Make sure Shower Head (14A) is securely tightened to Shower Arm
(14B).
Sleeve (B) is too short.
Extension kit 89-553 is available at a nominal charge for valves which have been
roughed-in too far back in the wall. The kit contains a one inch stem extension,
and longer screw and a sleeve which is one inch longer than the 862-300.
Dripping from either the tub spout or shower head.
Clean the Cartridge Assembly (D). Check to ensure the two Oval O-Rings (F)
on the back of the Cartridge (E) are in place. Reassemble cartridge, stem and
bonnet assembly and handle. Turn on the water and test. If the unit still leaks,
replace the Cartridge (E).
Make sure that both hot and cold water inlets are turned on.
Water flow is very low.
Check the Cartridge Assembly (D), for debris. Sediment where the water enters
the Shower Head (G) can also cause this symptom.
Water starts out hot and becomes cooler as handle is rotated counter
clockwise.
This is a potentially hazardous situation and should be corrected before using
the unit. Check the hot and cold inlet positions (hot- left cold-right). If you have
a back to back installation, (where hot and cold inlets are reversed) refer to
Valve Body instruction sheets for back to back installation.
Water flows from the shower head while filling the tub.
Check the position of the Valve Body (J). The letters “SHWR” should be cast
into the top and “TUB” on the bottom.
Water doesn’t get hot enough.
Remove Handle (A), Sleeve (B) and Flange (C) and then refer to Valve Body
instruction sheets for adjusting temperature range.
Water flows from the tub spout while using the shower.
The seal inside of the diverter mechanism may have become dislodged. The
Spout (H) may need replacement.
13 Francais : RINÇAGE FINAL
Pour effectuer un rinçage final, ouvrir le mitigeur et laisser l’eau s'écouler du
bec de baignoire (13A) pendant quelques minutes. Tirer sur le bouton (13B) du
bec pour permettre à l'eau de circuler dans le bras de douche (13C) pendant
quelques minutes jusqu’à ce que tous les corps étrangers aient été évacués
de la tuyauterie.
14 Francais : MISE EN PLACE DE LA DOUCHETTE
Visser la douchette (14A) sur le bras de douche (14B).
Assurez-vous que la douchette (14A) est solidement serrée au bras de
douche (14B).
13 Español: ENJUAGUE FINAL
Para el enjuague final, active la válvula y deje que el agua corra a través
del conducto de la tina (13A) durante varios minutos. Tire hacia arriba de la
perilla del conducto (13B) para permitir que el agua corra por el brazo de la
ducha (13C). Deje que el agua corra durante varios minutos hasta que salga
cualquier substancia de la línea.
14 Español: CÓMO INSTALAR EL CABEZAL DE LA DUCHA
Enrosque el cabezal de la ducha (14A) en el brazo de la ducha (14B).
Asegure de que la cabeza de la ducha (14A) esté apretada con seguridad
en el brazo de la ducha (14B).
7
13C
13A
13B
14A
14B
G
A
C
E
F
J
D
B
H