ODL Add-on/DIY Blinds —flush frame door glass User Manual
Page 4
ENCLOSED TREATMENT INSTALLATION INSTRUCTIONS
4
5
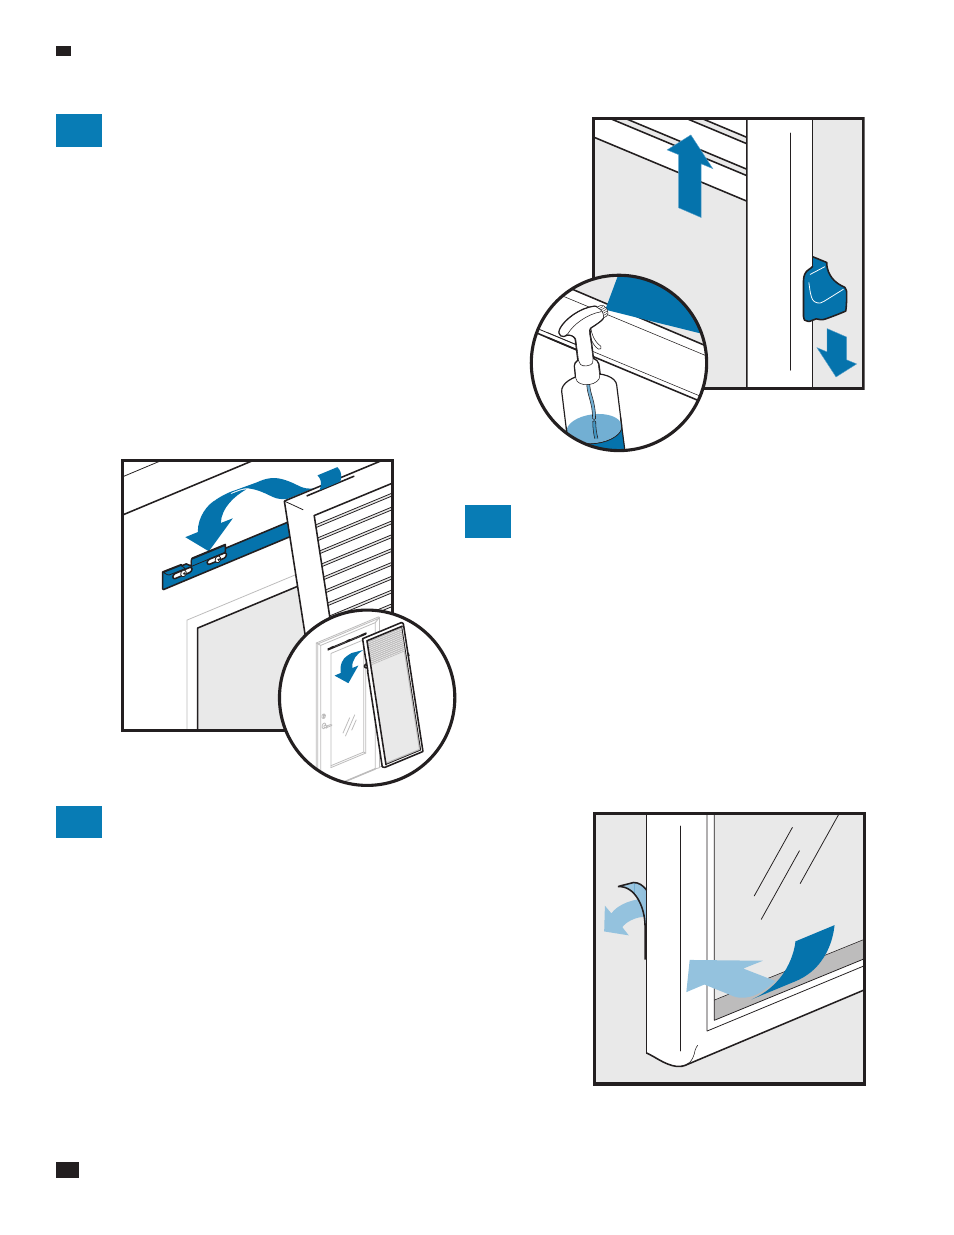
CLEAN GLASS
Stand unit upright. Fully raise the blind/shade. Clean the inside of
the treatment assembly and the window on the door.
6
HANG UNIT
Carefully lift and securely hang the top of the treatment
assembly over the top bracket. Angle the lower unit
towards you while you slide it on (if you are sliding unit
under a lever handle you will first have to slip the
treatment under lever before you hang it). Verify that the
three hooks in the bracket are in the slots at the top,
inside edge of the frame. Move side to side to verify the
unit is square and secure.
7
SECURE LOWER CORNERS TO DOOR
Your unit has two sections of Lock-Tight located in the lower left
and right corners. This material is very aggressive and when
installed according to these instructions, will hold the unit securely
to your door.
First clean your door in the locations where the Lock-Tight will be
installed. Use the supplied cleaning wipes to properly remove
grease and dirt from the door surface.
Once your door is clean and dry, peel the backing off of both
sections of Lock-Tight and press the frame firmly against your door
for 1 minute. Do not attempt to remove the unit for at least 20
minutes following initial installation. After 20 minutes the Lock-Tight
adhesive will be 90% secure. After 24 hours, it will be 100% secure.
To remove unit refer to the “Maintain” section of this instruction manual.