Plunger pumps, Sj & xj series pumps, North america – Vortexx SJ & XJ Series User Manual
Page 8: Service pumps (continued)
Operating Instructions and Parts Manual
SJ & XJ Series Pumps
Plunger Pumps
First Choice When Quality Matters
NORTH
AMERICA
Figure 10
Figure 11
Figure 12
Figure 13
Figure 15
Figure 14
Figure 16
Figure 17
Figure 18
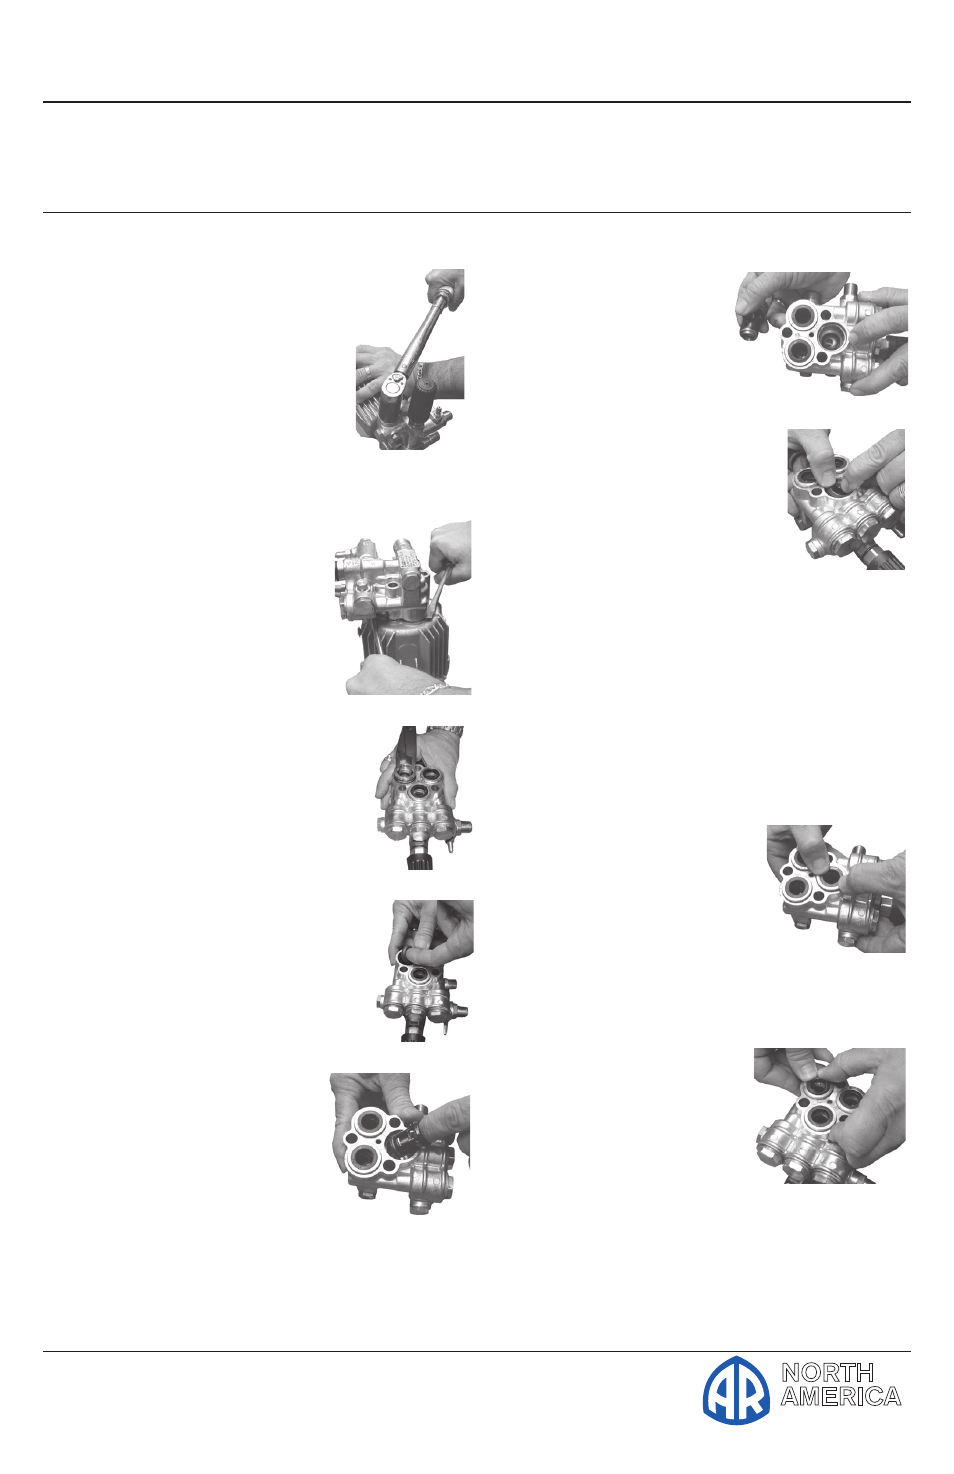
Service Pumps (Continued)
3. Install the valve cap and
torque to the proper
specifications. (See
figure 10).
Inlet Valves:
Disassembly:
1. Remove the manifold.
2. Remove low
pressure seals, insert
screwdriver under seal
lip and lift up. (See
figure 11)
3. Using a reversible
pliers, carefully remove
the packing retainers
(plunger guides). (See
figure 12)
NOTE: You do not want to
damage these so they can
be reused if not worn.
4. Remove the high-pressure
packing by pulling straight
out with your finger. (See
figure 13)
5. Pull out the valve cage/
head ring assembly, valve
poppet, spring and
O-ring. (See figure
14)
6. Inspect for any debris
or damage.
7. Remove the valve O-ring.
Assembly:
1. Install the valve
seat O-ring
squarely into the
bottom of the
manifold. (See figure
15)
2. Insert the valve assembly
and push squarely into
the O-ring. (See figure
16)
3. Install the high-pressure
packing by placing it into
the cylinder at an angle and then
pushing into place.
NOTE: The point of the “V” or flat
side of the packing is pointed at
you.
4. Lubricate the packing retainer
O-ring with a light film of oil
and install it into
the
cylinder.
5. Push it completely into
place.(See figure 17)
NOTE: The O-ring
will seat just inside the
manifold and you will hear
a slight pop.
6. Insert the low
pressure seal by
placing it into the
cylinder in at an
angle and pushing
it into place. (See
figure 18)