Switching from wall installation to desktop – AT&T TRIMLINE TR1909 User Manual
Page 15
10
11
Getting started
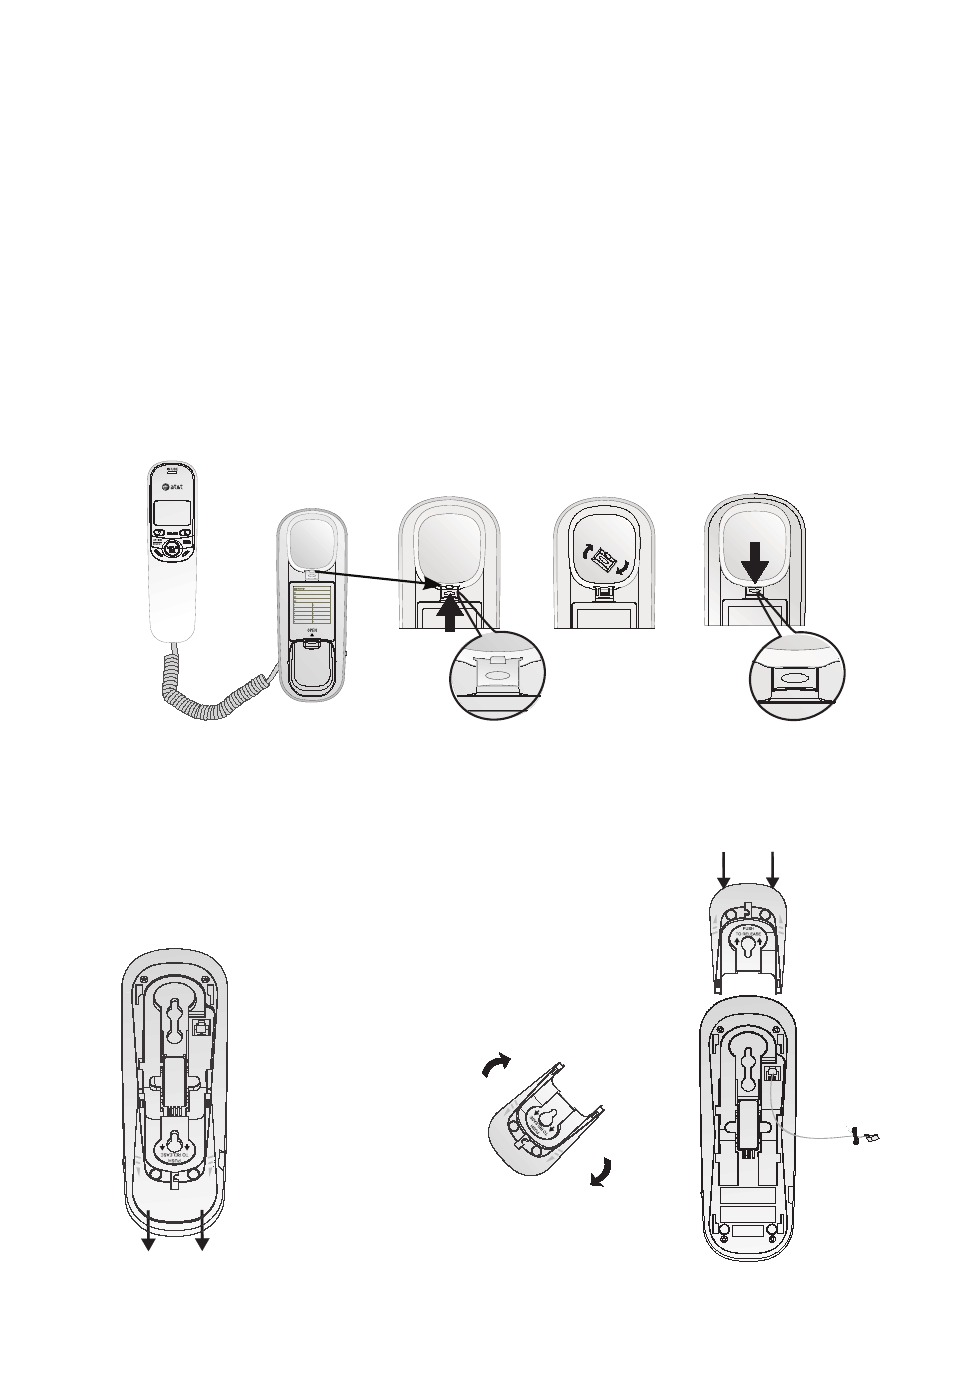
Switching from wall installation to desktop
To return the bracket from wall mount position to desktop use,
follow the instructions below:
Remove the telephone base from the mounting plate. Unplug
the telephone line cord from the telephone wall jack and
remove the cord from the slots under the telephone base.
Lift the handset and place it aside. On the telephone base, pull
out the handset tab and rotate it 180 degrees. Replace the
handset tab back to the grooves until it clicks into position.
1.
2.
Remove the bracket
from the base. Hold the
telephone base firmly
and then slide the
bracket downwards as
the arrows indicate.
3.
Rotate the bracket to the desktop
installation position. Push the
bracket down as shown below until
it clicks into place.
4.
Follow steps 2-4 in
Telephone installation on page 8 to install
your telephone for desktop use.
5.
- CL2909 (49 pages)
- 8434 (54 pages)
- 8434 (38 pages)
- TL74358 (41 pages)
- Definity 7410 (31 pages)
- 8503T (33 pages)
- NORTEL BCM50 (37 pages)
- EL52309 (8 pages)
- 100 (6 pages)
- 135 (8 pages)
- ML17959 (82 pages)
- System 75 (10 pages)
- CL82409 (9 pages)
- 2300 (13 pages)
- CL82601 (2 pages)
- CL82351 (2 pages)
- CL82351 (2 pages)
- TL74258 (97 pages)
- 820 (6 pages)
- 1856 (7 pages)
- 1187 (48 pages)
- 972 (29 pages)
- TR1909 (12 pages)
- TRIMLINE 210M (2 pages)
- SB67158 (2 pages)
- E2115 (27 pages)
- Generic 2 (44 pages)
- SBC-420 (26 pages)
- Partner Plus (26 pages)
- 1080 (18 pages)
- 1040 (74 pages)
- RIM BlackBerry Bold MDC 9000 (35 pages)
- System 25 (85 pages)
- System 25 (35 pages)
- System 25 (438 pages)
- System 25 (75 pages)
- DECT CL84209 (12 pages)
- DEFINITY 8101 (4 pages)
- 902 (6 pages)
- TL74108 (8 pages)
- 7406BIS (72 pages)
- CL4939 (77 pages)
- PARTNER MLS-12 (5 pages)
- 952 (8 pages)