LEDGlow Million Color LED Wheel Well Kit User Manual
Page 2
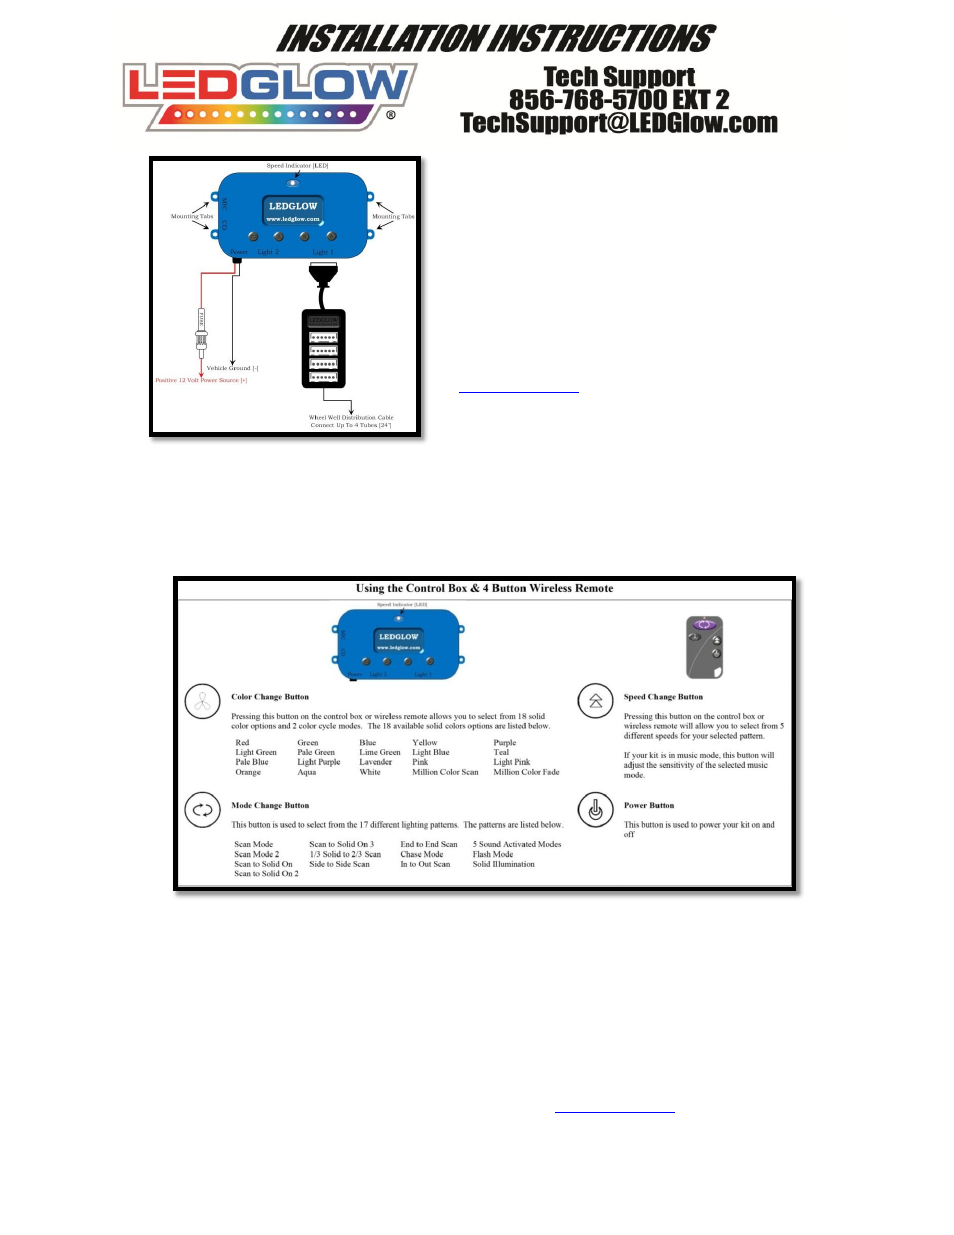
8.
Connect the red power wire to a positive (+) 12 volt source.
If you need to extend the red and black wires, be sure to use 16 or 18
gauge automotive grade wiring. If you are running the wires to your
vehicle’s battery, it must go through the firewall by using an existing
grommet or by drilling a hole and adding a new grommet which is
available at any auto parts store. Be sure to install the fuse within 6
inches of the battery. If you connect the power wires to a switched
source, the control box will not remember the color and/or pattern the
kit was last on. If you connect the power wires to a constant source,
the control box will remember the color and/or pattern the kit was last
on. Also when connected to a constant source, you will need to
physically turn the kit off as it will not power down with your vehicle.
If you want to tap power from your vehicle’s fuse box, we
recommend using LEDGlow’s Expandable Circuit, which is available
a
9.
Connect the black wire to a good, unpainted metal surface
under the dash at any main bracket or grounding block. If you are
connecting the wires to your vehicle’s battery, connect the black wire
to the negative (-) terminal of the battery or any engine ground.
10. Next, mount the junction cable on the firewall away from heat and in a dry location. The junction cable was not
designed to withstand the elements. Corrosion to the junction cable will void all warranties and may cause the control
box to fail.
11. Starting with the rear wheel well tubes, run the wires to the location of the junction cable. Make sure to secure the wires
to any suspension parts by using the included zip ties. Leave at least 10 inches between the exhaust and the wires.
12. Lower the vehicle if it was raised and test your new kit.
Adding or Replacing your Wireless Remote:
1.
Your kit is already pre-programmed for the included wireless remote. This setup is only needed when replacing an
existing remote or by adding additional wireless remotes to your system. You can program up to 3 wireless remotes to
one control box.
2.
In order to program the remote to the control box, you must turn the kit off.
a)
First Remote - Press and hold the mode button on the wireless remote and the mode button on the control box
for 5-7 seconds. Test the operation with the remote.
b) Second Remote - Press and hold the mode button on the wireless remote and the mode button on the control
box for 5-7 seconds. Test the operation with the remote.
c)
Third Remote - Press and hold the mode button on the wireless remote and the mode button on the control
box for 5-7 seconds. Test the operation with the remote.
For accessories, replacement parts and/or technical support, please v
for more information.