Cleaning, Wiring diagram, Installation – Reversomatic SA-90S_SA-90SM User Manual
Page 4: Cont.) c) sa-90sl
- Disconnect power supply
- Remove fan grille
- Clean grille with warm water and mild detergent (liquid soap). Do not use harsh detergent or
boiling water
- Dry grille with a cloth or towel
- Clean fan blades carefully
- Never allow water to enter into the motor
- Replace fan grille in place
CLEANING
B) Existing Construction
Before cutting a new hole in the existing ceiling:
- Choose best location (next to ceiling joist)
- Make sure the duct work can be installed and has easy access to exterior air outlet
- Wiring can be run to the planned area
- Make sure no existing wiring or other obstruction will interfere with installation
- Follow Installation A
NOTE:
In case of replacing an old unit, check existing duct work and electrical wiring and follow
installation A.
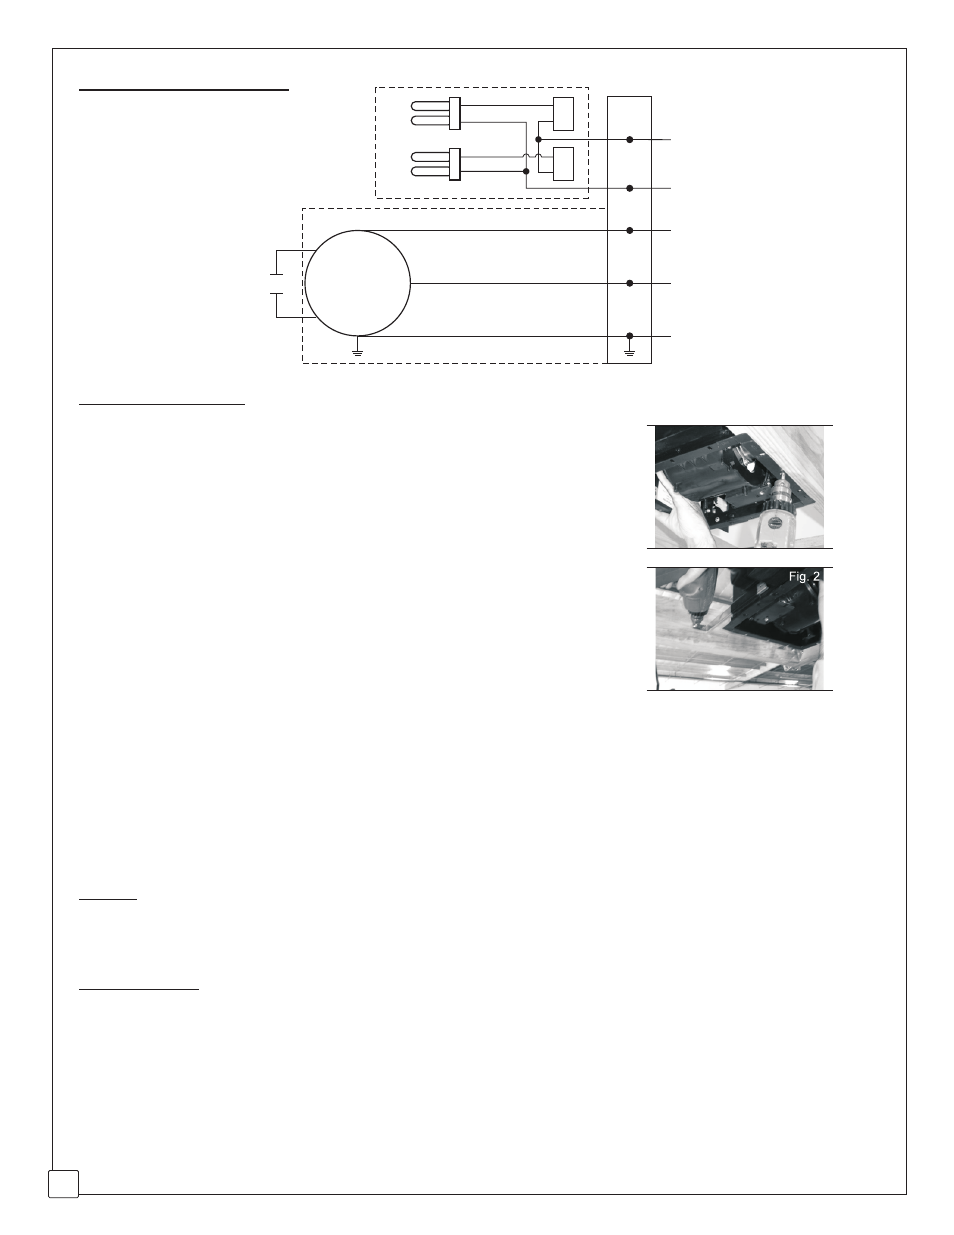
WIRING DIAGRAM:
(cont.)
C) SA-90SL
FAN
MOTOR
CAPACITOR
TO SWITCH
LIGHT UNIT
TO SWITCH
TO NEUTRAL
TO NEUTRAL
TO GROUND
JUNCTION
BOX
BLACK
WHITE
GREEN
FAN HOUSING
Ballast
1
Ballast
2
BLACK
BLACK
WHITE
WHITE
A) Wooden Joist Installation
- Install fan housing between ceiling joists using sufficient length of
screws as shown in Fig. 1 with the fan O/L facing the desired
exhaust duct direction.
- Install fan mounting brackets as shown in Fig. 2 to the fan sides
that are not connected to the joists.
- If the brackets are too short to reach the joist, use bracket
extensions
- Connect the circular duct to the backdraft damper. Secure with
duct tape and make sure there is no air leakage.
- Do not use power supply wires smaller than 14 AWG.
- Always use the metal duct and try to avoid flexible duct
INSTALLATION
Fig. 1
4
visit: www.reversomatic.com
j.tantay 10.07.09