4 configuring inbound acl rules – Asus RX3141 User Manual
Page 65
RX3141 User’s Manual
Chapter 9. Configuring Firewall/NAT Settings
55
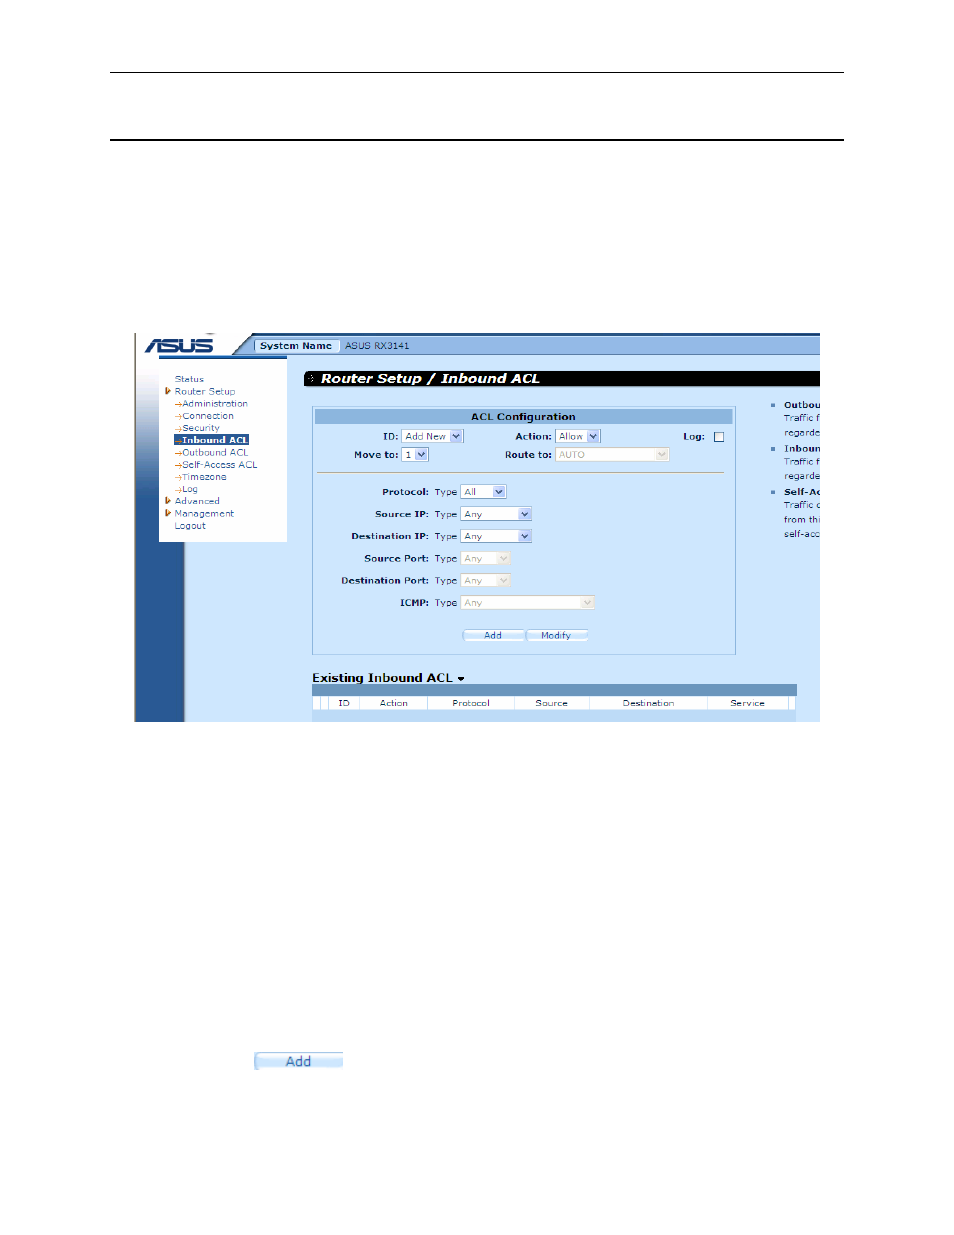
9.4 Configuring Inbound ACL Rules
By creating ACL rules in Inbound ACL configuration page as shown in Figure 9.2, you can control (allow or
deny) incoming access to computers on your LAN.
Options in this configuration page allow you to:
f Add a rule, and set parameters for it
f Modify an existing rule
f Delete
an
existing rule
f View configured inbound ACL rules
Figure 9.2. Inbound ACL Configuration Page
9.4.1
Add Inbound ACL Rules
To add an inbound ACL rule, follow the instructions below:
1. Open the Inbound ACL Rule configuration page, as shown in Figure 9.2, by double clicking the
Router Setup
Î Inbound ACL menu.
2. Select
“Add New” from the “ID” drop-down list.
3. Set desired action (Allow or Deny) from the “Action” drop-down list.
4. Make changes to any or all of the following fields: source/destination IP, source/destination port,
protocol, ICMP message type and log. Please see Table 9.3 for explanation of these fields.
5. Assign a priority for this rule by selecting a number from the “Move to” drop-down list. Note that
the number indicates the priority of the rule with 1 being the highest. Higher priority rules will be
examined prior to the lower priority rules by the firewall.
6. Click on the
button to create the new ACL rule. The new ACL rule will then be
displayed in the inbound access control list table at the bottom half of the Inbound ACL
Configuration page.