Bosch TES50651DE VeroCafe LattePro Kaffeevollautomat Helles Anthrazit Morning Haze User Manual
Page 38
34
Robert Bosch Hausgeräte GmbH
en
K
Do not put the following items in
the dishwasher: drip tray panel (8a),
drawer (4), brewing unit (5a).
J
The following items are dishwasher-
safe: drip tray for coffee outlet (8c),
coffee grounds container (8b), grate for
coffee outlet (8d), aroma cover (2) and
measuring spoon (19).
● Wipe out the inside of the appliance (tray
holders and drawer).
Important: Drip tray for coffee outlet (8c)
and coffee grounds container (8b) should
be emptied and cleaned daily to prevent
mould from developing.
N.B.: If the appliance is cold when switched
on with the power switch
O / I (9) or if it
switches off automatically after coffee has
been dispensed, it rinses automatically. In
other words the system cleans itself.
Important: If the appliance has not been
used for a prolonged period of time (e.g.
after a vacation), clean the entire appliance
thoroughly, including the milk system and
brewing unit.
Cleaning the milk system
If the milk system was not cleaned after
milk has been dispensed, after a certain
amount of time the message
Clean milk
system!
will appear on the display.
Clean the milk system immediately after
use! To clean, leave the rotary selector (6b)
in the same position it was in when last
used.
To pre-clean the milk system automatically:
1. Select
f
by turning the rotary knob (15).
2. Place a tall, empty container under the
outlet (6a).
3. Push the outlet as close as possible to
the container.
4. Place the end of the milk tube (6c) into
the container.
5. Press the
start button (10).
The machine automatically releases water
into the container and vacuums it up again
via the milk tube to rinse the milk system.
The rinse procedure stops automatically
after about 1 minute.
6. Empty the container and clean the milk
tube (6c).
In addition to this, clean the milk system
thoroughly at regular intervals (by hand or
in the dishwasher).
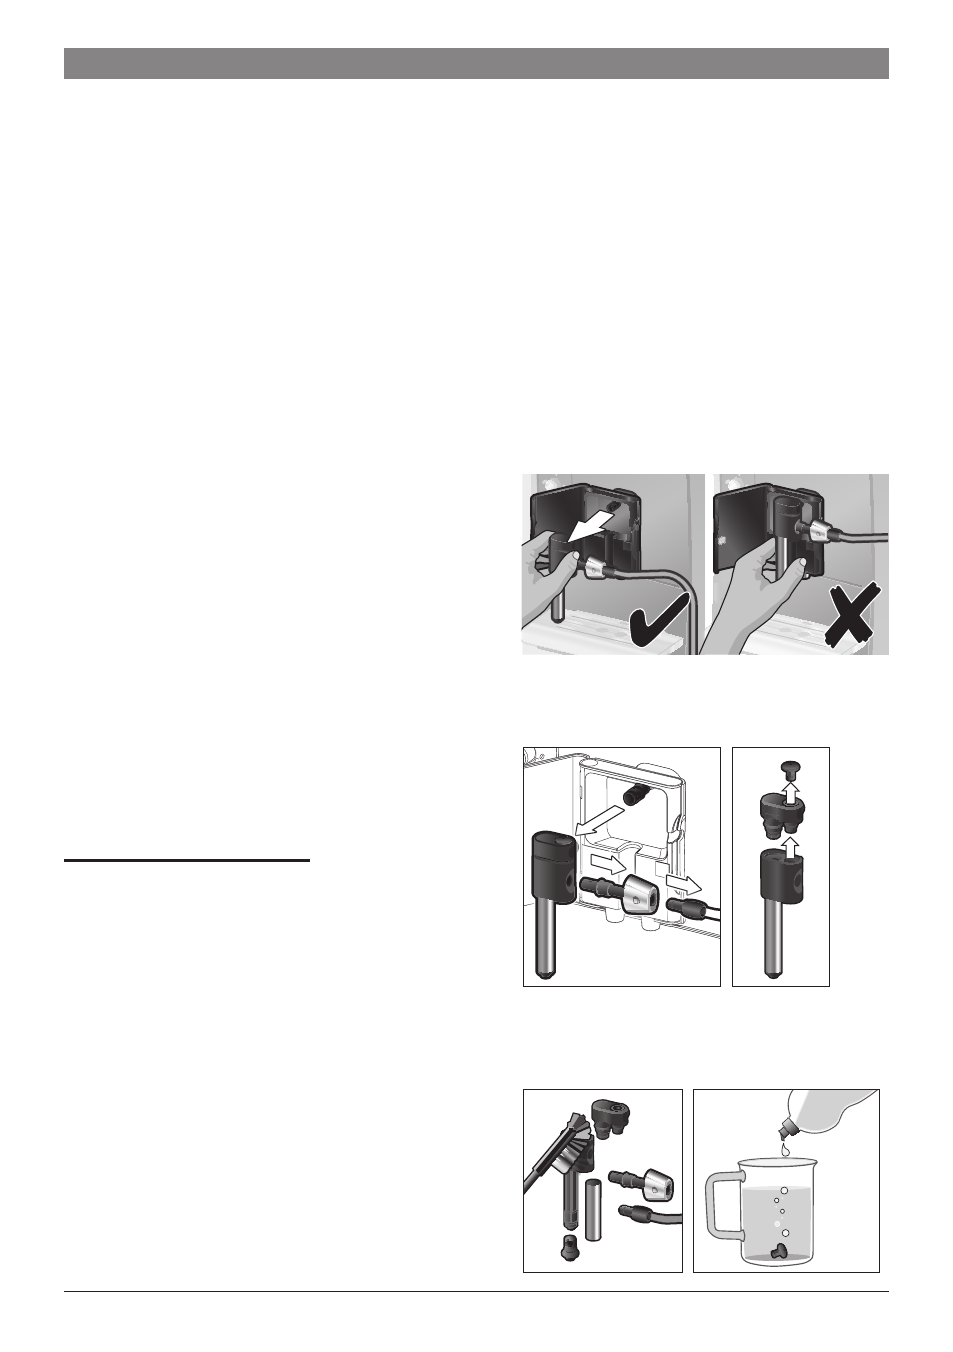
Dismantling the milk system for cleaning:
1. Pull the milk frother (6) forward out of
the appliance.
2. Dismantle the milk frother into its indi-
vidual parts (6a) to (6d) (see
figure C at
the start of the operating instructions).
3. Clean the individual parts with a deter-
gent solution and a soft brush. If neces-
sary, soak in a warm detergent solution.