Control company – Control Company 1087 ATOMIC CLOCK User Manual
Page 2
for poor reception are heavily reinforced concrete and steel structures and/or
placement of either unit close to video or PC monitors.
Important: The temperature display on the remote module is updated every 15
seconds, the remote temperature display on the main unit is updated every 3
minutes. The difference in update rates may account for discrepancies between the
reading shown on the main unit and that on the remote module. This is normal,
especially when the temperature at the remote module is fluctuating.
Remote Module Signal Indicators
Flashing, indicates the unit is attempting to receive the signal from the remote
module.
Not flashing, indicates successful signal reception from the remote module.
Indicates a signal has not been successfully received from the remote module.
SELECTING THE TIME ZONE
Slide the time zone switch, located on the back of the main unit, to the correct position
for the desired time zone:
PST = Pacific Standard Time
(“PST” will appear to the left of the time-of-day display.)
MST = Mountain Standard Time
(“MST” will appear to the left of the time-of-day display.)
CST = Central Standard Time
(“CST” will appear to the left of the time-of-day display.)
EST = Eastern Standard Time
(“EST” will appear to the left of the time-of-day display.)
DAYLIGHT SAVING TIME (DST)
Slide the DST switch, located on the back of the main unit, to the desired position.
To observe Daylight Savings Time, set the switch to ON. To disregard Daylight
Savings Time, set the switch to OFF.
SELECTING 12 OR 24 HOUR TIME DISPLAY
Each press of the 12/24HR button, located on the back of the main unit, will toggle the
time-of-day display between 12 hour (AM/PM) and 24 hour (military) time. The display
will indicate AM and PM when in 12 hour time-of-day display mode.
MANUAL CLOCK/CALENDAR SETTING
1. Slide the TIME SET switch, located on the back of the main unit, to TIME SET.
The time-of-day will flash.
2. Set the hour by pressing the HR button.
3. Set the minute by pressing the MIN button.
4. With the desired time-of-day on the display, slide the TIME SET switch to
CALENDAR. The year will flash.
5. Set the year by pressing the YEAR button.
6. Set the month by pressing the MONTH button.
7. Set the day number by pressing the DATE button. (Once the year, month and day
number have been selected, the main unit will display the proper day-of-week
once the TIME SET switch is set to the LOCK position.)
8. With the desired date on the display, slide the TIME SET switch to the LOCK
position.
NOTE: Manual changes made will be automatically overridden with the next complete
signal reception from the Atomic Clock.
MANUALLY INITIATING SIGNAL RECEPTION
Atomic Clock—
If you have moved the main unit from a location where it was receiving a strong
complete signal, it is recommended that you manually initial signal reception to insure
that the unit will receive a complete signal in its new location.
To manually initiate signal reception:
Press and release the WAVE button, located on the back of the unit. will flash on
the display, indicating that the unit is attempting to receive the signal from the Atomic
Clock. (See the “Signal Reception - Atomic Clock” section.)
Remote Module—
If you have moved the main unit or the remote module, it is recommended that you
manually initial signal reception to insure that the main unit will receive a signal from
the remote module.
To manually initiate signal reception:
Press and release the RE-SYNC button, located on the back of the main unit. will
flash on the main unit display, indicating that the unit is attempting to receive the signal
from the remote module. (See the “Signal Reception - Remote Module” section.)
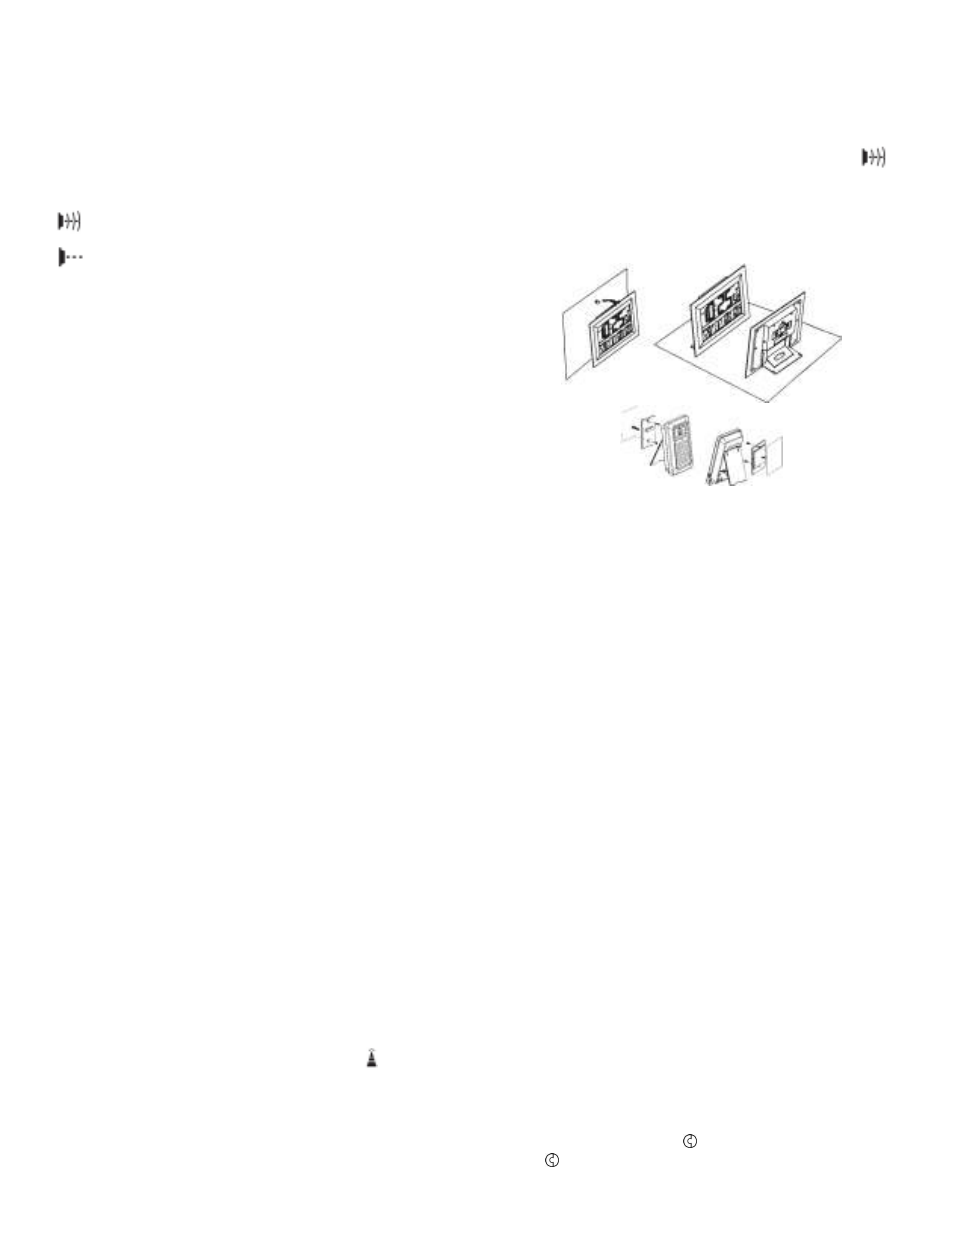
WALL MOUNT AND BENCH STAND
Both the main unit and remote module have built in bench stands. The units may also
be wall mounted. See the following illustrations.
RESET BUTTON
Located on both the main unit and remote module, this button is only used when either
unit is operating in an unfavorable way or malfunctioning, most commonly caused by
ESD (electrostatic discharge) or radio interference. To reset either unit, press and
hold down the button for 2 seconds. All settings will return to default values. Pressing
the RESET button has a similar effect as removing and re-installing the batteries.
ALL OPERATIONAL DIFFICULTIES
If either unit does not function properly for any reason, try resetting both units (see
the “Reset Button” section). If the units do not function properly after a reset,
replace the batteries with new high quality batteries (see the “Battery Replacement”
section). Low battery power can occasionally cause any number of “apparent”
operational difficulties. Replacing the battery with a new fresh battery will solve
most difficulties.
BATTERY REPLACEMENT
Erratic readings, faint readings, or no display are all indications that the batteries must
be replaced. See the “Initial Set-up” section for instructions on replacing the batteries.
Warranty, Service, or Recalibration
For warranty, service, or recalibration, contact:
CONTROL COMPANY
4455 Rex Road
Friendswood, Texas 77546 USA
Ph. 281-482-1714
Fax 281-482-9448
E-mail [email protected]
www.control3.com
Control Company is ISO 9001 Quality-Certified by
DNV and ISO 17025 accredited as a Calibration
Laboratory by A2LA.
Control Company Cat. No. 1087
Traceable
®
is a registered trademark of Control Company
© 2008 Control Company
92-1087-00