System refill/airlock elimination – Mityvac MV4535 COOLING SYSTEM AIREVAC KIT User Manual
Page 7
Form 822954
Page Number - 7
10. Turn on the compressed air. The vacuum will make a hissing
noise as the high pressure air passes through it. If the cooling
system is not empty, it is normal that some fluid may be expelled
from the venturi exhaust.
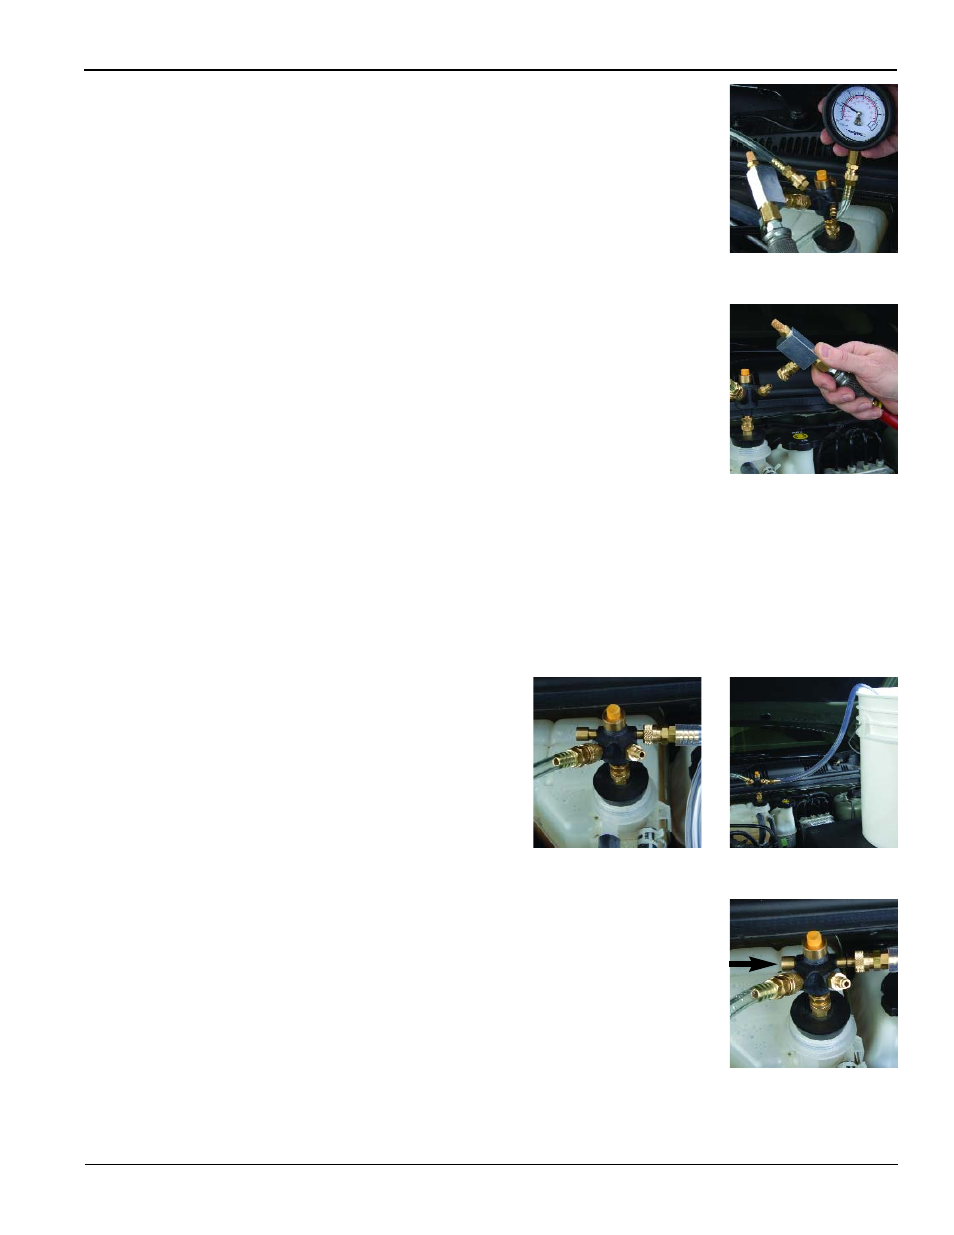
11. Allow the vacuum to pull air from the cooling system until the
gauge indicates 24 to 26 in Hg (1.6 to 1.8 bar) (81 to 88 kPa)
or the value stops increasing (Fig. 9). This should only take about
1 to 2 minutes during which time it is normal for the radiator
hoses to collapse.
12. Once the proper vacuum is achieved, disconnect the Venturi
Vacuum from the Valve Coupler before turning off the air or
disconnecting the air hose (Fig. 10). Turning off the air or
disconnecting the air hose prior to disconnecting the venturi
from the valve coupler, will allow air to reenter the system.
13. Watch the gauge for at least 30 seconds. The vacuum reading
will remain steady if the system does not have a leak. If the
cooling system has a leak, the vacuum will drop.
14. If the cooling system has a leak, it should be located and
repaired prior to testing, and the system re-evacuated.
15. If no leak is detected and no further repairs are required,
the vacuum may be used to quickly refill the system without
trapping air. See the following section for the proper procedure
to refill the cooling system with new coolant. Otherwise, shift
the Shuttle Valve on the Valve Coupler to the “Open” position to
relieve the vacuum.
16. Disconnect components, clean and store them properly.
System Refill/Airlock Elimination
Set-up & Procedure:
Follow steps 1 through 15 of the procedures for the
Vacuum Leak Test.
1. If there are no leaks in the system, do not open the Shuttle Valve.
2. Connect the Refill Hose to the Shuttle Valve using the
quick-connect coupler (Fig. 11).
3. Place the opposite end of the Refill Hose into a supply of coolant
adequate enough to completely refill the cooling system (Fig. 12).
4. Place the coolant supply at a level even with the radiator or
coolant bottle, or higher.
5. Shift the Shuttle Valve to the “Open” position, allowing the
vacuum to pull the coolant into the system (Fig. 13).
6. If the system does not completely refill, reapply the vacuum and
repeat the refill procedure.
7. Once the refill is complete, disconnect the components, clean,
and store them properly.
8. Top off the radiator or coolant bottle if necessary, and replace
the cap properly.
Fig. 9
Fig. 10
Fig. 13
Fig. 12
Fig. 11