Battery installation, Control panel, Powering on – Lectrosonics HH User Manual
Page 6: Battery installation control panel
HH
LECTROSONICS, INC.
6
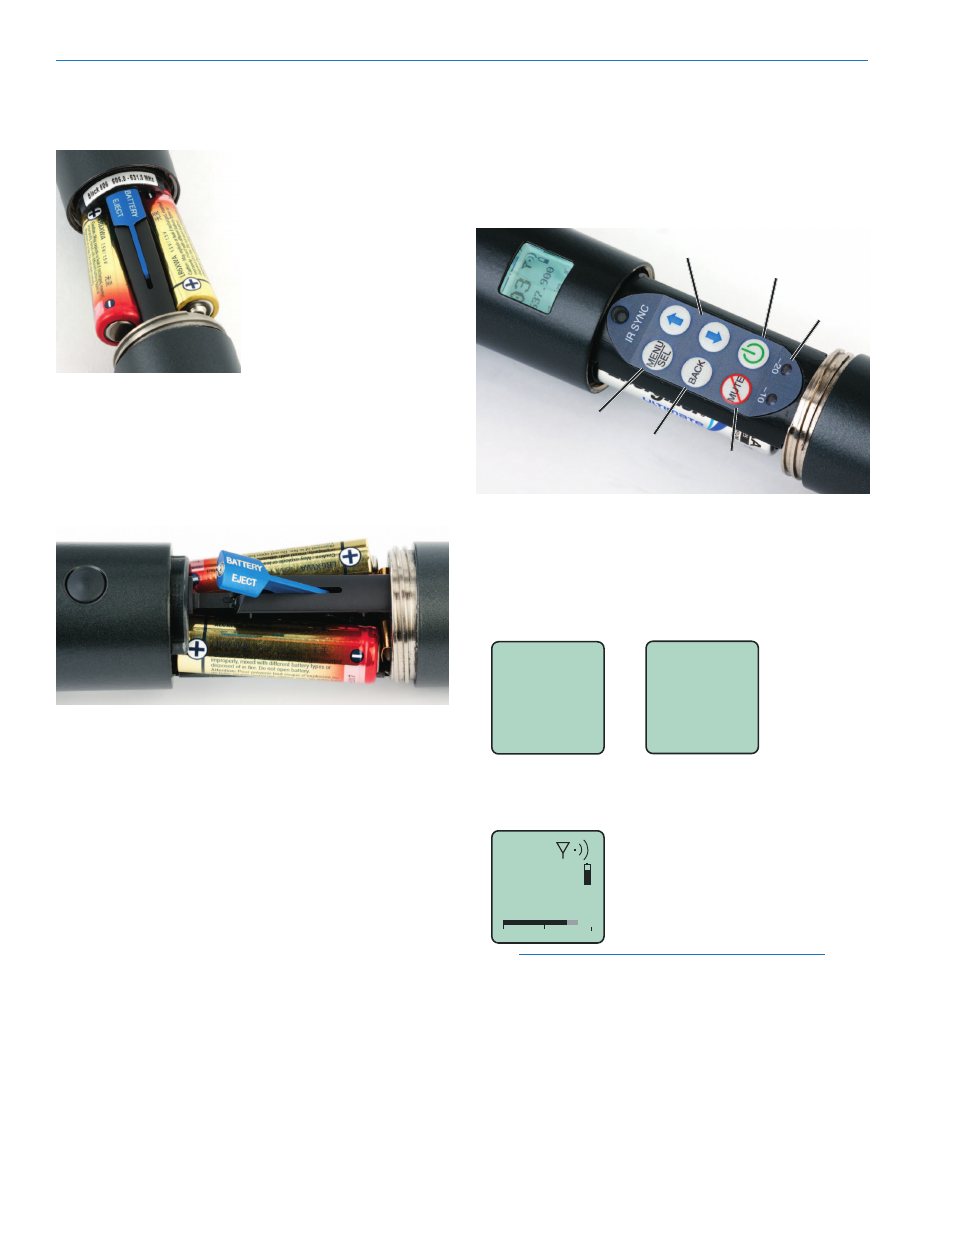
To insert batteries,
close the eject lever and
insert the upper con-
tacts first (closest to the
mic capsule). Polarity is
marked on the label in
the bottom of the battery
compartment.
To remove the batteries, pull the eject lever outward.
The battery tips will move outward, making them
easier to grasp.
Battery Installation
Control Panel
Six membrane switches on the control panel are used
to set up the transmitter by navigating the menus on
the LCD and selecting the desired values.
The IR SYNC port is reserved for future use with IR
enabled receivers.
Power Button
Side Button
Setup Switch
Modulation
LEDs
Previous
Screen
UP/DOWN Buttons for
Menu Item Selection
Enter Menu and
Select Item
Powering On
Press and hold the Power Button for several seconds
until a countdown on the LCD is completed. The
countdown from 1 through 3 will appear on the LCD,
followed by a display of the model, firmware version,
frequency block and compatibility mode.
Hold
for
Rf On
...3
HH
V1.00
Blk 24
Hybrid
When you release the button, the unit will be opera-
tional with the RF output turned on and the Main
Window displayed.
5
623.400
-40
-20
0
A
The Main Window
NOTE: If the Power Button is released before the
countdown is completed, the unit will boot up in
the “standby” mode with the RF output turned off.