Hydrotech C, C PLUS, A PLUS, E, E-DC and E PLUS Series PULSAtron User Manual
Page 18
18
•
If the pump has been out of service for a month or longer, clear the pump head
valve assemblies by pumping fresh water for approximately 30 minutes. If
the pump does not operate normally after this “purging run”, replace
cartridge valve assemblies.
6.2 DISASSEMBLY AND ASSEMBLY
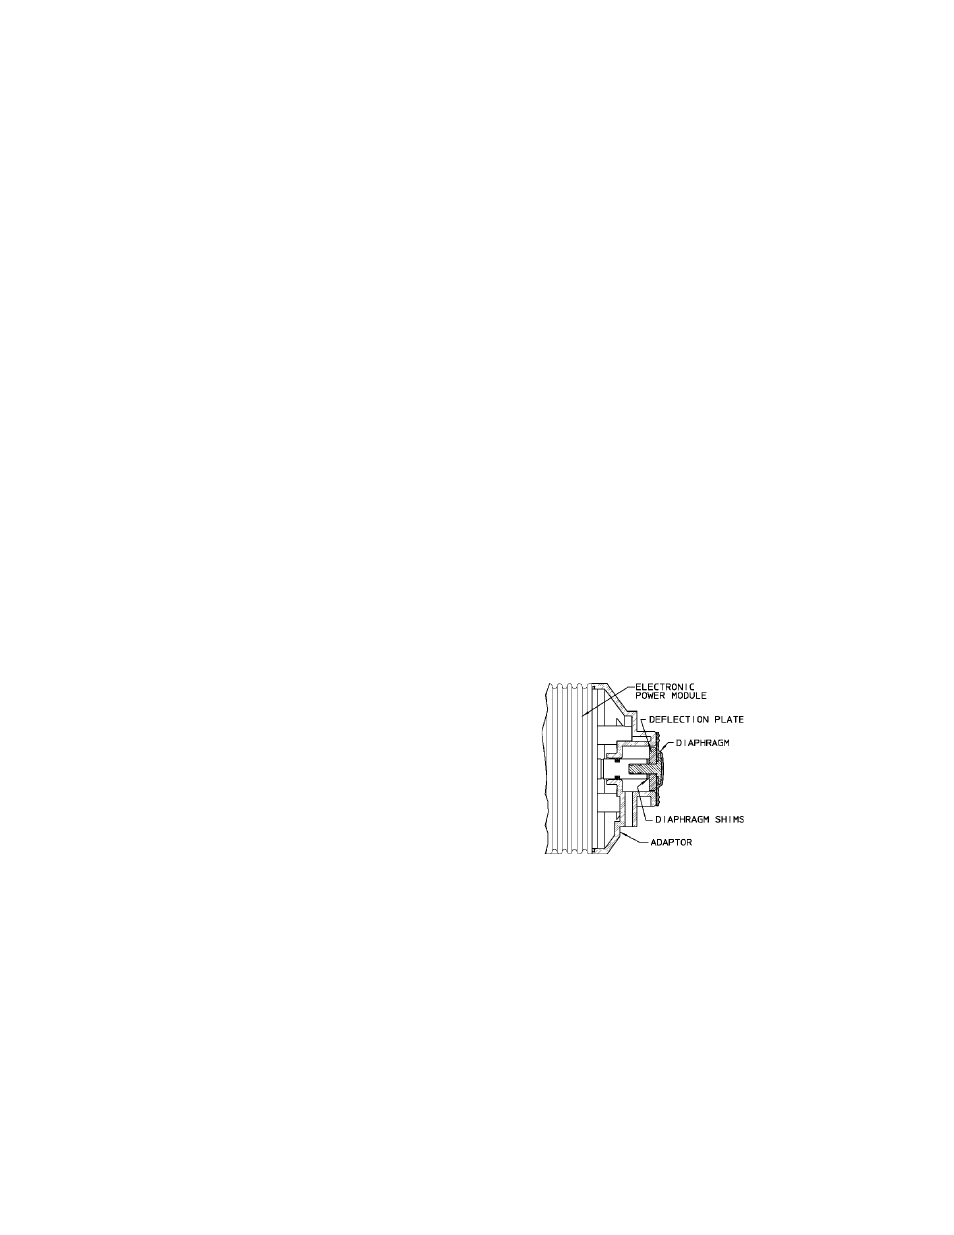
DIAPHRAGM REMOVAL
Flush pump head and valve assemblies out by running pump with water or other
suitable neutralizing solution. Wash outside of pump if chemical has dripped on
pump. Set stroke length knob of pump to 0% and unplug pump.
Depressurize the system and disconnect tubing or piping from the pump. Remove
the four pump head screws and then remove the pump head assembly.
Remove the diaphragm by grasping it at the outer edge and turning it counter
clockwise until it unscrews from the electronic power module (EPM). Don’t lose
the deflector plate or diaphragm shims which are behind the diaphragm, they are
needed for re-assembly. Note shim quantity may be from 0 to 2.
Inspect diaphragm, if it is intended to be used again look for indications of the
Teflon face being overstretched, (localized white areas) or the elastomer on the
back of the diaphragm being worn. Excessive amounts of either condition require
diaphragm replacement.
6.3 DIAPHRAGM REPLACEMENT
•
When replacing the diaphragm, it is
always a good idea to replace the valve
cartridges and other worn parts. A kit
is available from your supplier with all
parts necessary to completely rebuild
your pump’s wet end. All your sup-
plier needs to know is the “KOPkit
No.” on your pump’s data label to
supply this kit.
•
Set pump stroke length at 50% and
unplug the pump.
•
If you kept the shims from the original diaphragm or know the original
quantity you can avoid the next step for shimming the diaphragm.
FIGURE 14