Preparing for installation – CHIEF SL220 User Manual
Page 6
SL220
Installation Instructions
6
PREPARING FOR INSTALLATION
Installation Requirements
The SL220 has been designed to be mounted recessed into a
suspended ceiling consisting of 2’ x 2’ ceiling tiles and secured
by a WireVice system.
Electrical Rating
100-250VAC~, 50/60Hz, 960W
North America: 120VAC, 60Hz, 8A
IMPORTANT ! :
Installation and maintenance of this product
must be completed by a qualified service technician.
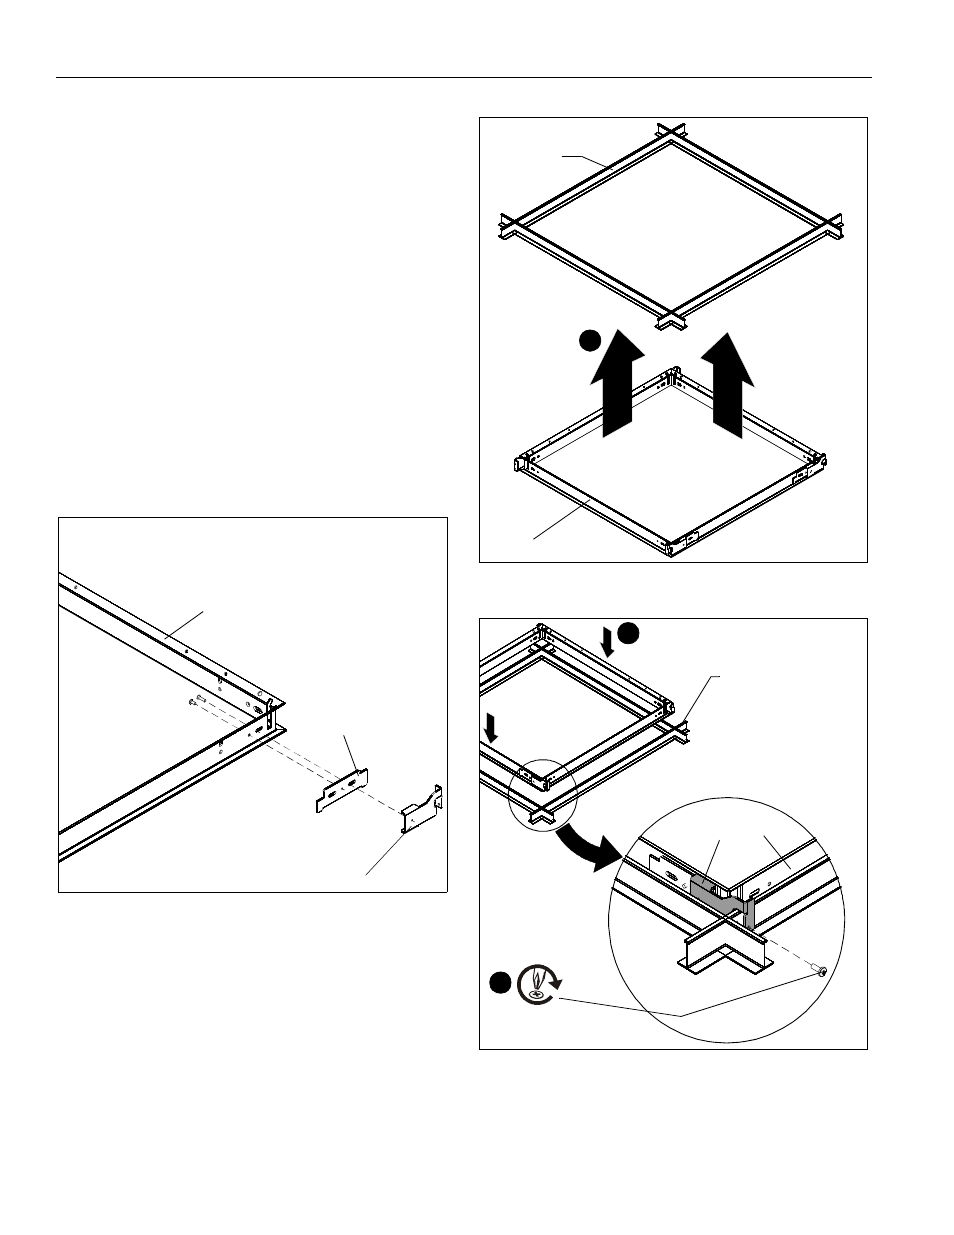
Preparing SL220 Framework
NOTE:
Addition of the vertical bracket (C) is optional. The
vertical bracket is used to allow vertical adjustment into
the ceiling if a ceiling tile is attached to the bottom of the
SL220.
1.
OPTIONAL: Attach vertical brackets (C) to both sides (in
each corner) of the SL220 frame (B) using a 06-32 x 5/16"
Phillips flat head screw (F). (See Figure 1)
2.
Attach horizontal bracket (D) over the vertical bracket (C) at
each corner of the SL220 frame using a 06-32 x 1/2" Phillips
flat head screw (E). (See Figure 1)
Figure 1
Installing SL220 Framework
1.
Remove one 2 ft x 2 ft tile from ceiling.
2.
Insert SL220 frame (B) with attached brackets into the
empty ceiling space. (See Figure 2)
3.
Set SL220 frame over top of ceiling framework, hooking
each horizontal bracket (D) onto the ceiling framework.
(See Figure 3)
4.
Secure SL220 frame (B) to ceiling framework using one
10-24 x 1/2" Phillips head screw (K) through each horizontal
bracket (D) at each corner. (See Figure 3)
Figure 2
Figure 3
(B)
(C)
(D)
Ceiling
Framework
2
(B)
Ceiling
Framework
3
(D)
4
(K) x 4
(B)