CHIEF LSMVPU User Manual
Page 11
Installation Instructions
MSMVPU/LSMVPU
11
Plumb Adjustment
1.
Using the provided 1/2" wrench (X), turn plumb adjustment
bolt to the left to adjust screen away from the wall. (See
Figure 13)
2.
Using the provided 1/2" wrench (X), turn plumb adjustment
bolt to the right to adjust screen toward the wall. (See
Figure 13)
Figure 13
Adjusting Roll/Height of Wall Brackets
NOTE:
The height adjust wall brackets allow adjustment of
+ 1/2".
1.
Turn to right (tighten) to raise side of screen.(See Figure 14)
2.
Turn to left (loosen) to lower side of the screen. (See Figure
14)
Figure 14
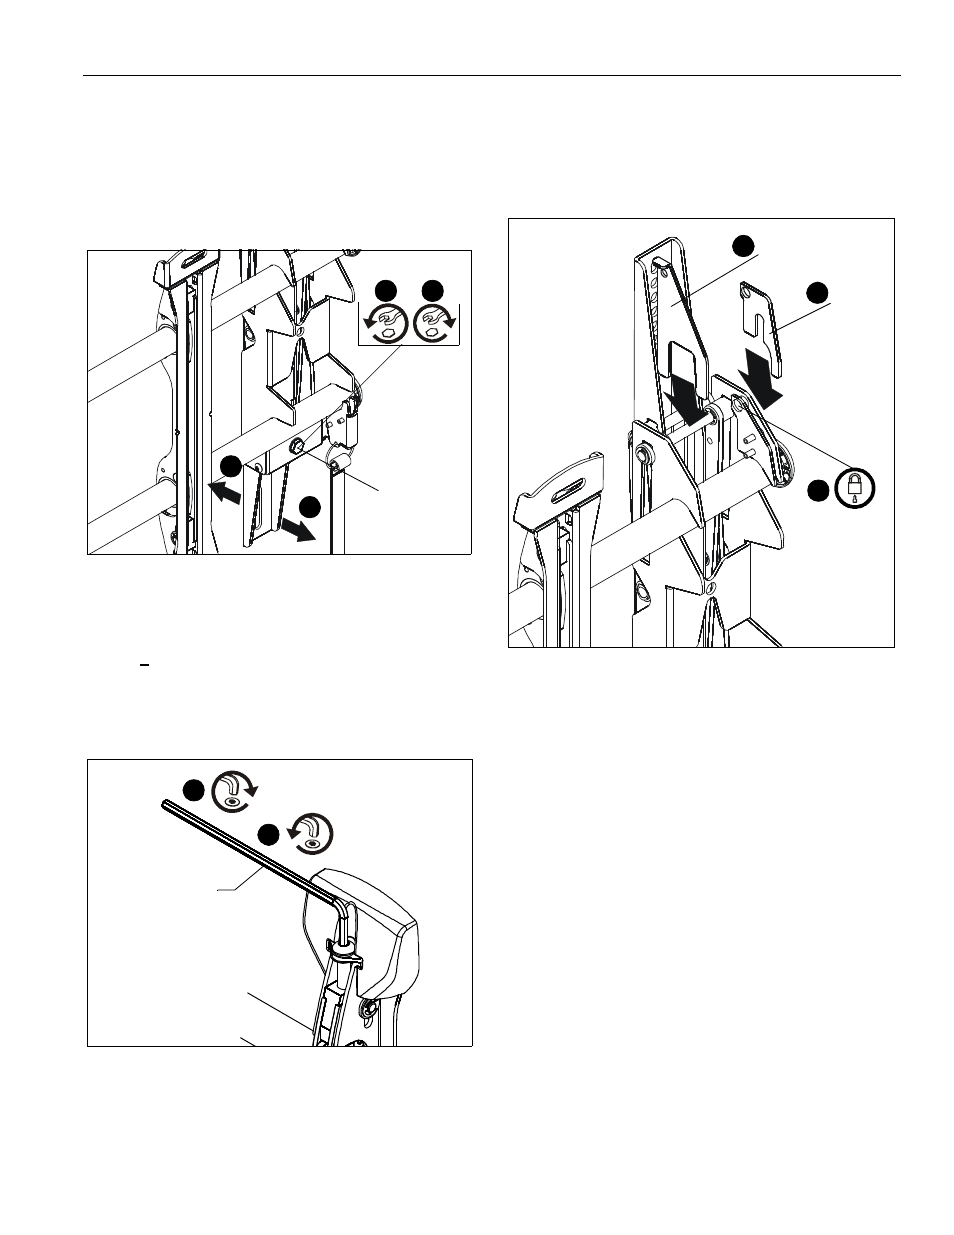
Locking Mount (Optional)
1.
Add security bracket (S) to the mount. (See Figure 15)
2.
Add padlock (not included) through holes on small security
bracket (S) and mount. (See Figure 15)
3.
Add hold-back bracket (T) to the mount to secure mount in
recessed position. (See Figure 15)
4.
Repeat Steps 1-3 for the other upright for additional
security.
Figure 15
2
1
2
1
plumb adjustment
bolt
Raises screen
Lowers screen
1
2
(W)
(Screen not shown for clarity)
(S)
(T)
1
3
2