BARSKA AX11780 - Extra Large Biometric Rifle Safe User Manual
Page 2
BARSKA warrants this new safe to be free of original defects in
material and/or workmanship under normal use for a period of twelve
(12) months from the date product is received by purchaser. This
warranty does not include damage caused by improper installation or
maintenance. Damage from misuse, abuse, accident (such as
dropping), normal wear and tear, fire, flood, or acts of nature. Damage
from service or repairs other than those performed by BARSKA.
Labor, cost and shipping charges for the removal and replacement of
defective parts beyond the initial twelve-month warranty period. All
transportation and shipping charges. Removing or altering the seal
under any circumstances will automatically void the warranty.
This warranty is limited to original purchaser and is not transferable.
This warranty applies only to products purchased in the United States.
Please email [email protected] or call 1.888.666.6769 for Return
Merchandise Number (RMA#) before any returns. The RMA number
must appear on the outside of the shipping package. Product must be
packed carefully and sturdily in its original packaging to prevent
damage in transit and returned freight pre-paid to:
BARSKA OPTICS
Repair Department
855 Towne Center Drive
Pomona, CA 91767
Please include all of the following when returning BARSKA products
for service and/or replacement:
1. Please write your complete details (Name, Address, Telephone #,
E-mail address, RMA#, etc.)
2. Purchase receipt or Proof of Purchase. (Original/Copy)
3. A brief explanation of the defect.
4. A Check/Money Order of
$90.00 to cover inspection, shipping
and handling.
*Please allow 6-8 weeks for delivery.
BARSKA will examine and test returned product and repair or replace
defective part(s) or units with new part(s) or a new unit if necessary
within the warranty period. Purchaser is required to remit
$90.00 to
BARSKA for return shipping and handling at time product is returned.
If repair is required after warranty period expiration, purchaser will be
charged for replacement parts and return shipping.
BARSKA® Optics shall not be liable for any consequential, incidental
and/or contingent damages whatsoever. We will not pay shipping,
insurance or transportation charges from you to us, or any import
fees, duties and or taxes. This warranty supersedes all previous
BARSKA® Optics warranties.
Biometric Safe
1 YEAR LIMITED WARRANTY
BC325
5/13
9. LOW BATTERY WARNING
1. When the door is closed and 3 repetitive beeps are heard,
and Indicator Lights (E) flash red, it indicates the batteries
are low
2. Replace batteries immediately
- Open safe, remove Battery Compartment (B) cover and
all 4 AA batteries
- Insert 4 new AA batteries and restore Battery
Compartment (B) cover
NOTE: All registered fingerprints remain stored
10. CARE AND MAINTENANCE
- To maximize the security and performance of the safe, keep
Fingerprint Scanner (D) clean; use a dry cloth to remove
any smudges or prints off the Fingerprint Scanner after
each use
- Test registered fingerprints every 6 months
- Keep liquids away from the control panel. Spills on the
control panel will cause damage and possibly electric shock
- Secure safe in a proper area to prevent from falling and
causing damage or injury
- DO NOT disassemble the product. For all repairs, contact
BARSKA Customer Service
- DO NOT use chemicals or cleaning agents to clean the safe
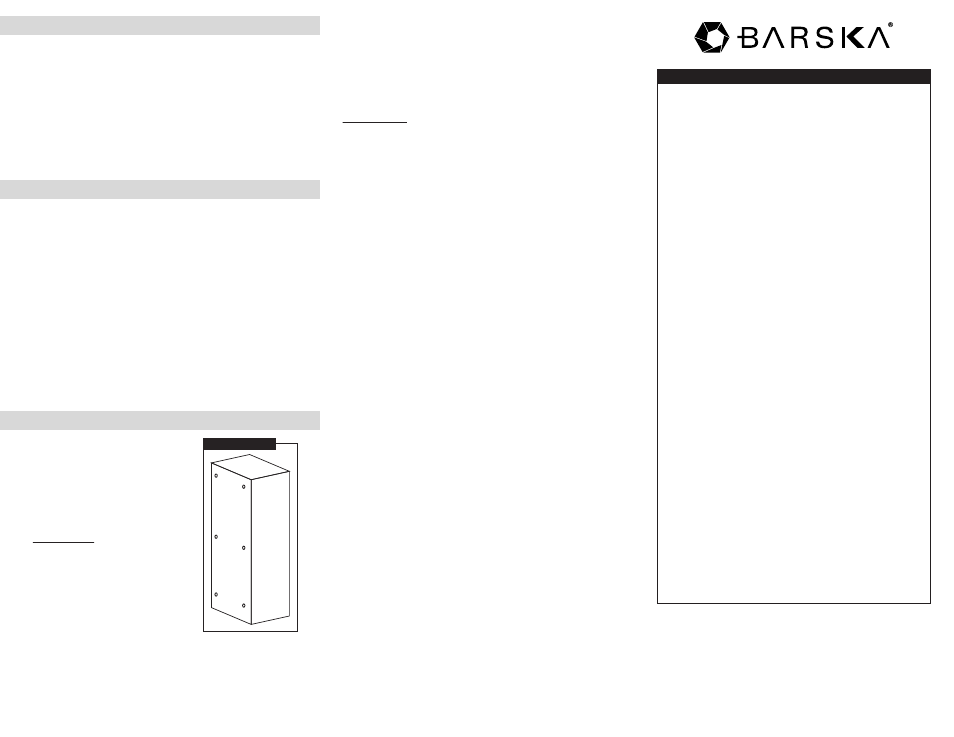
11. MOUNTING INSTRUCTIONS
The safe may be mounted to a wall
or floor. Be aware of the load
bearing. Failure to do so can result in
personal injury and/or damage to
property. Use appropriate tools when
performing work and always use eye
protection
Wall Mounting
Do not mount the safe without
anchoring to the wall
- Find the studs in the wall, at your
desired location. Most studs
are 16 inches or 24 inches apart
- Check the wall for concealed wires
or pipes
- Measure the location of the pre-set drill holes; mark their
exact position onto the wall ensuring that the studs or
anything else behind will not interfere
- Drill the appropriate size holes for the anchors you are using
- Carefully press the anchor into the holes at this time
- Mount the safe by running screws from inside of the safe
and securing to anchors; ensure the safe is
mounted securely
Floor Mounting
- Use proper drill tools depending on the type of floor you are
mounting the safe (wood, tile, or concrete)
- Measure the location of the pre-set drill holes; mark their
exact position onto the floor
- Drill the appropriate size holes for the anchors you are using
- Carefully press the anchor into the holes at this time
- Mount the safe by running screws from inside of the safe
and securing to anchors; ensure the safe is
mounted securely
Mounting Holes
* Actual model may vary