Antex Electronics XM-100 Commercial XM Satellite Radio User Manual
Page 23
XM-100 Commercial Satellite Audio Receiver
23
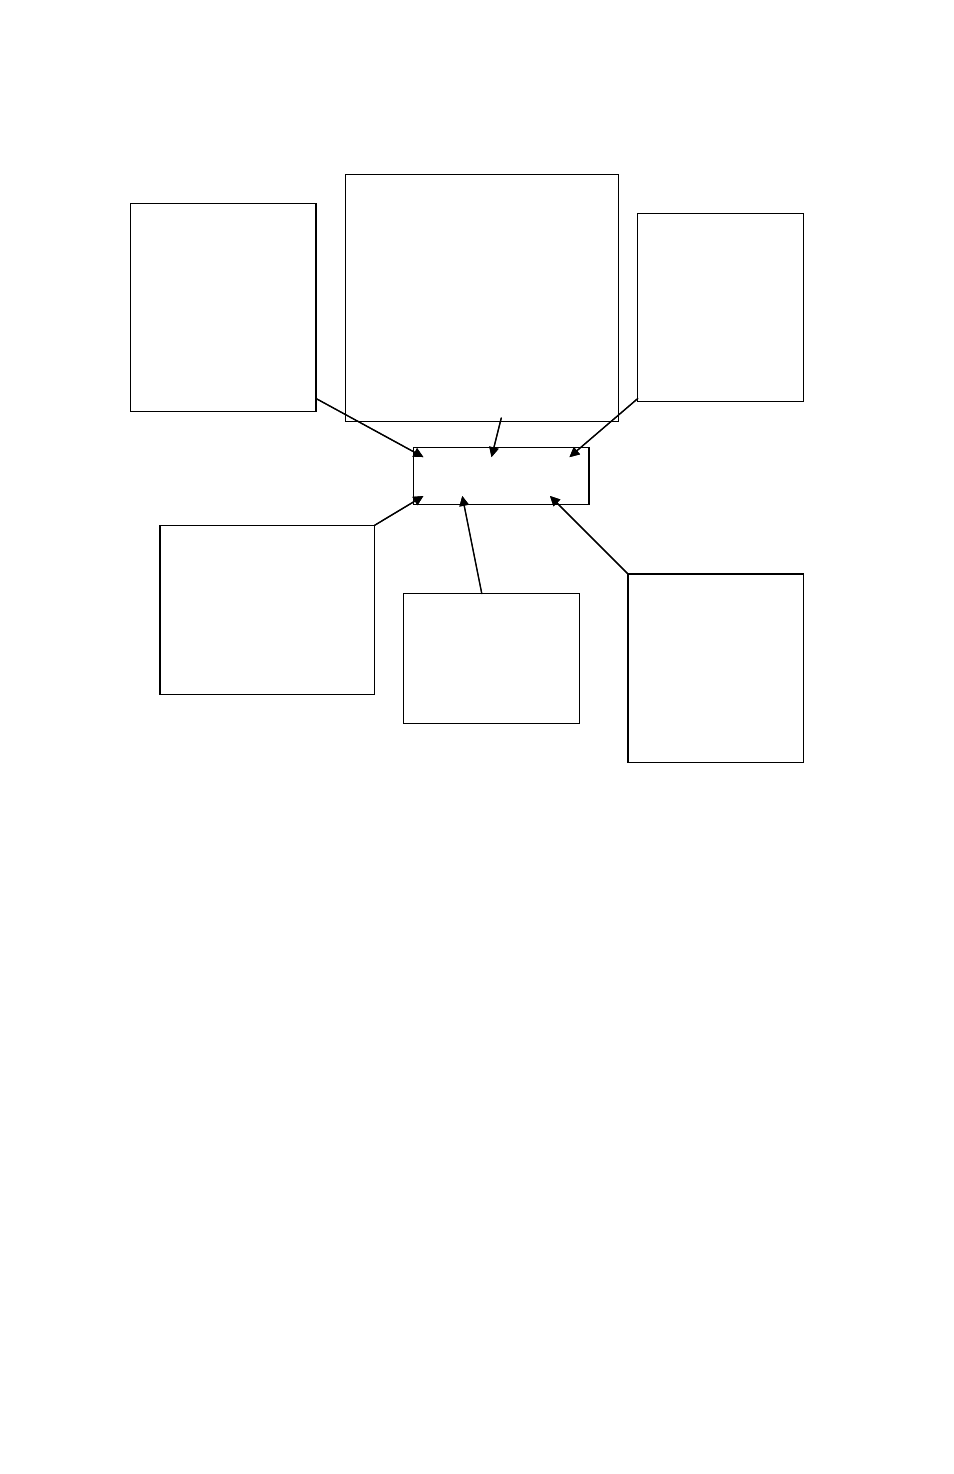
F46 C021 V-6
C Mon 11:45A
Force Tune Event
number. Not editable,
up and down arrows on
the remote cycle
through list if in Edit
mode. If in Add New
mode, event number is
displayed for reference
and up and down arrows
do nothing.
Indicates sort mode. “C”
means sorted by Channel
number, “T” means sorted
by time of day, “D” means
sorted by day of week, then
time. “N” indicates the Add
New mode. This field is not
editable.
Day of Week. Use up
and down arrows on
the remote to change.
Mon, Tue, Wed, Thu,
Fri, Sat, Sun, M-F, M-
Th, All (everyday).
Time of day. Hours,
minutes, and AM/PM
are separate fields.
Use up and down
arrows on the remote
to change or numeric
entry. Left and right
arrows move between
fields.
Channel number. Use direct numeric
entry with remote, or up and down
arrows on remote. Down arrow
below channel 000 has options
“*Any” for a volume only change,
“*Off” to turn unit off at scheduled
time, and “*DEL” to delete this
event, ” *LCK” to lock the front
panel, and “UNL” to unlock the front
panel. “SEL” must then be pressed
on the remote to enter the Delete
Confirmation display.
Volume Setting. Use
up and down arrows
on the remote to
change. Range is –9
to +9, is an absolute
setting, and matches
the settings in the
Line Level setup
menu.
The left/right arrows on the remote move the cursor through
the fields that can be changed. The settings for each of the
fields are selected using the up/down keys on the remote.
The ―channel number‖ field selects the channel number to tune
to or one of several options. Selecting an invalid channel will
set the display to ―???‖ and the cursor will not move. Selecting
―Any‖ allows for a volume change applied to the current audio
channel at the programmed time – a feature useful for
decreasing the audio volume during slow hours of a restaurant
or bar. Locking and unlocking the front buttons for specific
hours of the day (LCK, UNL) and turning off the unit at a
specified time (Off) may also be programmed. Note that
subsequent to a programmed ―Off‖ period, any valid forced
tune event to a channel will turn the unit back ―On‖. An
existing event is deleted by choosing DEL in this field.
When finished reviewing, adding, or deleting Forced Tune
events with this menu, pressing the SEL button on the remote
will prompt to save the changes. Selecting either Yes or No will
return you to the Edit or Add New screen.
Pressing the Mode button will exit and not save any changes.