American Expedition Vehicles Tummy Tucker – TJ Wrangler NON-Rubicon User Manual
Page 4
Installation Instructions:Tummy Tucker™ – TJ Wrangler NON-Rubicon
Nth30115 v4.doc
page 4 of 11
Download @ www.nthdegreemobility.com
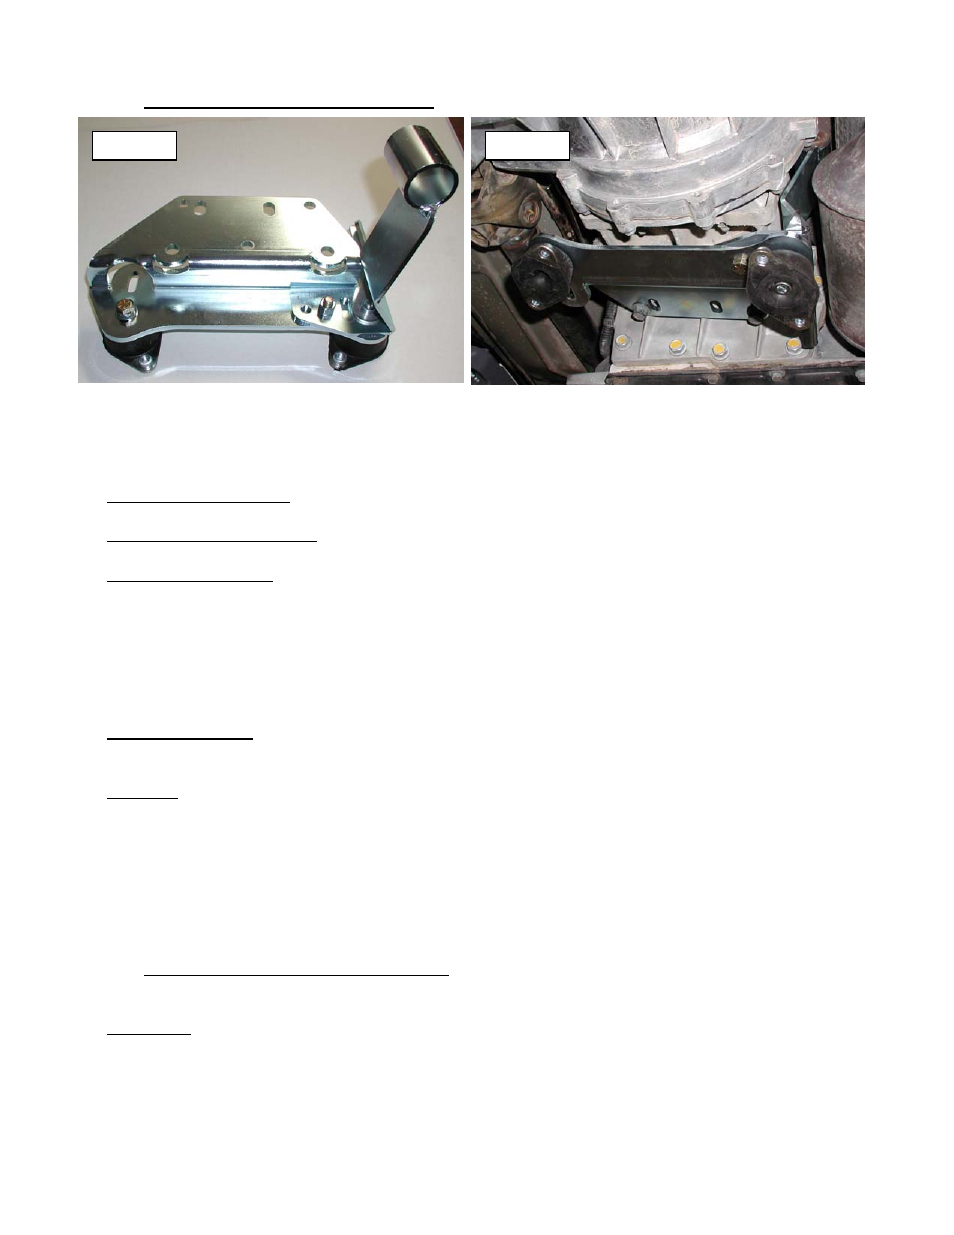
Figure 4
Figure 5
Step 7: Install the new Trans Mount Assembly to the trans in the same manner that the original one was
removed. This will be easiest if you increase the height of the jack under the transfer case output so that
the trans is higher relative to the exhaust than it was stock. Start all bolts by hand, then torque to 50 ft-
lbs. Figure 5 shows a mount installed on a TJ Rubicon with 4-speed automatic – others will look similar.
Notes for specific transmissions
– AX-5, AX-15, & NV3550: For all manual transmissions, replace the original two or four bolts with the
supplied 7/16x1”L flathead bolts. (Automatics re-use the original bolts.)
– NSG-370 (6-speed manual): Replace the original four bolts with the M10x25mm bolts provided –
make sure to distinguish these from the 7/16” flathead bolts that look similar but will not fit!
– 32RE (A999) 3-speed: This trans uses just two bolts that will go into the two slotted holes in the
bracket. For ’97-02 TJs, keep the bolts at the back of these slots (so bracket is as far forward as
possible).
Notes on Exhaust - Pin Modifications. A few TJ’s will require some minor alteration of the exhaust
hanger pin at the transmission mount – this hanger has changed often over the years, so while your
model year will give you an idea if mods are needed, only a test fit will confirm exactly what must be
done. Unless you’ve had custom exhaust work done, you should never need to rework the actual pipe,
only the hanger. Check if these apply to you:
– Late ’00 thru ’02 TJ: You will likely need to remove some of the ‘extra’ lower rod so that it will not rest
on the leading edge of the Tummy Tucker. The best approach is to use a sawzall to cut horizontally
through the lower rod to remove the end of the rod as shown in figure X.
– ’97-02
TJ: The exhaust hanger pin may need to be bent upward slightly (’97-’99 with ‘flat cat’ will
usually be okay, ’00-’02 TJ’s with the more round ‘fat cat’ may or may not need bending). Do not
bend the pin before you test-install the TT main skid plate. Only after the TT skid is in place will you
know if it needs to be bent. When doing the clearance check after step 9, if the catalytic converter is
hitting the floor, you need to bend the pin up to lower the catalyst – you may be able to do this in the
Jeep, but it will go better if you lower the TT skid and remove the adapter bracket instead. Less than
5% of installations will require the rod to be bent (usually only if something caused it to bend
previously – such a rock damage, etc.)
Step 8: Reposition T-case Shift Linkage Bracket. Because the TT raises the rear of the powertrain, the
TJ’s body-mounted T-case shift linkage geometry is affected. To correct it, you need to lower the
powertrain-side pivot for the relay rod until it is again level with the body side.
- ’97-02
TJ’s, The factory bracket can be modified to correct the relay rod position: Pry the relay rod
away from the trans until it pops out of the green plastic grommet in the bracket, then remove the
upper two driver’s-side t/case-to-trans nuts (9/16”) to remove the bracket. Tap the green grommet
out of it’s hole from the transmission side with a hammer and small socket. Next, locate and drill a
new hole for the grommet – the hole should be 15/32” diameter and located at least 1.0” below the
original hole (or as low as possible while maintaining 1/8” of material around the hole). Depending on