Installation, Please read before you start – American Expedition Vehicles JK Slider - Rear Differential Skid Plate User Manual
Page 2
PLEASE READ BEFORE YOU START
TO GUARANTEE A QUALITY INSTALLATION, WE RECOMMEND READING THESE INSTRUCTIONS
THOROUGHLY BEFORE BEGINNING ANY WORK. THESE INSTRUCTIONS ASSUME A CERTAIN
AMOUNT OF MECHANICAL ABILITY AND ARE NOT WRITTEN NOR INTENDED FOR SOMEONE NOT
FAMILIAR WITH AUTO REPAIR.
This product is covered under the AEV Parts Limited Warranty, a copy of which can be found at aev-conversions.com/warranty.
INCLUDED PARTS
QTY
REQUIRED TOOLS
Slider
1
3/4” socket
Hardware pack
1
9/16” socket
Torque wrench
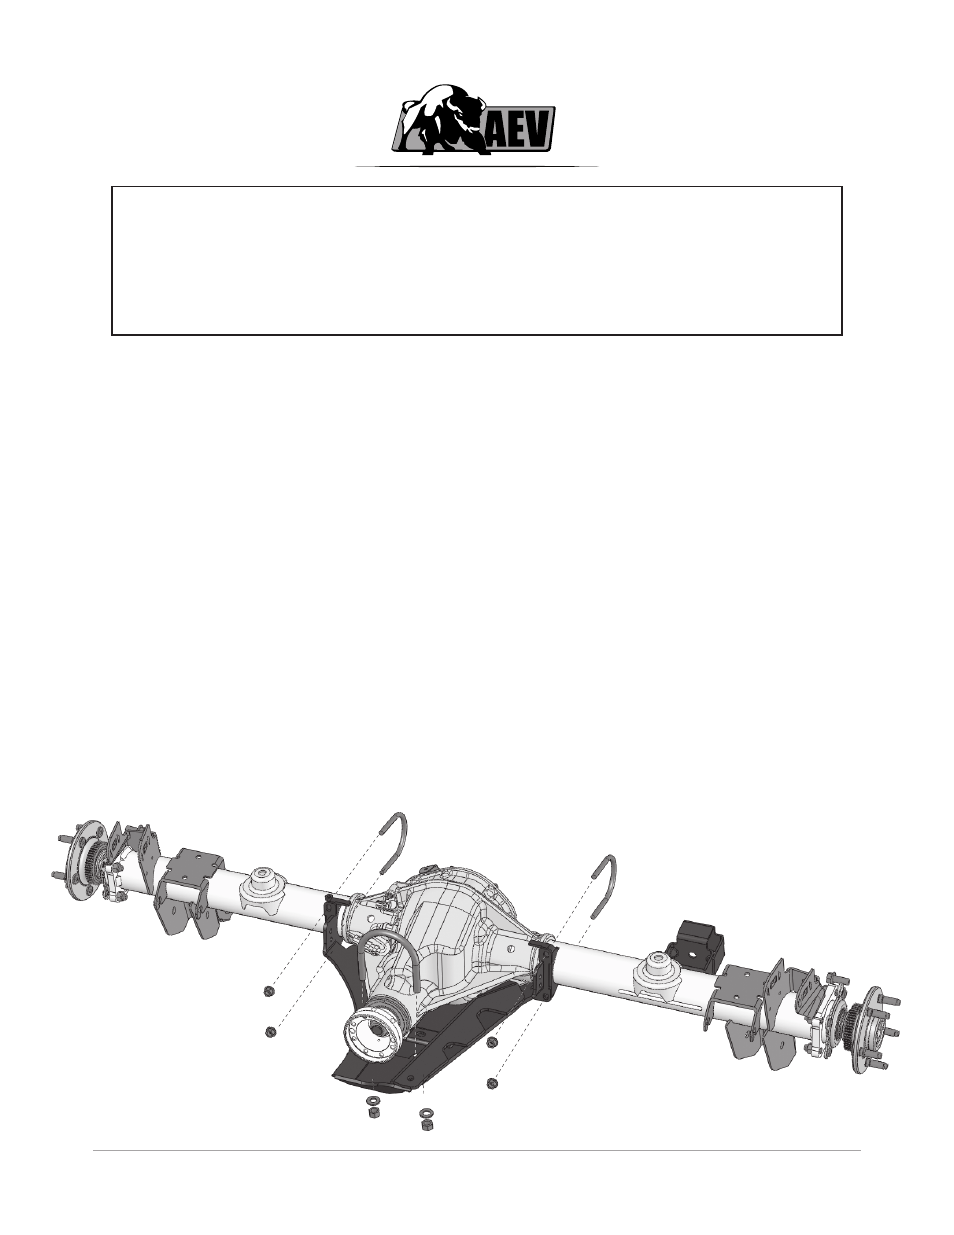
installation
1. Position slider on axle, this is a very tight interference fit designed to allow the slider to spread the
impact load across the differential, not concentrate it to one location. So it may be necessary to force
the slider into location. This can be done using a jack, or a dead blow hammer. DO NOT LET GO OF
SLIDER until at least one U-Bolt is installed and finger tight, or the slider may fall off axle.
2. Install all three U-Bolts with nuts/washers loosely
3. Snug all nuts
4. Torque all nuts. 3/8” nuts to 15 ft. pounds. 1/2” nuts to 40 ft. pounds. Once tightened, ensure that
the slider is tight to the axle tube with no gaps.