American Expedition Vehicles JK WINCH MOUNT CALL OF DUTY User Manual
Page 4
Page 4 of 5
11. Place the winch mount assembly into position on the frame
12. Insert the (8) button head bolts through the front mounting holes to align
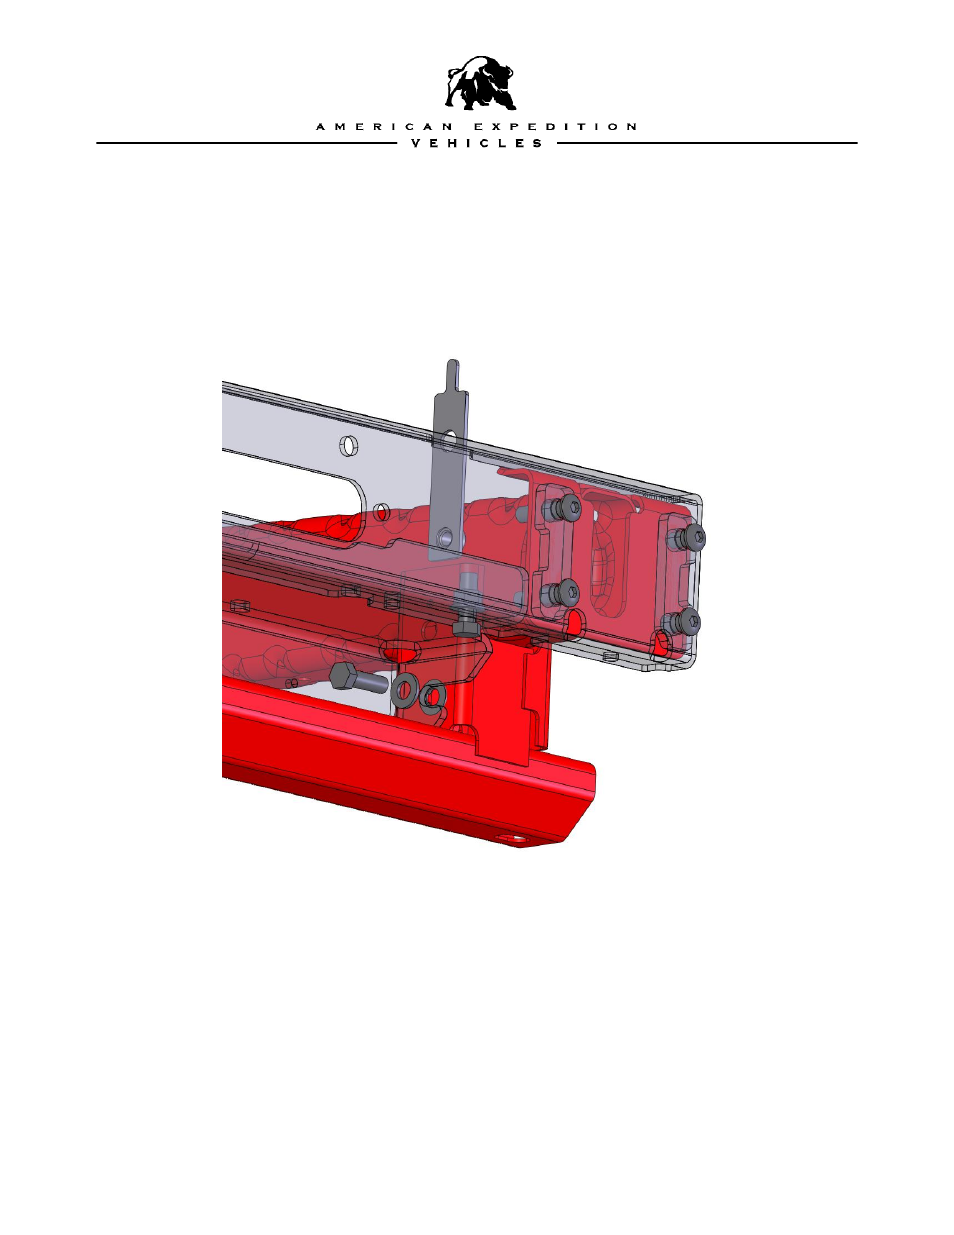
13. With the winch mount aligned, bolt the winch mount to the lower frame attachment points
using 1/2” x 1 1/2" hex head bolts, washers, and nut plate as shown below
14. NOTE: REFER TO THE 2012 WINCH MOUNT ADDENDUM FOR VACUUM PUMP
BRACKET RELOCATION.
15. Remove the (8) button head bolts
16. Install the square nuts that come with the Warn winch into the winch and feet. A little
silicone is helpful to hold them in place
17. Place the winch onto the winch mount. Do not install winch mounting bolts at this time
18. Re-install the bumper (download complete bumper instructions at aev-conversions.com)
19. NOTE: REMEMBER TO USE THE SHORT BUTTON HEAD BOLT AND PLAIN NUT
SUPPLIED IN THE SUPPLEMENT KIT IN THE RIGHT (PASSENGER) SIDE UPPER
MOST INNER LOCATION WHEN RE-INSTALLING THE BUMPER. USING A LONG
BOLT HERE WOULD INTERFERE WITH THE WINCH MOTOR
20. Re-install skid plate using the supplied self-tapping bolts in the front 6 locations