Elmo Rietschle R-VWP 500/1000/1500/2500 User Manual
Page 29
29
www.gd-elmorietschle.com © Gardner Denver Schopfheim GmbH, Gardner Denver Deutschland GmbH
|
Maintenance and repair
n
1
s
6
n
2
n
4
n
4
n
3
s
4
s
3
s
2
n
6
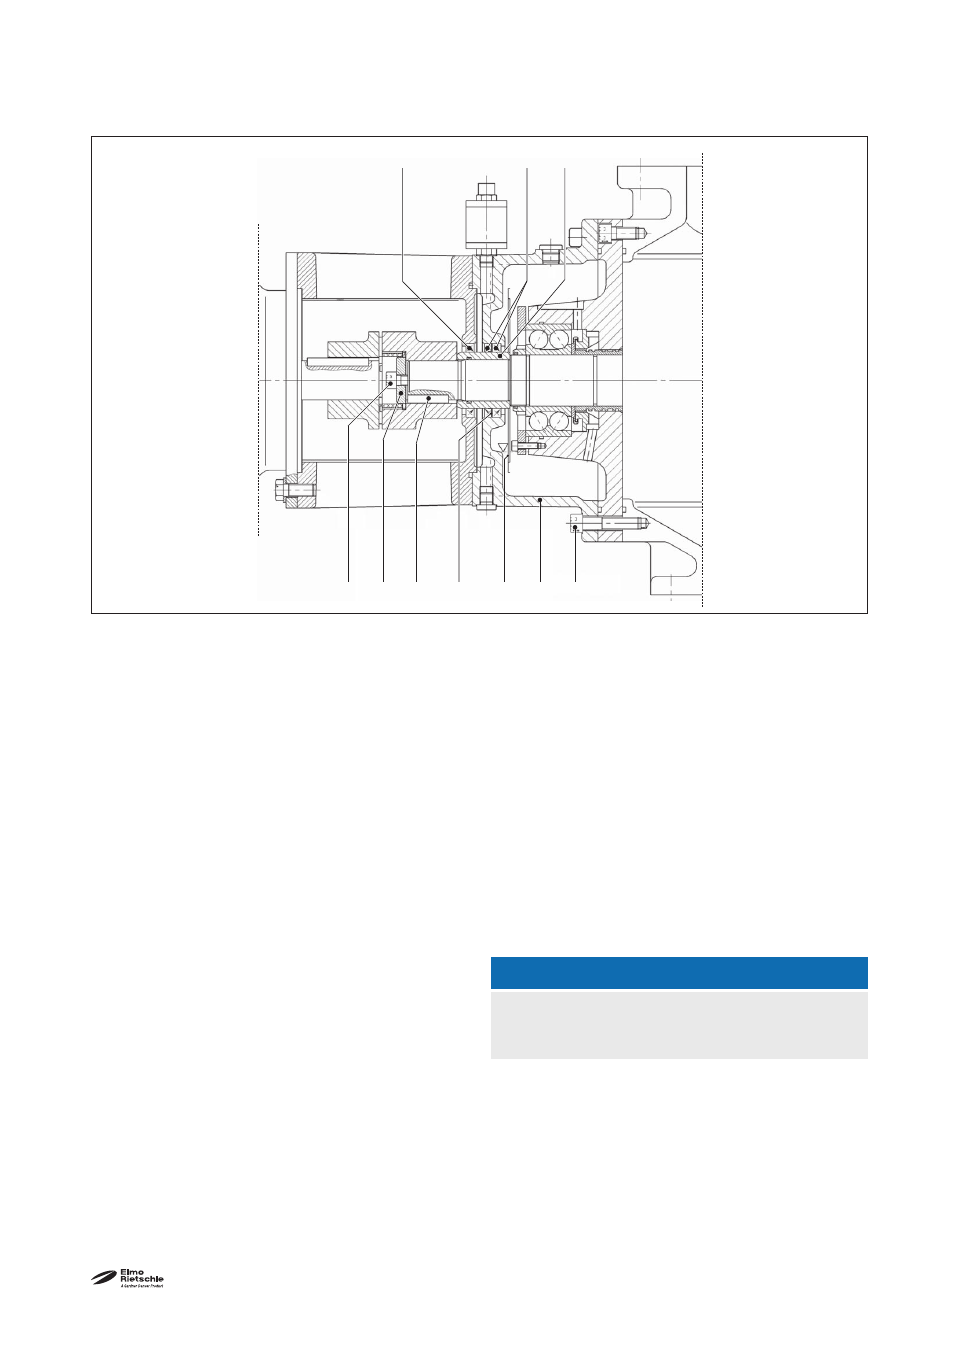
VWP 2500
After unscrewing the screws (Fig. 10/s
5
) remove the motor fl ange (Fig. 11/n). Unscrew screw (Fig. 13/
s
2
) and
remove with disc (Fig. 13/
s
3
)
.
Pull off the coupling driven (Fig. 13/
q
1
) with a suitable tool from the shaft end.
Remove key (Fig. 13/
s
4
). Drain the oil in the chamber on the motor side by unscrewing the plugs
(
Fig. 3/
K
1
)
and (
Fig. 11/
K
3
)
. After unscrewing the screws (Fig. 11/
s
) remove motor fl ange (Fig. 11/
n)
. Remove screws
(Fig. 13/
s
6
). To pull off the intermediate fl ange (Fig. 13/
n
1
), two screws should be screwed into the two
threads Fig. 3/a
6
.
Remove wearing sleeve (Fig. 13/
n
3
) of the piston. Push on new wearing sleeve and O-ring.
Take care that the O-ring is not damaged. Push off sealing rings (Fig. 13/n
4
) and supporting ring (Fig. 13/n
6
)
with a drift out of the motor fl ange (Fig. 11/n) and intermediate fl ang. Mount new sealing rings and support-
ing ring. Take care on right fi tting position. Mount intermediate fl ange (Fig. 13/
n
1
) and motor fl ange (Fig. 11/
n
). Take care that the sealing rings are not damaged on the keyway eventual use a
protection sleeve.
Re-assemble
of the remaining components
in reverse order
.
Fill oil in bearing and sealing oil chamber.
NOTICE
For fi lling the sealing oil chamber with oil remove
the ventilation screw (Fig. 3/G
1
).
Fig. 13 Changing of the shaft sealing rings and the
shaft wearing sleeve VWP 2500
VWP 2500