Xylem SuSix Sensor with Wiper - Wiper and Gasket Replacement Kit 206355 User Manual
Page 2
www.mjk.com
DK: +45 45 56 06 56
NO: +47 69 20 60 70
SE: +46 53 31 77 50
NL: +31 251 672171
IRL: +353 879535625
USA: +1 847 482 8655
AUS: +61 3 9758 8533
GB/DK Wiper and Gasket Rep Kit 100127
2
Denmark
www.mjk.dk
[email protected]
+45 45 56 06 56
The Netherlands
www.mjk.com
[email protected]
+31 251 672171
North America
www.mjk.com
[email protected]
+1 847 482 8655
Norway
www.mjk.no
[email protected]
+47 69 20 60 70
Sweden
www.mjk.se
[email protected]
+46 53 31 77 50
Australia
www.mjk.com
[email protected]
+61 3 9755 1529
Distributed
by:
MJK
offices:
Ireland
www.mjk.com
[email protected]
+353 87 953 5625
Singapore
www.mjk.sg
[email protected]
3
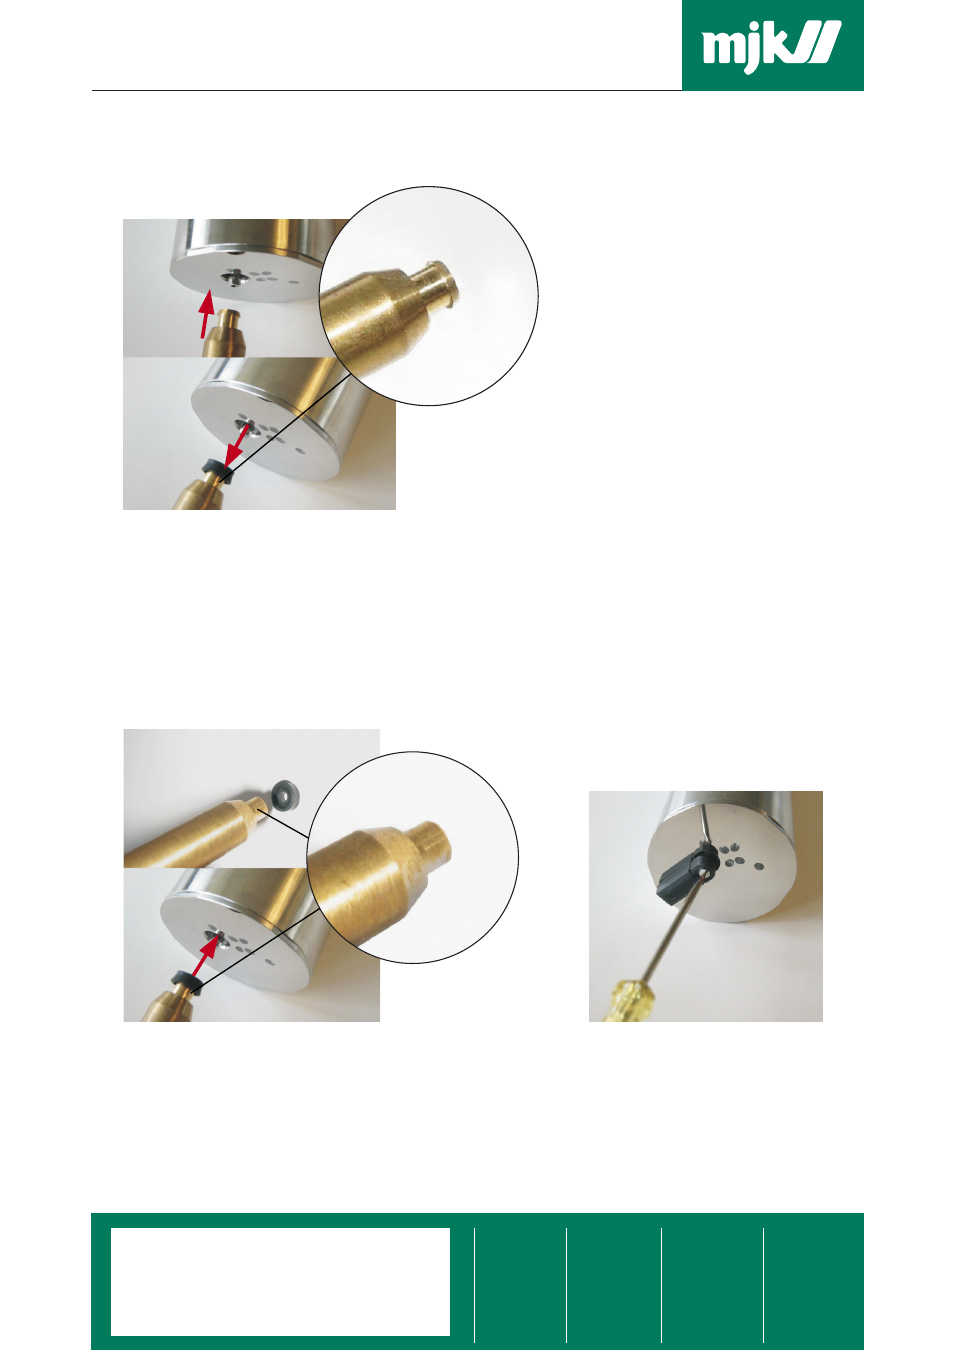
6. Carefully insert the barb end of the draw tool into the now visible gasket, and then care-
fully extract the draw tool including the gasket (see figure 2).
Figure 2. Remove used gasket with the draw tool
If there are any trace of dirt or impurities on the axle, remove them with a soft cloth. The
wiper axle must under no circumstances be scratched, and it must be full gloss polished
in the area, where the gasket is located. Failure to comply with these requirements, or if
there is any moist inside the sensor, the sensor must be returned to MJK for service.
7. Carefully mount the new gasket onto the no-barb end of the draw tool and insert it on the
axle until it is 1 mm below the sensor head surface (see figure 3).
Figure 3. Insert new gasket with the no-barb end of the draw tool Figure 4. Mount and secure wiper
8. Mount the new wiper with a screw and secure it with a screwdriver (figure 4). Make sure
that the wiper does not block the optics. Otherwise the sensor will not measure correctly.
9. Reconnect the sensor to the converter and put the sensor back into operation.
10. This concludes the wiper and gasket replacement procedure.
Wiper and Gasket Replacement Kit