Installation instructions – Xylem Palmer & Bowlus flumes User Manual
Page 2
2
Installation instructions
MJK Automation A/S
Byageren 7
DK-2850 Nærum
Denmark
Tel.: (+45) 45 56 06 56
Fax: (+45) 45 56 06 46
[email protected]
www.mjk.dk
Mounting of the flume
1: The flume should be mounted in-line in the pipe without contractions both upstream and
downstream.
2: The flume section should be mounted in absolute level.
3: To obtain a precise measurement, it is important that both the upstream and the down-
stream pipe slopes downwards equally to ensure the water never accumulates in the
measuring section of the flume.
4: Position the flume correctly in relation to the flow direction. Observe the flow direction as
indicated with an arrow on the top edge of the flume.
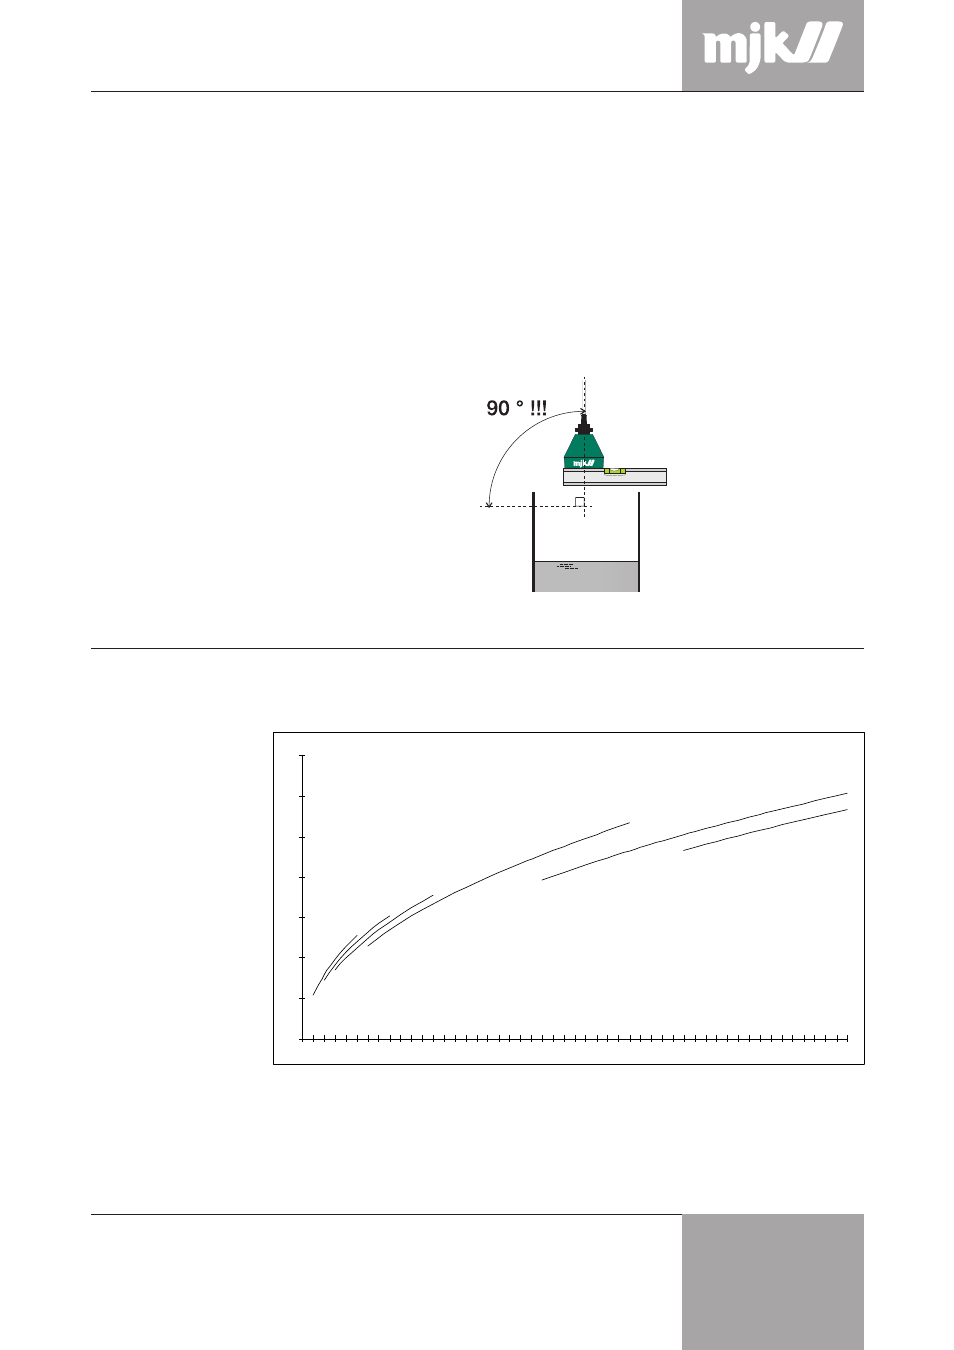
Q/h diagram for the MJK Palmer & Bowlus
flumes, the height h
a
is shown as a function of
the flow Q.
0
0,05
0,1
0,15
0,2
0,25
0,3
0,35
0
50
100
150
200
250
300
350
400
450
500
h
a
[m]
Q [m
3
/h]
8"
10"
12"
15"
30"
24"
Mounting of the
ultrasonic sensor
1: It should be mounted firmly.
2: It should be mounted absolutely vertical. Use a spirit level in TWO directions.
Use a spirit level in TWO directions.
Use a spirit level in TWO directions.
Use a spirit level in TWO directions.
Use a spirit level in TWO directions.
3: The ultrasonic sensor should be mounted so the ultrasonic signal can pass without any
obstructions from pipes, cables and other installations.
Q/h diagram for Palmer
& Bowlus flumes