Xylem AT210 SOIL MOISTURE SENSOR User Manual
Page 4
4
IV
Installation
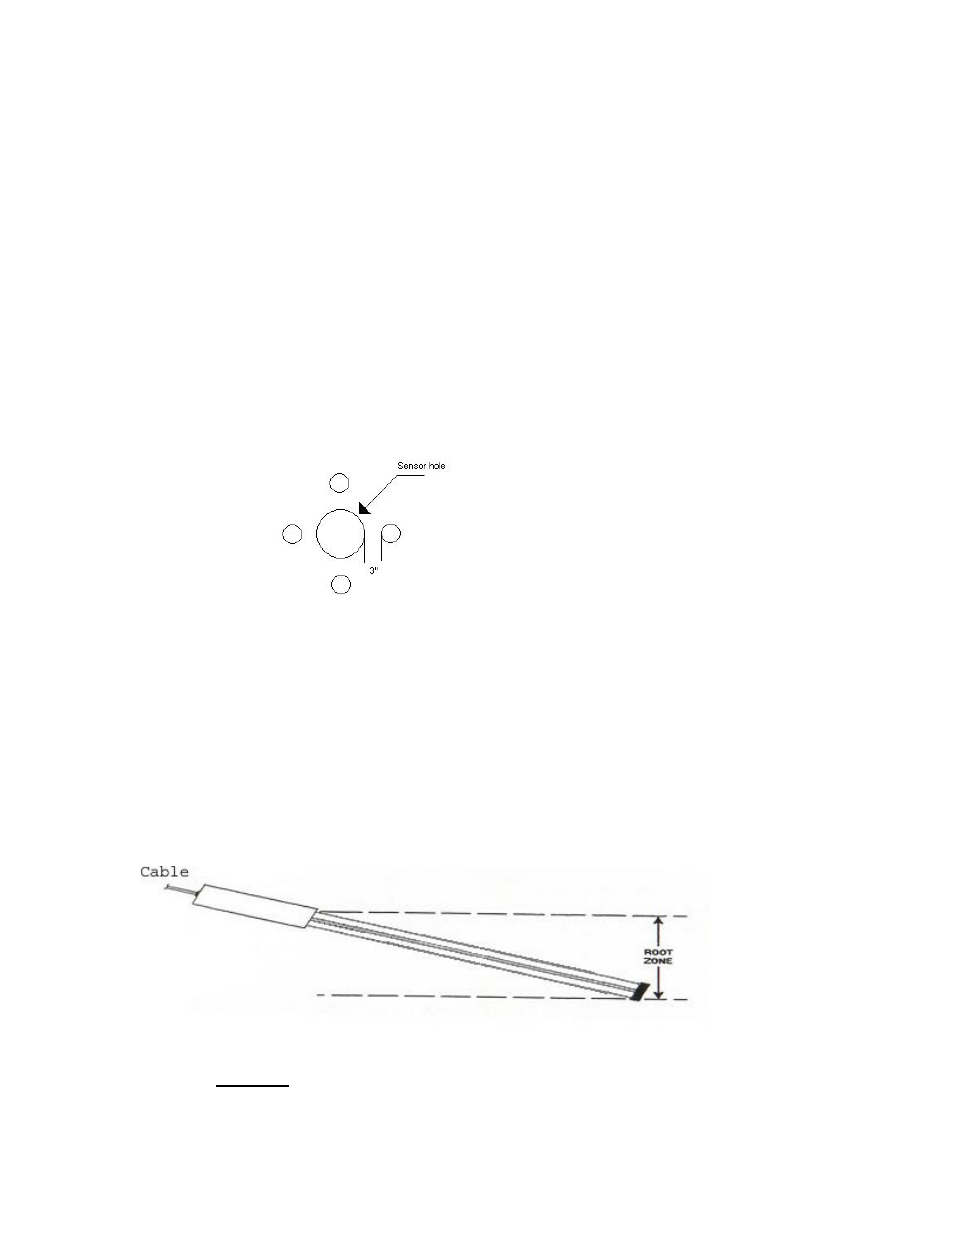
The AT210 Soil Moisture Sensors measure an 18” section of soil. The first 9” at the end
closest to the cable and the bottom ½” are not included in the measuring area. The
sensing area must be in contact with the soil and can be placed in any direction or depth.
In deep-rooted crops, such as orchards, it is normally installed vertically. In a vertical
installation, make a ¾” wide hole and place the sensor at the desired measuring depth.
The sensor must be in full contact with the soil to get an accurate reading. To make sure
the soil is packed around the sensor; drive a rod about ½” in diameter into the ground
about 3” away from the sensor, to the same depth as the sensor. Be sure the rod goes in
parallel to the sensor to avoid hitting and breaking the sensor. Remove the rod and drive
it down 3” away from the opposite side of the sensor. Then repeat the procedure at 90
degrees to the first set of 2 holes. Looking down, the pattern would look like this:
Pack dirt over the top to prevent water from preferentially entering the top. An alternate
method of packing the soil against the sensor is to prepare slurry from the native soil and
fill the hole. Then insert the sensor. The slurry will help fill the space between the
sensor and the soil. Horizontal sensors would be installed in a trench and then back filled
and packed.
To take an average for a range less then the sensors length, place the probe at an angle.
The average at this depth is the reading that will be received. This will allow you
measure at your “Root Zone”. To measure the water content at a given depth, place the
senor horizontal at the depth to be measured.
Caution: DO NOT leave the sensor lying out in the direct sun.