Xylem Flow Probe Alignment Fin Installation User Manual
Flow probe alignment fin installation
Flow Probe Alignment Fin Installation
02-069
07/2010
Significant errors can occur when measuring water flow other than directly parallel to the
direction of flow. The Global Water Flow Probe Alignment Fin is designed to help orient
the probe parallel to flow when the end of the probe can’t be seen well due to the depth or
cloudiness of the water. To use this accessory, immerse the probe and rotate it back and
forth until the least amount of resistance is felt due to the water flowing past the
alignment fin. To install the fin, follow these simple directions.
Your Flow Probe Alignment Fin Kit includes these parts:
1 Alignment
Fin
2 Pole
Clamps
2
#6-32 x 5/8” Stainless Steel Machine Screws
2
Black #6-32 x 7/8” Stainless Steel Thumb Screws
4
#6-32 Stainless Steel Hex Nuts
To begin, spread the clamps apart and install them
around the flow probe pole as shown.
Install the fin as shown with the alignment tab on
the
fin
inserted
into the slot on the propeller housing
at the end of the flow probe pole.
Using a Phillips screwdriver, install the #6
screws and 2 of the nuts into the clamps.
Tighten the screws firmly to hold the clamps
in place.
Install
the
thumbscrews
and
remaining
nuts
through
the
holes
passing through the clamp
and
fin
and
tighten
firmly.
To remove the fin, loosen the thumbscrews and pull
the fin off. Retighten the thumbscrews to prevent
the
nuts
from
being
lost.
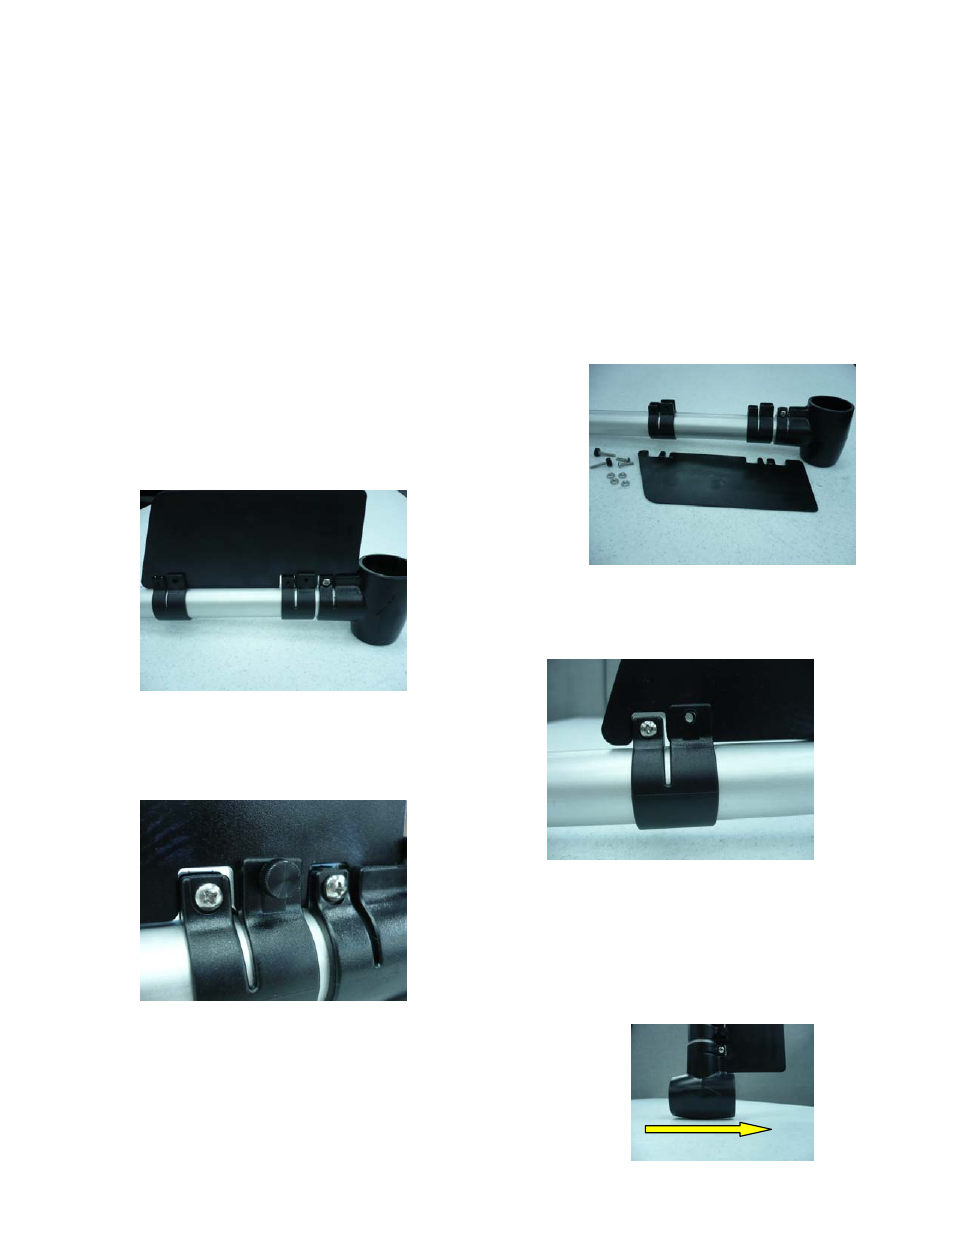
When using the alignment fin, the direction of flow is as shown.