Installation planning – Xylem Heat Exchangers User Manual
Page 3
If paint deterioration begins, as
evidenced by discoloration or light
rusting, consider touch-up or repainting.
If the unit is painted with our standard
shop enamel, areas of light rust may be
wire brushed and touched-up with any
good quality air-drying synthetic enamel.
Units painted with special paints (when
specified on customers’ orders) may
require special techniques for touch-up or
repair. Obtain specific information from
the paint manufacturer. Painted steel
units should never be permitted to rust
or dete riorate to a point where their
strength will be impaired. But a light
surface rusting, on steel units which will
be re-painted after installation, will not
generally cause any harm. (See Items 3
and 4 for internal surface preservation.)
If the internal preservation (Items 3 and
4) appears inadequate during storage,
consider additional corrosion prevention
measures and more frequent inspections.
Interiors coated with rust preventive
should be restored to good condition and
re-coated promptly if signs of rust occur.
1
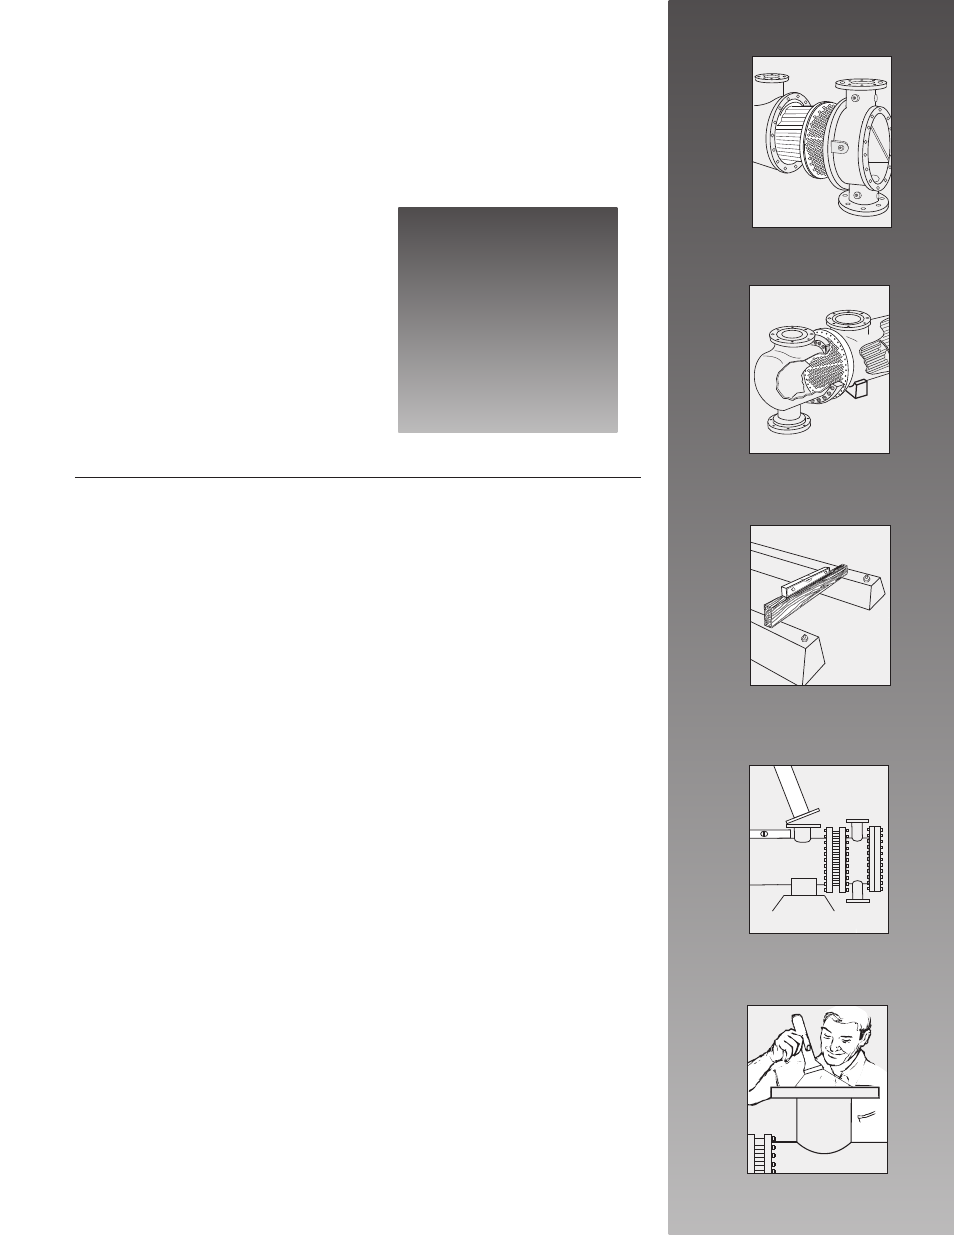
On removable bundle heat exchangers,
provide sufficient clearance at the station-
ary end to permit the removal of the tube
bundle from the shell. On the floating
head end, provide space to permit removal
of the shell cover and floating head cover.
2
On fixed bundle heat exchangers, provide
sufficient clearance at one end to permit
removal and replacement of tubes and at
the other end provide sufficient clearance
to permit tube rolling.
3
Provide valves and bypasses in the
piping system so that both the shell
side and tube side may be bypassed to
permit isolation of the heat exchanger for
inspection, cleaning and repairs.
4
Provide convenient means for frequent
cleaning as suggested under maintenance.
5
Provide thermometer wells and pressure
gauge pipe taps in all piping to and from
the heat exchanger, located as close to the
heat exchanger as possible.
6
Provide necessary air vent valves for the
heat exchanger so that it can be purged to
prevent or relieve vapor or gas binding on
both the tube side and shell side.
7
Provide adequate supports for mounting
the heat exchanger so that it will not
settle and cause piping strains.
Foundation bolts should be set accu-
rately. In concrete footings, pipe sleeves
at least one pipe size larger than the bolt
diameter slipped over the bolt and cast
in place are best for this purpose as they
allow the bolt centers to be adjusted
after the foundation has set.
8
Install proper liquid level controls
and relief valves and liquid level and
temperature alarms, etc.
9
Install gauge glasses or liquid level
alarms in all vapor or gas spaces to
indicate any failure occurring in the
condensate drain system and to prevent
flooding of the heat exchanger.
10
Install a surge drum upstream from the
heat exchanger to guard against pulsation
of fluids caused by pumps, compressors or
other equipment.
11
Do not pipe drain connections to a
common closed manifold; it makes it more
difficult to determine that the exchanger
has been thoroughly drained.
Installation Planning
cautIon:
Provide fire extinguishers,
fire alarms or telephone to
protect building and equip
ment against fire damage.
Be sure that the building and
storage practices meet all
local, state, and federal fire
and safety codes!
10
9
3