Getting started, Installing the battery, Charging the battery – Acer C20 User Manual
Page 5
Englsh
2
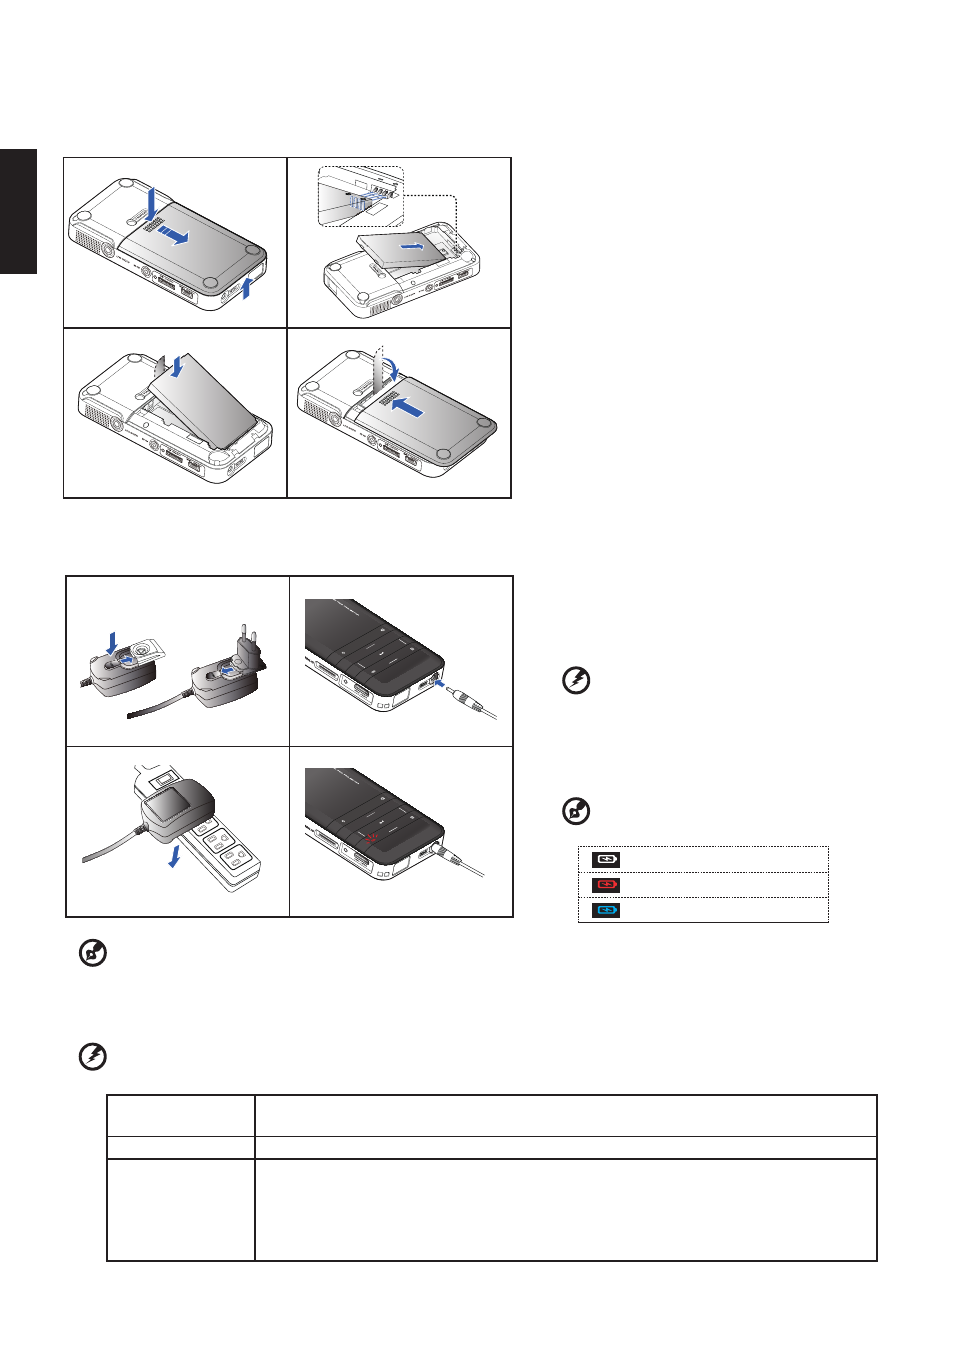
Installing the Battery
1. Remove the battery cover. (llustraton #1~3)
2. Insert the battery wth the electrcal contact
facng downward and away from the lens.
(illustration #4)
3. Ensure that the battery pull tab extends from
under the battery. (llustraton #5)
4. Slide the battery cover back into place over
the battery pull tab. (illustration #6~7)
1
2
3
4
5
7
6
1. Remove protecton cap and nsert the plug.
(llustraton #1~2)
2. Connect the charger. (illustration #3~4)
3. Durng chargng the LED ndcator lghts red.
(llustraton #5)
......................................
Warning: Projector wll not charge whle
operatng.
4. The LED Charge Indicator will go off when
battery s fully charged. Ths process may take
up to 2.5 hours.
......................................
Note: Led ndcator
Operaton
Battery chargng
Charge complete
Charging the Battery
2
1
3
4
5
Getting Started
.....................................................................................................
Note: After the projector s turned off, the battery may not start chargng rght away due to over temperature
protecton.
......................................................................................................
Warning:
Battery chargng
The accessory batteries have a small amount power at the time of purchase. The fi rst
charge should last for 6
hours and the machne should not be used durng chargng.
Battery ndcator
Indcaton for 3 stages or sectons. ( 50%/20%/5%)
Notes on battery
use
1. When the batteres are used, chargng wll automatcally stop f ther temperature s
greater than 45℃.
2. After they cool down, chargng wll resume and you do not have to plug or unplug the
batteres/adapter.
3. It s not recommended to charge the batteres mmedately after use.