Remote control layout, English – Acer X1111 User Manual
Page 15
5
English
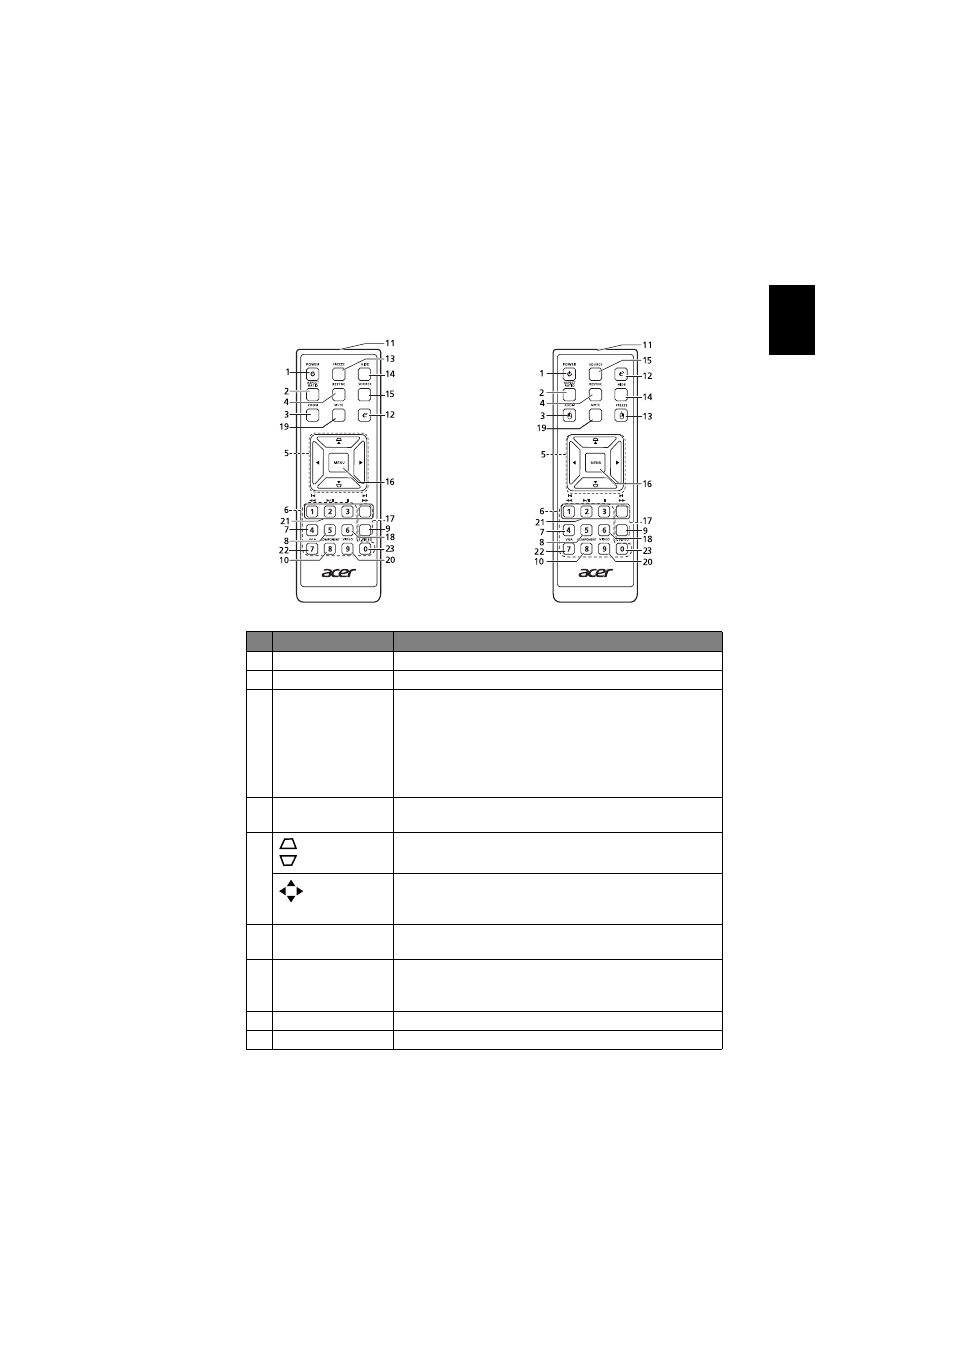
Remote Control Layout
#
Function
Description
1
POWER
Refer to the "Turning the Projector On/Off" section.
2
ASPECT RATIO
To choose the desired aspect ratio.
3
ZOOM
•
Zooms the projector display in or out.
•
When a USB cable is connected, it performs the
same function as the left mouse button. (For
X1111H/X1111A/X1211/X1211H/X1211S/X1211K/
X1213P/X1213PH/X1311KW/X1313PW/
X1313PWH)
4
RESYNC
Automatically synchronizes the projector to the input
source.
5
Keystone
Adjusts image distortion caused by tilting projection
(±40 degrees).
Four
directional
select keys
Selects items or makes adjustments to your selection.
6
Keypad 0~9
Press "0~9" to input a password in the "Setting" >
"Security" OSD.
7
VGA
To change source to VGA. This connection supports
analog RGB, YPbPr (480p/576p/720p/1080i/1080p),
and YCbCr (480i/576i).
8
COMPONENT
(No function)
9
S-VIDEO
To change source to S-Video.
PgDn
PgUp
SD/USB A HDMI/DVI
LAN/WiFi
USBB
ENTER
BACK
PgDn
PgUp
SD/USB A HDMI/DVI
LAN/WiFi
USBB
ENTER
BACK
(X1111H/X1111A/X1211/X1211H/X1211S/
X1213P/X1213PH/X1313PW/X1313PWH)
(X1111/X1211K/
X1311KW)