Installation, Installation of built-in ovens, Fastening the oven – Hotpoint Ariston Deco MHR 940.1 (AN)-HA User Manual
Page 14
14
GB
Installation
Important: The power supply to the appliance must
be cut off before any adjustments or maintenance
work is done on it.
Installation of Built-in Ovens
To ensure the proper working order of the built-in
appliance, the kitchen unit must be of a suitable
size.
The sizes of the unit for installing the cooker under a
worktop or in a column unit are shown in figure.
To provide adequate ventilation, there must be
appropriate ventilation openings in the front bottom
and the top part of the cabinet (an intake opening on
the bottom of at least 200 cm2, and an exhaust
opening of at least 90 cm2).
The unit panels next to the cooker must be heat
resistant. In the case of veneered wood units, glues
must be resistant to a temperature of 120 °C.
In accordance with safety standards, once the
appliance has been mounted, there must be no
possible contact with electrical parts. Any protective
parts must be secured so that they can only be
removed with the use of tools.
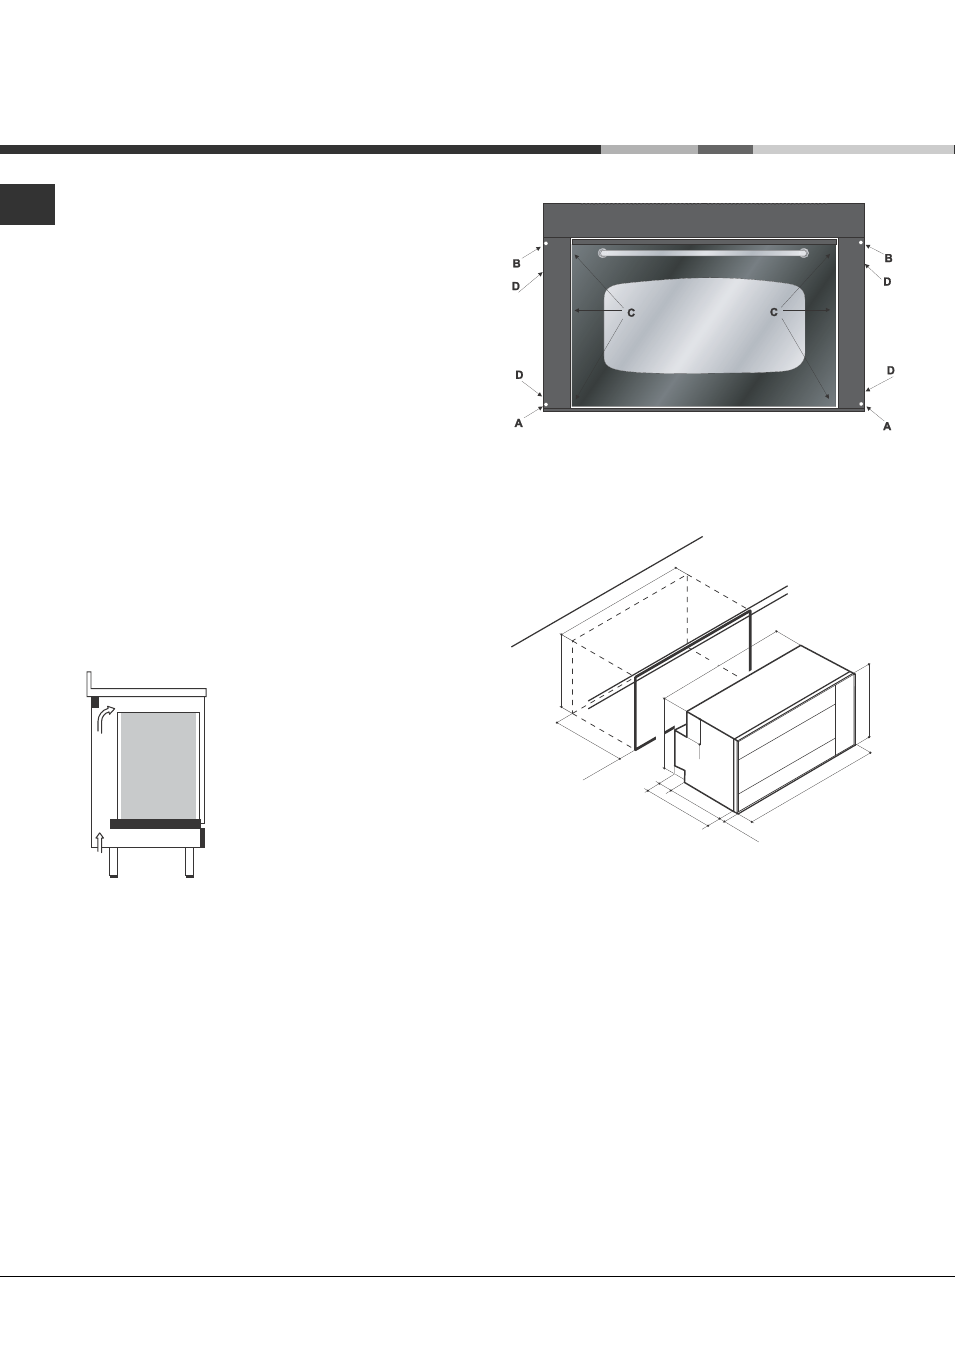
Fastening the oven
Before inserting the oven into the cabinet, loosen the
4 rear screws “D” - which fasten the side panels - if
necessary. This will make it easier to move the oven
vertically. The oven should be fastened to the
cabinet through the 4 holes situated on the frame,
using the screws and spacers provided. Once the
oven has been fastened to the cabinet by inserting
and screwing the screws in holes “A” tightly,
proceed as follows:
1) With the oven door open, loosen the six screws
“C” (this way the side panels can slide down);
2) Lower the side panels as much as necessary to
gain access to the 2 holes “B” to fix the oven
permanently;
3) Put the side panels back in place and fasten the
6 screws “C” tightly.
447
mm
78
min.
550
mm
162 mm
585
mm
595
mm
860
mm
22
mm
895
mm
525
mm
580
mm
840
mm