3 establish vpn tunnel using automatic keying, 1 configure vpn policy on pix 501, 3 setup routing table – Asus SL1000 User Manual
Page 6
Copyright 2006, ASUSTek Computer, Inc.
Page
3
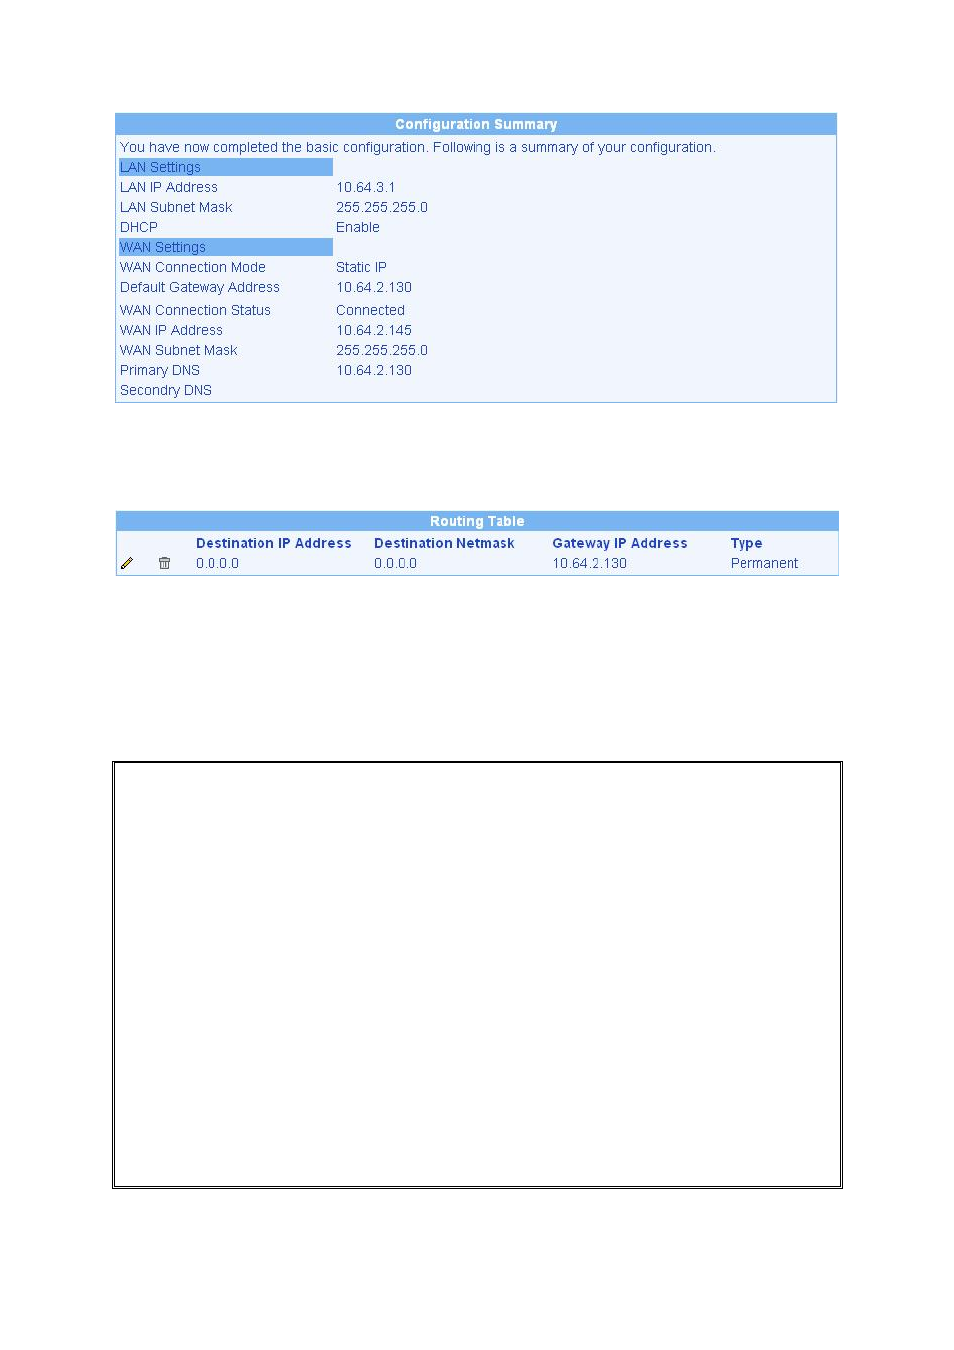
Figure 2.7 Verify WAN interface configurations on the SL1000/SL500
2.3.3 Setup Routing Table
Figure 2.8 Setup a default route to the SL1000/SL500
3 Establish VPN Tunnel using Automatic Keying
3.1 Configure VPN Policy on PIX 501
Step: 1 Configure access list rule and VPN policy
pixfirewall(config)# access-list SL1000 permit ip 192.168.30.0 255.255.255.0 10.64.3.0 255.255.255.0
pixfirewall(config)# nat (inside) 0 access-list SL1000
pixfirewall(config)# sysopt connection permit-ipsec
pixfirewall(config)# crypto ipsec transform-set set1 esp-3des esp-sha-hmac
pixfirewall(config)# crypto ipsec security-association lifetime seconds 3600
pixfirewall(config)# crypto map toSL1000 20 ipsec-isakmp
pixfirewall(config)# crypto map toSL1000 20 match address SL1000
pixfirewall(config)# crypto map toSL1000 20 set peer 10.64.2.145
pixfirewall(config)# crypto map toSL1000 20 set transform-set set1
pixfirewall(config)# crypto map toSL1000 interface outside
pixfirewall(config)# isakmp enable outside
pixfirewall(config)# isakmp key cwtest address 10.64.2.145 netmask 255.255.255.0
pixfirewall(config)# isakmp identity address
pixfirewall(config)# isakmp policy 20 authentication pre-share
pixfirewall(config)# isakmp policy 20 encryption 3des
pixfirewall(config)# isakmp policy 20 hash sha
pixfirewall(config)# isakmp policy 20 group 2
pixfirewall(config)# isakmp policy 20 lifetime 3600