1 introduction, 2 network setup, 1 setup description – Asus SL1000 User Manual
Page 4: 2 setup cisco pix firewall, 1 setup ip address of lan interface, 2 setup ip address of wan interface
Copyright 2006, ASUSTek Computer, Inc.
Page
1
1 Introduction
This application note details the steps for creating an IPSec VPN tunnel between an ASUS Internet
Security Router and a CISCO PIX Firewall device. It is assumed that both devices have static IP
address on the WAN interface, and a default route configured. All settings and screen dumps
contained in this document are taken from a CISCO PIX 501 device running firmware PIX Firewall
Version 6.3(4), and an ASUS SL1000/SL500 running firmware 1.1.72A.410.
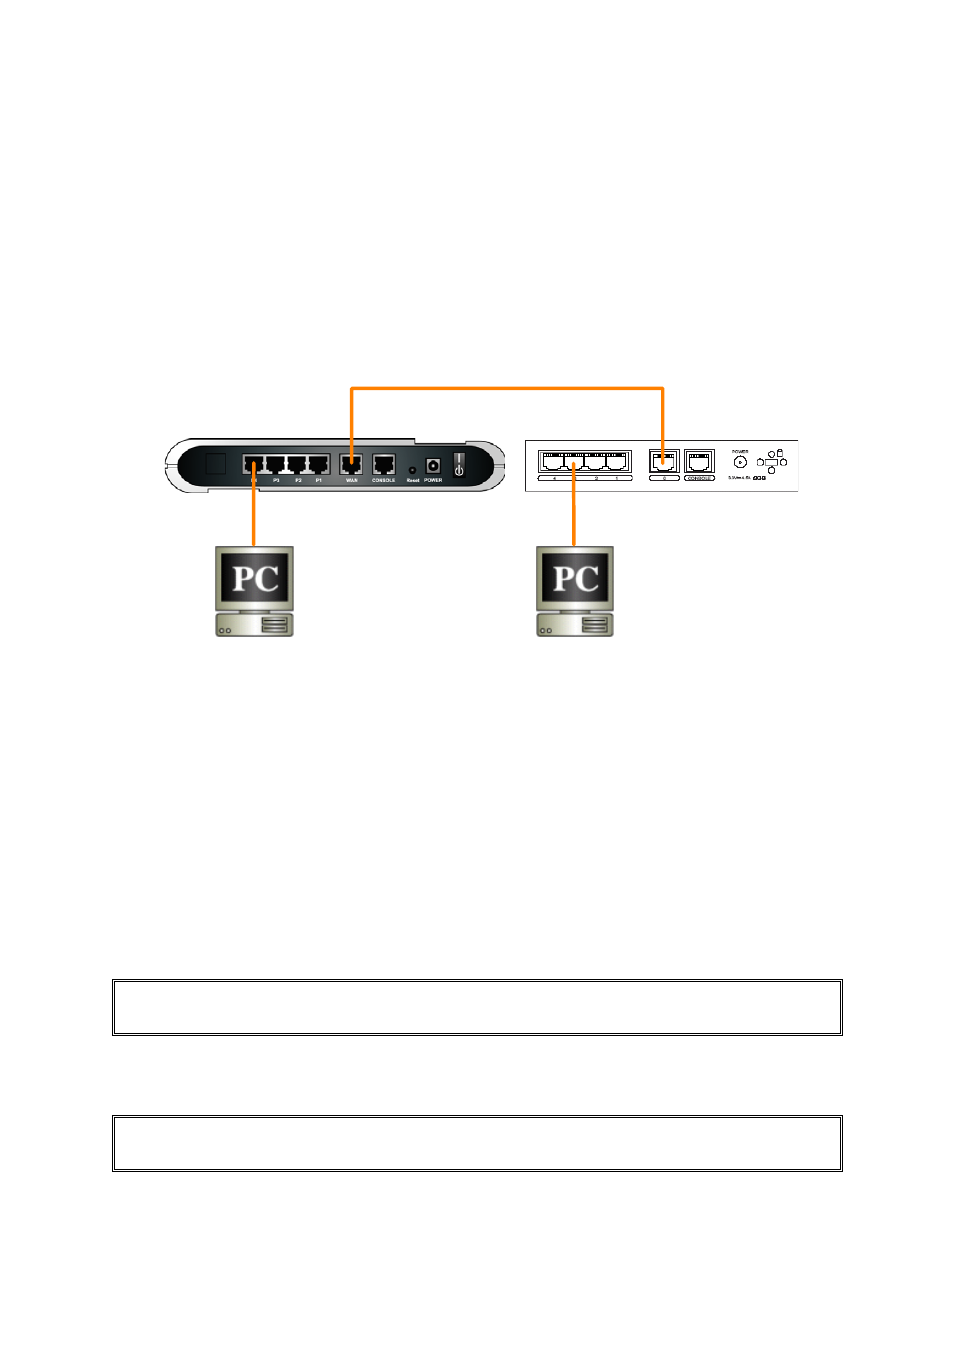
2 Network Setup
This section describes how to setup the network to carry out the SL1000/SL500 and CISCO PIX 501
Network Configuration as illustrated in Figure 2.1.
PC2:
10.64.3.11
WAN:
10.64.2.145
LAN:
192.168.30.1
WAN:
10.64.2.130
Internet Security
Router
CISCO PIX501
PC1:
192.168.30.2
LAN:
10.64.3.1
Cross Ethernet Cable
Figure 2.1 Network Connections
2.1 Setup
Description
PC1 and PC2 are hosts in protected networks running Windows NT/98/2000/XP or Redhat Linux.
Both SL1000/SL500 and PIX Firewall will protect their traffic from external network. NAT is not
required for traffic between the two intranets, which can be transmitted using a VPN tunnel over the
public Internet (in this setup example, a direct connection between two WAN interfaces serves as
public network). However, NAT is required for connections to public Internet.
2.2 Setup CISCO PIX Firewall
2.2.1 Setup IP address of LAN interface
pixfirewall# configure terminal
pixfirewall(config)# ip address inside 192.168.30.1 255.255.255.0
Figure 2.2 Setup LAN port IP address on the PIX firewall
2.2.2 Setup IP address of WAN interface
pixfirewall(config)# interface ethernet0 auto
pixfirewall(config)# ip address outside 10.64.2.130 255.255.255.0
Figure 2.3 Setup WAN port IP address on the PIX firewall