6 chapter 3: general instruction, Vm ware – Asus CP240 User Manual
Page 20
3-6
Chapter 3: General Instruction
4. Enter “[Configuration]” --> [Network],and select “Enable DHCP”.
Configuration
Change the network settings for the device
Enable DHCP:
192 . 168 . 100 . 51
255 . 255 . 255 . 0
192 . 168 . 100 . 1
192 . 168 . 100 . 2
0 . 0 . 0 . 0
Auto
IP Address:
Subnet Mask:
Gateway:
Primary DNS Server:
Secondary DNS Server:
Domain Name:
FQDN:
Ethernet Mode:
Enable 802.1X Security:
Identity:
Client Certificate:
Network IPv6 SCEP Label Discovery Session Language Power Display Access Audio Reset
OK
Cancel
Apply
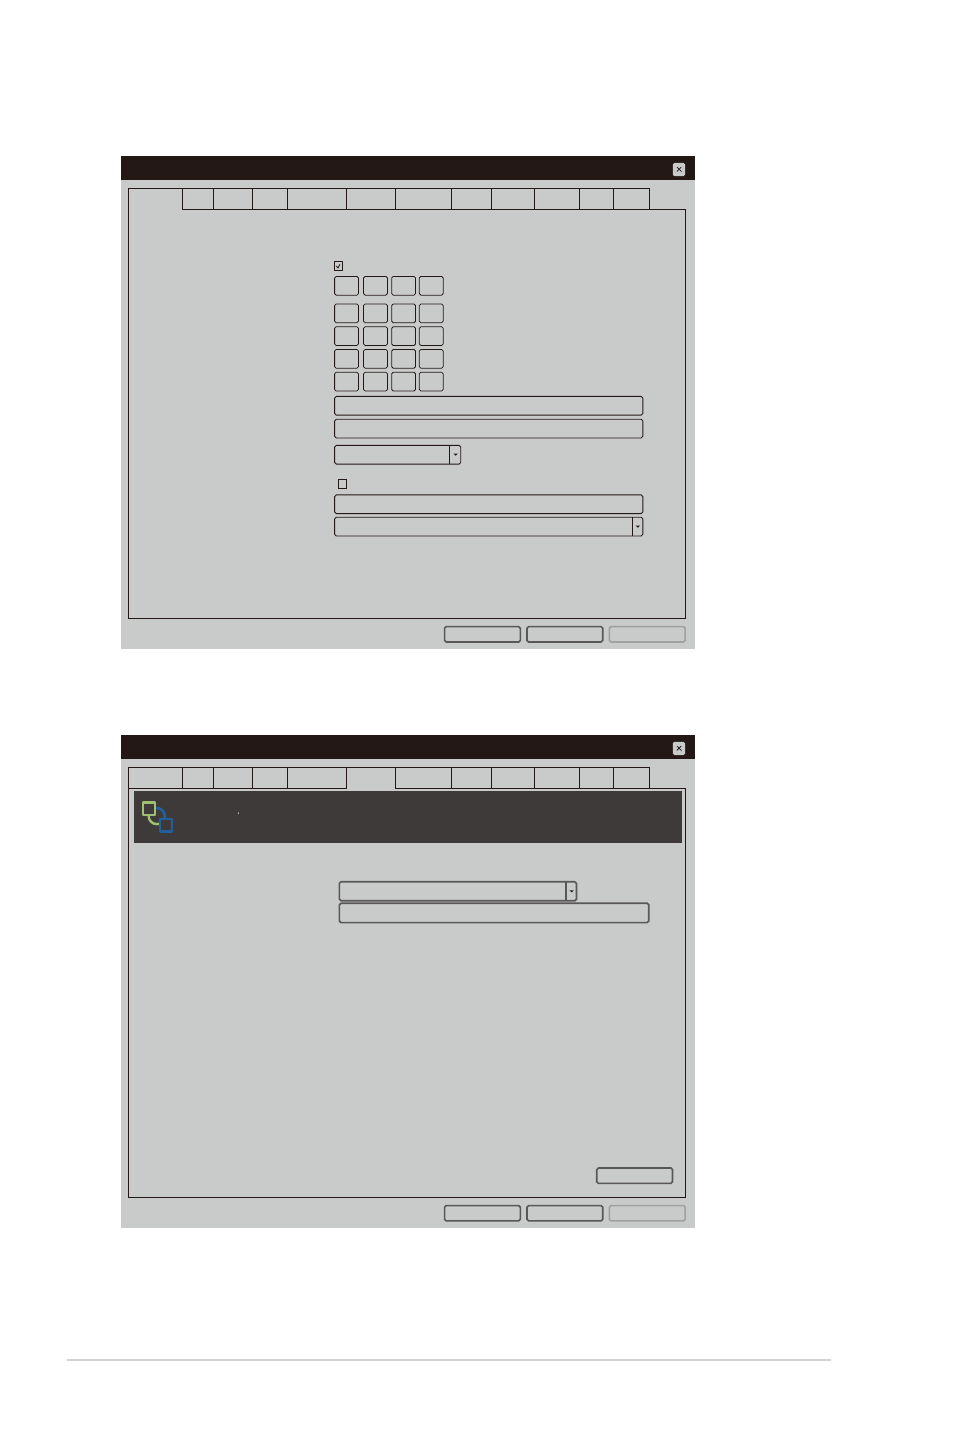
5. Select [Session] sheet and enter “DNS Name or IP Address”, then click
“Apply” to execute.
Configuration
Configure the connection to a peer device
Connection Type:
DNS Name or IP Address:
View Connection Server
192.168.100.252
vm
ware
Horizon View
TM
Client
Network IPv6 SCEP Label Discovery Session Language Power Display Access Audio Reset
OK
Cancel
Advanced
Apply