Cervical restorations, Tunnel restorations – GC EUROPE Fuji VIII GP User Manual
Page 11
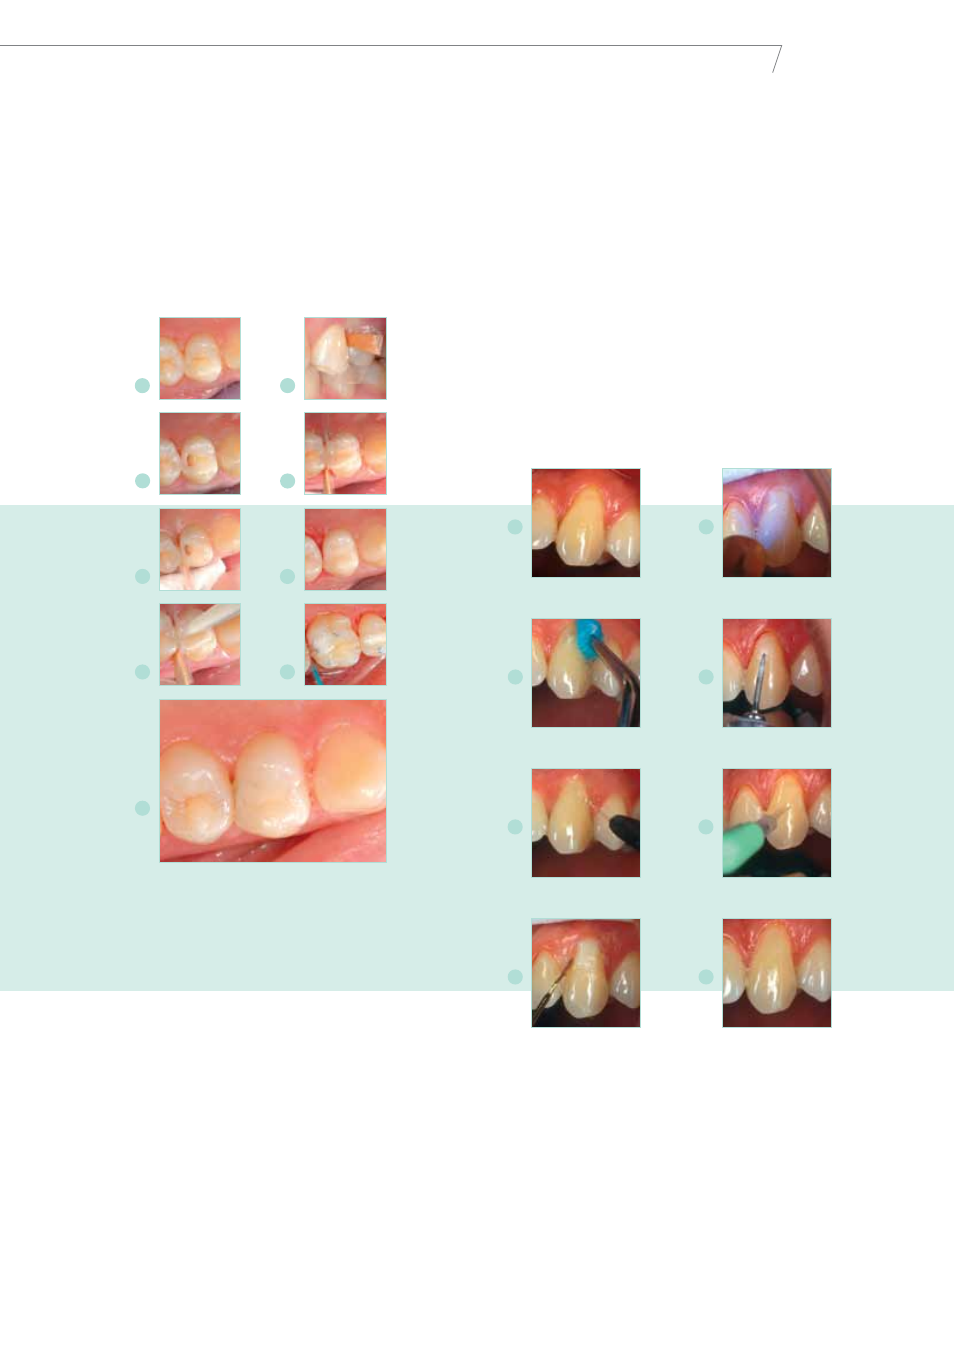
Cervical restorations
Achieve more aesthetic results in cervical cavities with
the superior shade matching that resin-modified glass
ionomers, such as Fuji II LC Improved, offer you.
Reap the abundant benefits of the moisture tolerance of
glass ionomers in these circumstances. And you’ll achieve
an even better marginal seal thanks to reliable chemical
adhesion.
1
Patient exhibits a distal lesion on an upper
first premolar;
2
A “T” access cavity is crea-
ted in the enamel and caries removed with
#5 round bur;
3
A short Mylar strip is placed
interproximally and wedged against the cavity
preparation;
4
After conditioning, a glass io-
nomer is placed to slightly overfill the cavity;
5
The Mylar strip is pushed over the cement
as the patient occludes;
6
The restoration is
contoured and finished;
7
Completed resto-
ration: the most conservative and aesthetic
option for restoring an initial Class II cavity;
8
A layer of protective varnish may reduce
proximal surface degradation of the glass
ionomer restoration;
9
Tunnel restoration 14
months after placement.
Images first published in the ADA News Bulletin,
No 358, 2007 and are reproduced with the per-
mission of the Australian Dental Association Inc.
1
Cervical lesion;
2
After preparation of tooth, apply conditioner;
3
Washing and drying;
4
Form the contour and place a transparent
matrix if required;
5
Light cure for 20 seconds;
6
Finish under water
spray using superfine diamond bur, silicone point and polishing strips;
7
After polishing apply coating to protect the GIC during the first
24 hours;
8
Finished restoration
11
Tunnel restorations
When you preserve the structural inte-
grity of the peripheral rim, this actually
strengthens the posterior tooth. With
this in mind, use a tunnel preparation
technique to remove proximal decay
and access proximal lesions without
compromising the rim.
1
2
3
4
5
6
7
8
9
Dr
. G. Knight
1
2
3
4
5
6
7
8
Which Restorative